NEOLink Guide
How to use effectively the NEOLink platform
- NEOLink Guidebook
- What is NEOLAiA?
- Introduction
- Logging In to NeoLink
- Dashboard
- Structure
- Create Item
- My items
- Show Filters: Discover Relevant Items and Set Up Notifications
- Recent items
- Browse Items
- Notifications
- Focus Academy
- Description
- Basic Info
- Join the NEOLink Event Discussion in the Virtual Cafè
- NEOLink: Virtual Cafè Group Settings
- Your NEOLink Event in Virtual Café
- Share NEOLink Events Anywhere & Virtual Café Interoperability
- COIL
- Interaction with Virtual Cafe'
- Information and settings
- Choosing category
- Visibility and Notifications
- Planning an NEOLink Event with Integrated Topics
- License
NEOLink Guidebook
| Vittorio Scarano | Giuseppina Palmieri | Maria Anna Ambrosino | Vanja Annunziata | Raffaella D'Urso |
| UNISA | CeRICT | UNISA | UNISA | CeRICT |
| vitsca@unisa.it | gipalmieri@unisa.it | mambrosino@unisa.it | vannunziata@unisa.it | raffaelladurso17@gmail.com |
Abstract
This guide provides a comprehensive overview of the NEOLink platform, supporting users in the creation, management, and publication of educational and collaborative items within the NEOLAiA alliance. It describes the main workflows for setting up different types of items—such as Focus Academy programmes, COIL courses, Blended Intensive Programmes, Virtual Exchange Courses, and NEOTeach initiatives—and explains how to configure related interaction spaces through the Virtual Café platform.
The guide also outlines how content visibility, group settings, and categories are managed on Virtual Café, highlighting the role of public and private groups in fostering communication, collaboration, and community engagement. By following this guide, users gain practical guidance on how to publish items on NEOLink and effectively connect them to interactive environments that support participation, feedback, and knowledge sharing across the alliance.

What is NEOLAiA?
NEOLAiA is an European University Alliance of 9 young universities from small and medium size cities in different European countries: Spain, France, Germany, Sweden, Lithuania, Czechia, Romania, Italy and Cyprus.
NEOLAiA is transforming regional connectivity by embracing:
- Digital trasformation
- Diversity and inclusion
- Enhanced mobility
Our nature
Most members of the European Union are living in small and medium-sized cities or in the countryside. So, as young universities with the power and commitment to reform, we are the most important drivers of innovation and social change, in our regions.
Global challenges such as climate change, digitalization, demographics, and urbanization are the Global Challenges of our time. They affect metropolises and regions differently. Global Challenges fuel growing populism, worries and the call for authoritarian structures, especially outside capitals. The regions beyond the metropolises are the places where Europe’s future is negotiated on a daily basis as an opportunity and as a challenge.
NEOLAiA makes Europe an experience. Our students are first generation academics, often with a migrant background within their family. They are ambitious, they are diverse, and they are talented. Our societies and the future of the European Union need their potential.
NEOLAiA wants to raise the potential of our regions. Empowering regions means strengthening democracy, preventing populism, fostering inclusion, exploiting the potential of heterogeneity, countering extremism, and making excellent research and teaching an everyday experience.
Vision
|
|
 |


The NEOLAiA alliance is designed to achieve ambitious goals reaching to 2030 when we see ourselves as:
- A strong, highly integrated European University representing a main stay of European values and high-quality education for all the member university regions.
- An open and inclusive educational and social environment, fostering equity at university and in European society at large, ensuring that the diverse communities within academia and in the regions feel connected and committed to work together to face the global challenges and find solutions to common concerns such as Global Health to improve wellbeing
for all. - A model international educator motivating widening cohorts of students to engage in innovative research-informed and socially relevant study programmes crossing the borders of disciplines, research areas, countries and cultures, keeping pace with the digitalization of teaching and learning and at the same time cherishing personal contact and a tailor made approach.
Mission
 Enhance regional connectivity to prevent populism through innovation in academic mobility. Internationalisation and academic exchange are key for a cosmopolitan worldview that reacts against nationalistic and populist tensions. NEOLAiA will develop a series of mobility and multicultural initiatives that will expand on traditional exchange programmes and lead to a seamlessly integrated alliance of international universities.
 Strengthen inclusion and interculturalism, through common standards against barriers to participation by underrepresented groups. Inclusive societies embrace diversity as a contribution to economic and social development. NEOLAiA will be shaped by principles of widening participation and inclusion, driven by the concept of equity in education and research. It will create standards, policies, training and certification on diversity & inclusion (D&I) and plurilingual education. In addition, a strong focus on the societal engagement for D&I through open events will benefit the intercultural awareness of its academic community and societies in the largely diverse populations of the NEOLAiA non-metropolitan regions.
 Increasing research impact at a regional scale through higher scientific output by building on existing regional specialization strengths and on knowledge transfer (open science). Research and scientific output with real impact in regional development will be boosted with a smart specialization strategy based on existing regional research capacity and strengths as found on NEOALAiA’s needs analysis survey (bibliometric research, in section 1.1.4, also in the annex section) on specialisation areas that point to NEOLAiA’s 3 key pillars and the NEOLAiA Key Application Area of Global Health). NEOLAiA’s actions will apply digital access to research by mapping synergies and resources among partners to increase:
a) the number of peer-reviewed scientific reports in high-quality channels;
b) the diversity of concrete solutions at a regional scale in applying research for regional development, and
c) the capacity for knowledge transfer (open science) to society.
 Increasing regional output in terms of entrepreneurial training, product ideation, start-up support and incubation. Universities play a key role in regional economic development by bridging education, research, knowledge transfer and economic output.
NEOLAiA will benefit academic communities and society at large in non-metropolitan regions with new educational infrastructures that support the transfer of ideas to production, contributing to the regional and economic development of its partners.
 Increasing the number and scope of joint teaching and learning programmes to address identified Shared Challenges (SC) through regional collaboration. NEOLAiA will develop common teaching and learning standards and increase the number of double/multiple and ulterior joint study programmes, in alignment with a “European space of learning” rooted in regional and diverse points of view.
OUR PILLARS
The 3 main pillars of the project:
 Digital Transformation
Through its positive impact on sustainable connectivity and socio-economic development at a regional scale.
 Diversity and inclusion
Through its positive impact of D&I policies in European populations and underrepresented groups.
 Enhanced Mobility
Through its positive impact on cultural and social inclusiveness for a shared European citizenship against populistic tensions.
WHERE WE ARE
NEOLAiA is a close-knit alliance of nine young, dynamically developing higher education institutions based in small and mid-sized cities in the regions beyond metropolises:
- Bielefeld University(Germany)
- University of Jaén (Spain)
- University of Nicosia (Cyprus)
- Örebro University (Sweden)
- University of Ostrava (Czech Republic)
- University of Salerno (Italy)
- “Ștefan cel Mare” University of Suceava (Romania)
- University of Tours (France)
- Šiauliai State University of Applied Sciences (Lithuania)

Online and Social Media Channels
 |
https://neolaiacampus.eu/ |
|
|
https://www.facebook.com/NEOLAiA1 |
|
|
https://www.instagram.com/neolaia.campus |
|
|
https://www.linkedin.com/company/neolaia |
|
|
https://www.youtube.com/@NEOLAiA_CAMPUS |


Introduction
What is NEOLink
NEOLink, the platform developed within the NEOLAiA Alliance of European Universities to support institutional collaboration and academic initiatives.
NEOLink is the central platform used to create, manage, and publish academic and community-based initiatives within the NEOLAiA ecosystem, such as Focus Academy, COIL courses, Blended Intensive Programmes, Virtual Exchange Courses, Summer School and NEOTeach initiatives programmes.
NEOLink guides users through a structured creation process, where all the required information related to an item (e.g. programme details, status, description, and settings) is entered step by step. This ensures that content is complete, consistent, and ready to be shared with the community.
Once the basic information is completed, NEOLink connects the item to the VirtualCafè platform. During this final step, the user can choose to create a private VirtualCafè group, which will host discussions and interactions related to the item.
After publication:
-
The item automatically appears on VirtualCafè under the appropriate category (e.g. NEOLink News).
-
The Latest section notifies users about the new activity.
-
Interested users can discover the item, follow updates, and participate in discussions according to the group’s visibility settings.
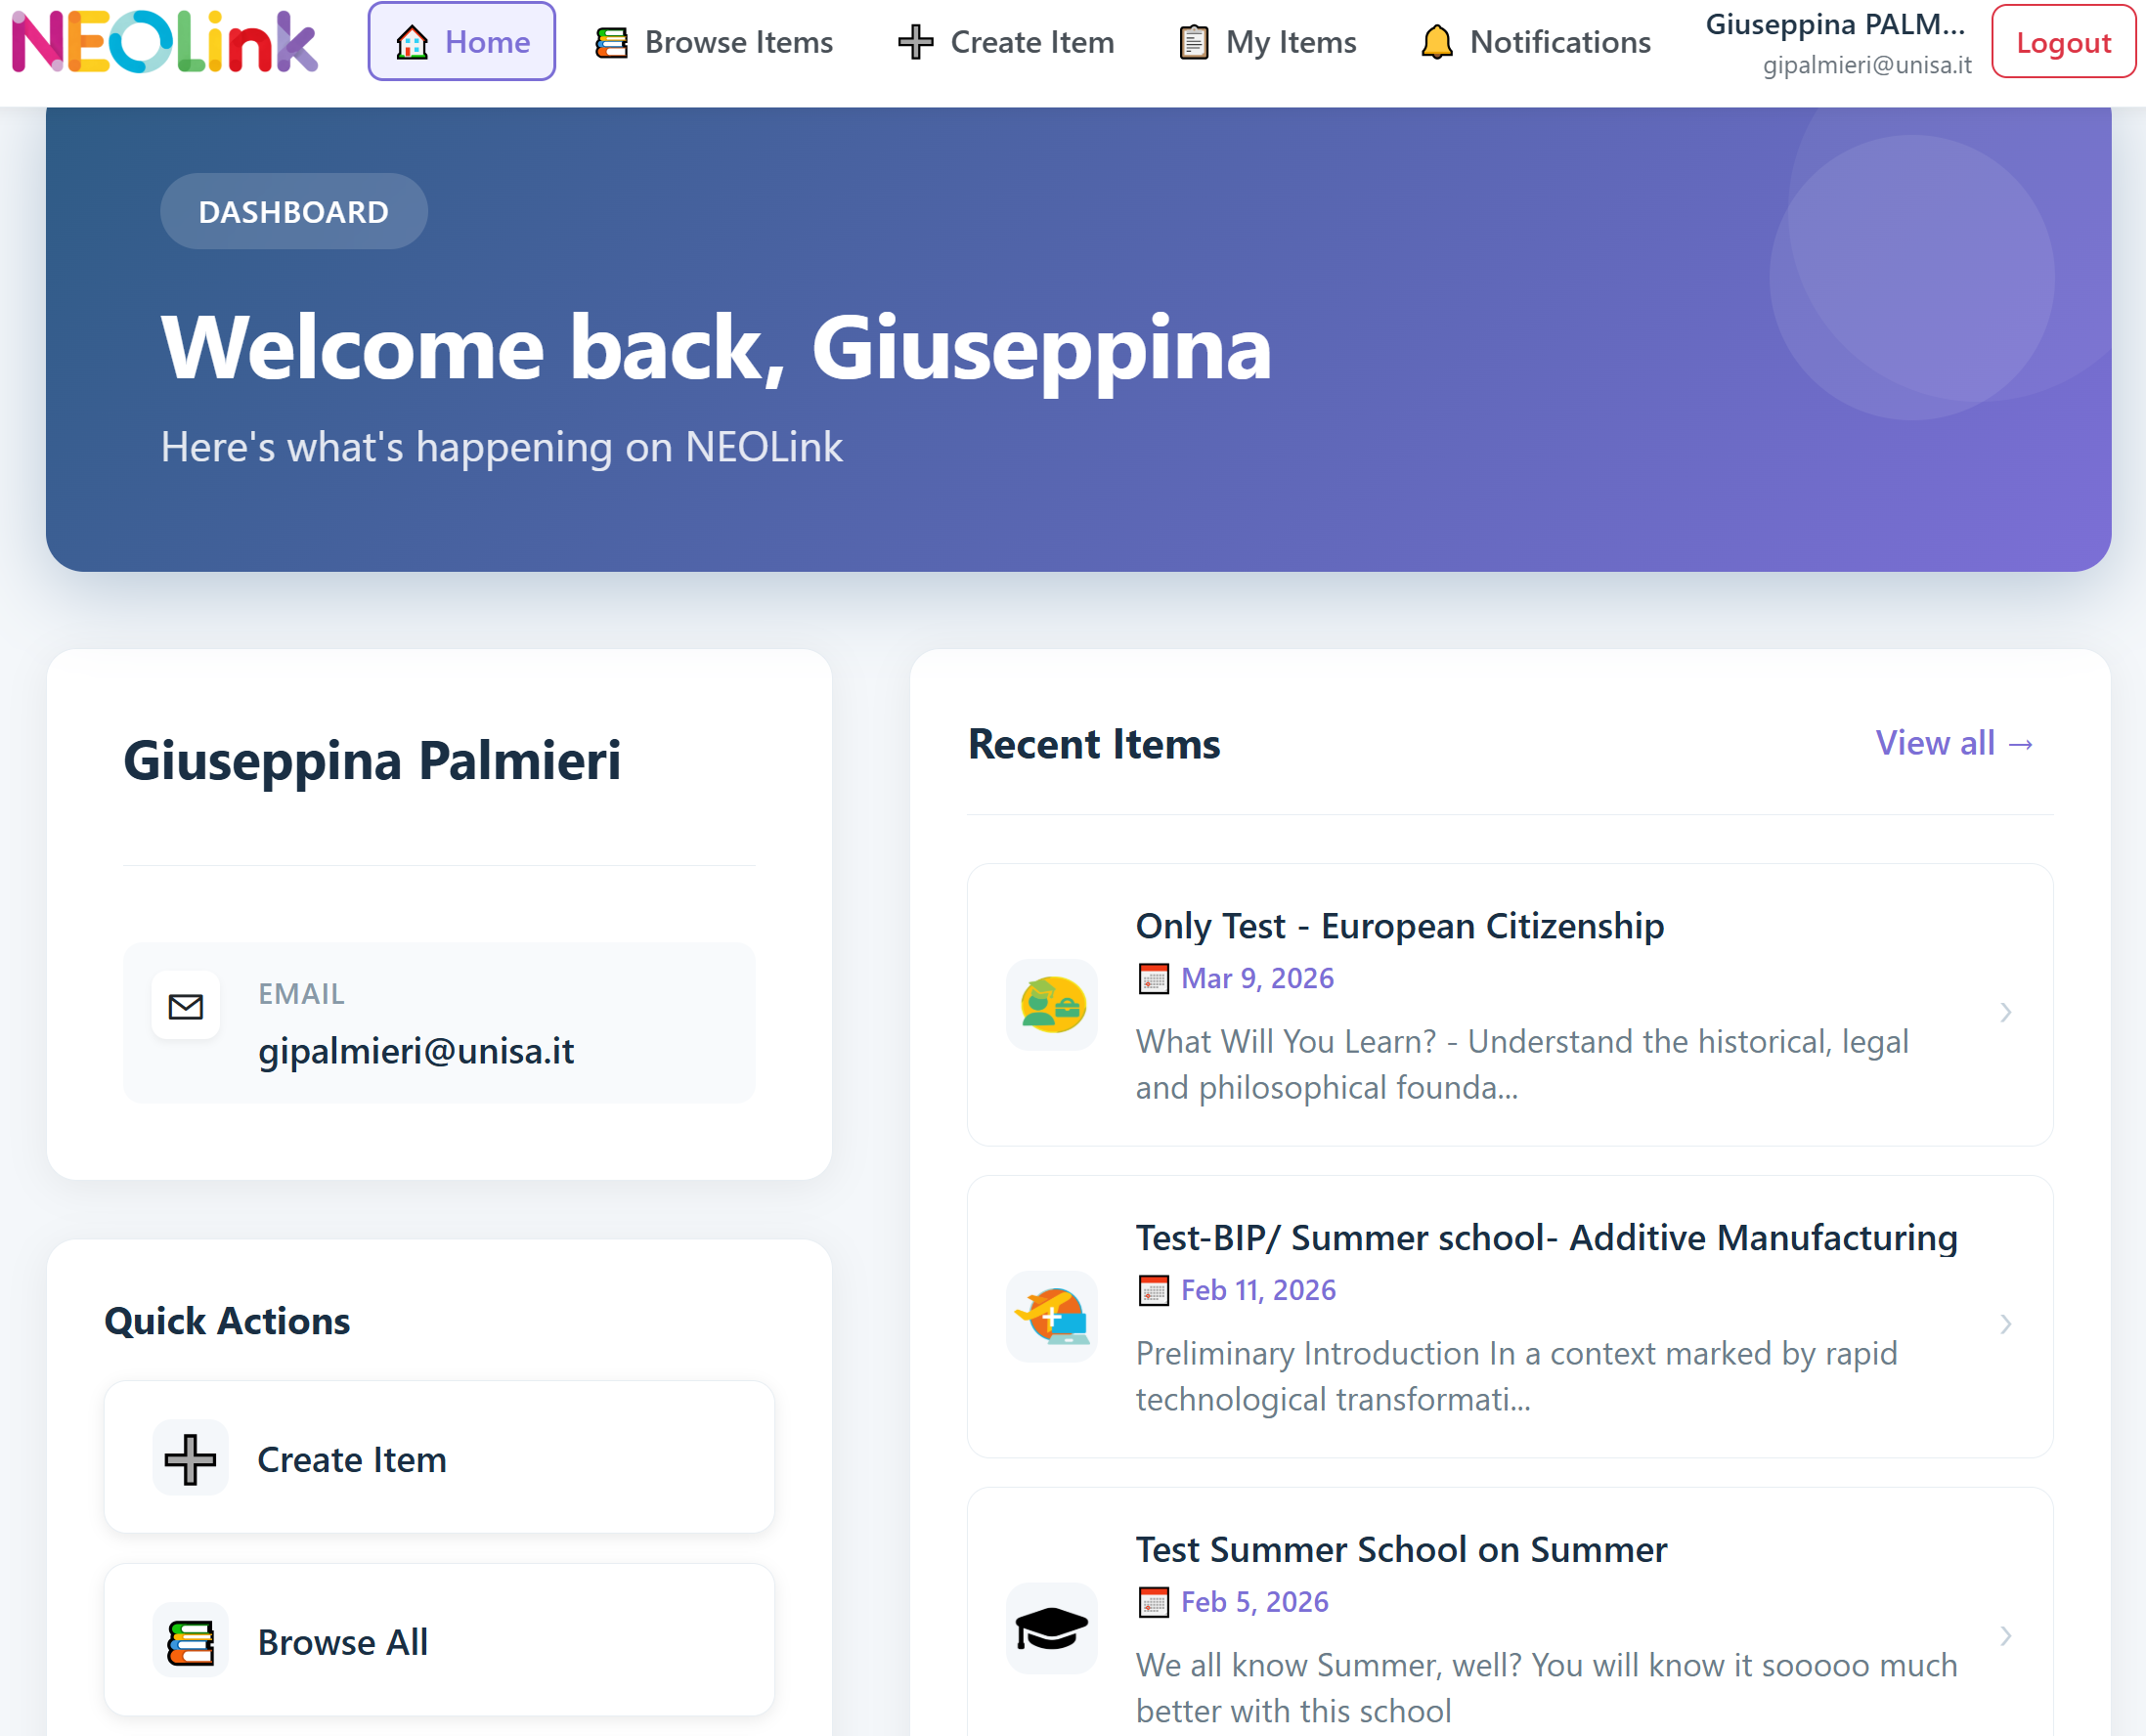
NEOLink Dashboard Overview
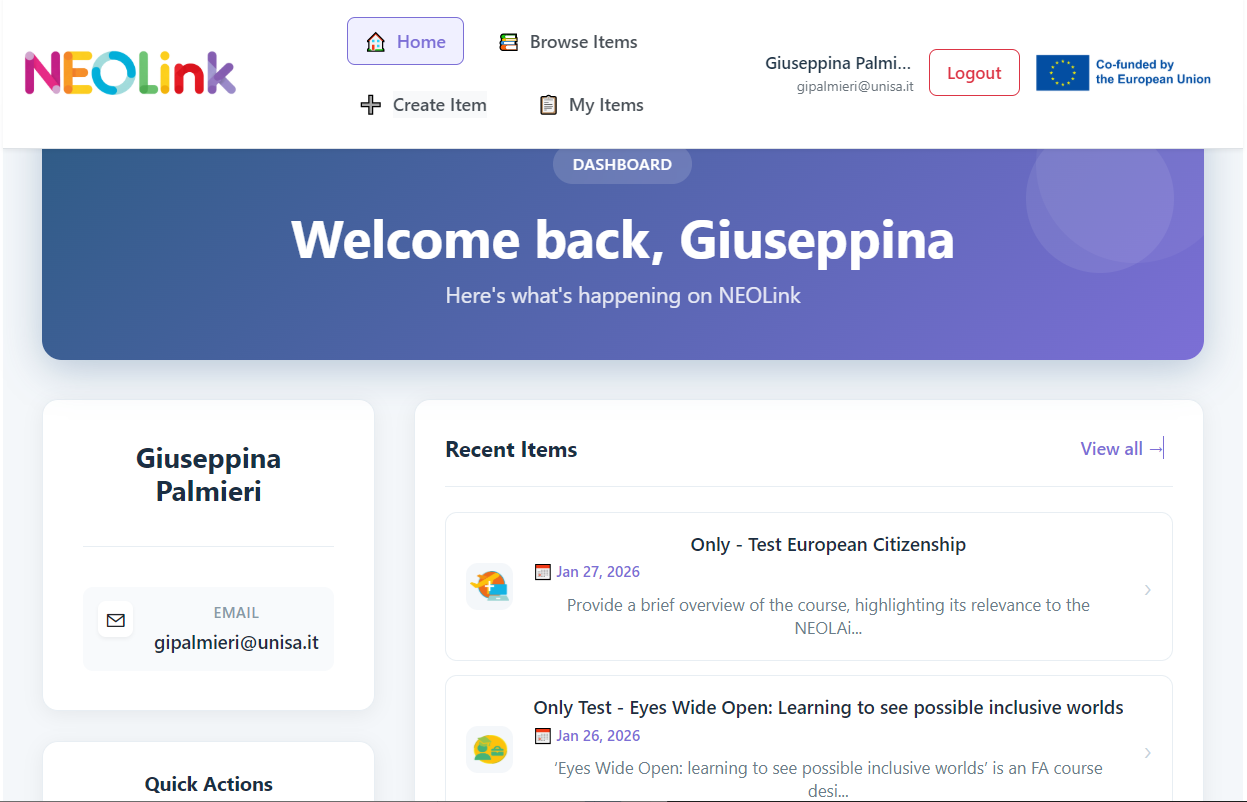
The screen below shows the NEOLink dashboard, which is the main home page users see after logging into the platform. The dashboard provides a quick overview of the user’s account and recent activity.

At the top of the page, a navigation bar allows users to:
🏠 Home
- Takes the user to the main page of the application.
- Usually displays an overview or dashboard.
📂 Browse Items
- Allows the user to explore and view the list of available items.
- May include search, filters, categories, and sorting options.
➕ Create Item
- Lets the user create a new item (e.g., a new record, file, form, task, etc.).
- Usually opens a form for entering data.
📝 My Items
- Shows items associated with the user (created by them or assigned to them).
- Provides a personalized view of the user’s own content.
🔔 Notifications
- Notifications
- Saved alerts
Welcome banner
In the centre of the page, a welcome banner displays a greeting message and confirms that the user is currently on the NEOLink dashboard.
-
User panel
Displays the user’s registered email address and account details. -
Recent Items panel shows the most recently created items on the platform, including, for example, those displayed in the screenshot below:
-
“Eyes Wide Open: Learning to See Possible Inclusive Worlds”
-
“Digital Storytelling for Cultural Heritage”
Each item includes the creation date and a short description, allowing users to quickly review recent additions.
-
-
Quick Actions panel
Provides a shortcut button to Create Item, enabling users to start a new entry directly from the dashboard.
Overall, the dashboard serves as a central control panel, helping users monitor activity and quickly access the most important functions of NEOLink.
Who is using NEOLink
The intended audience
The NEOLink platform is meant for NEOLAiA users who want to participate in joint activities and need to find a matching user in a NEOLAiA university with the same interest.
The idea is that there is one publisher (the user publishing an offer to link to) and one (or more) consumer (the user(s) who adopt the offer to connect and collaborate.
Logging In to NeoLink
The NEOLink allows you to log in using your university credentials.
Here's how:
- Go to NEOLink address site (https://neolink.neolaiacampus.eu/ )
- Click on “Enter NEOLink” button
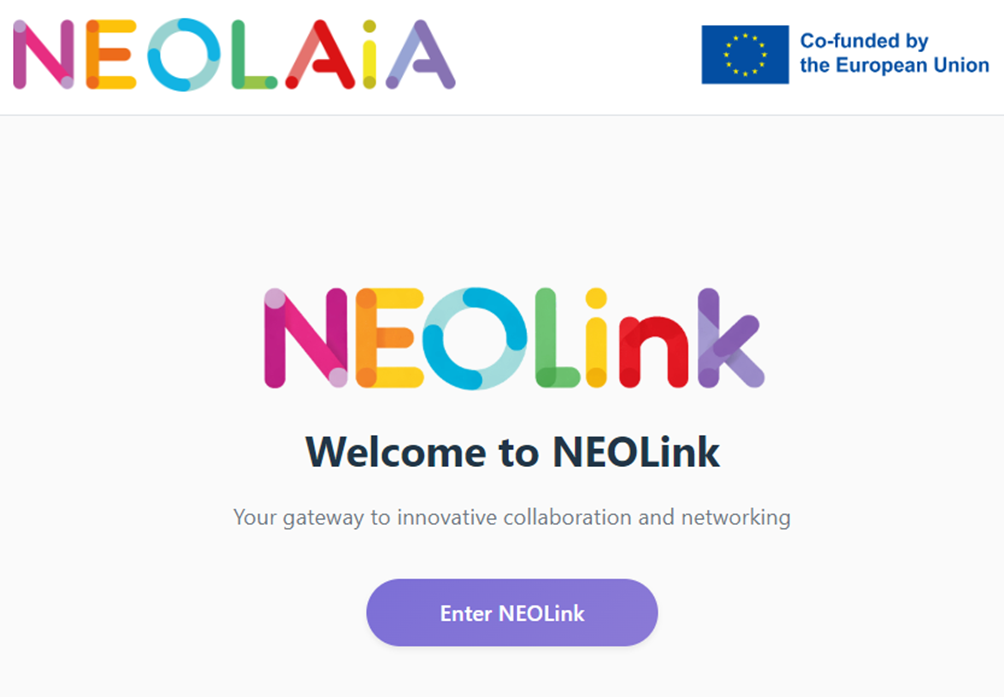
After clicking “Enter NEOLink”, user is redirected to the Welcome page, where they can sign in to the platform.
NEOLink login interface allows users to access the platform using their institutional credentials through the eduGAIN federated authentication system.
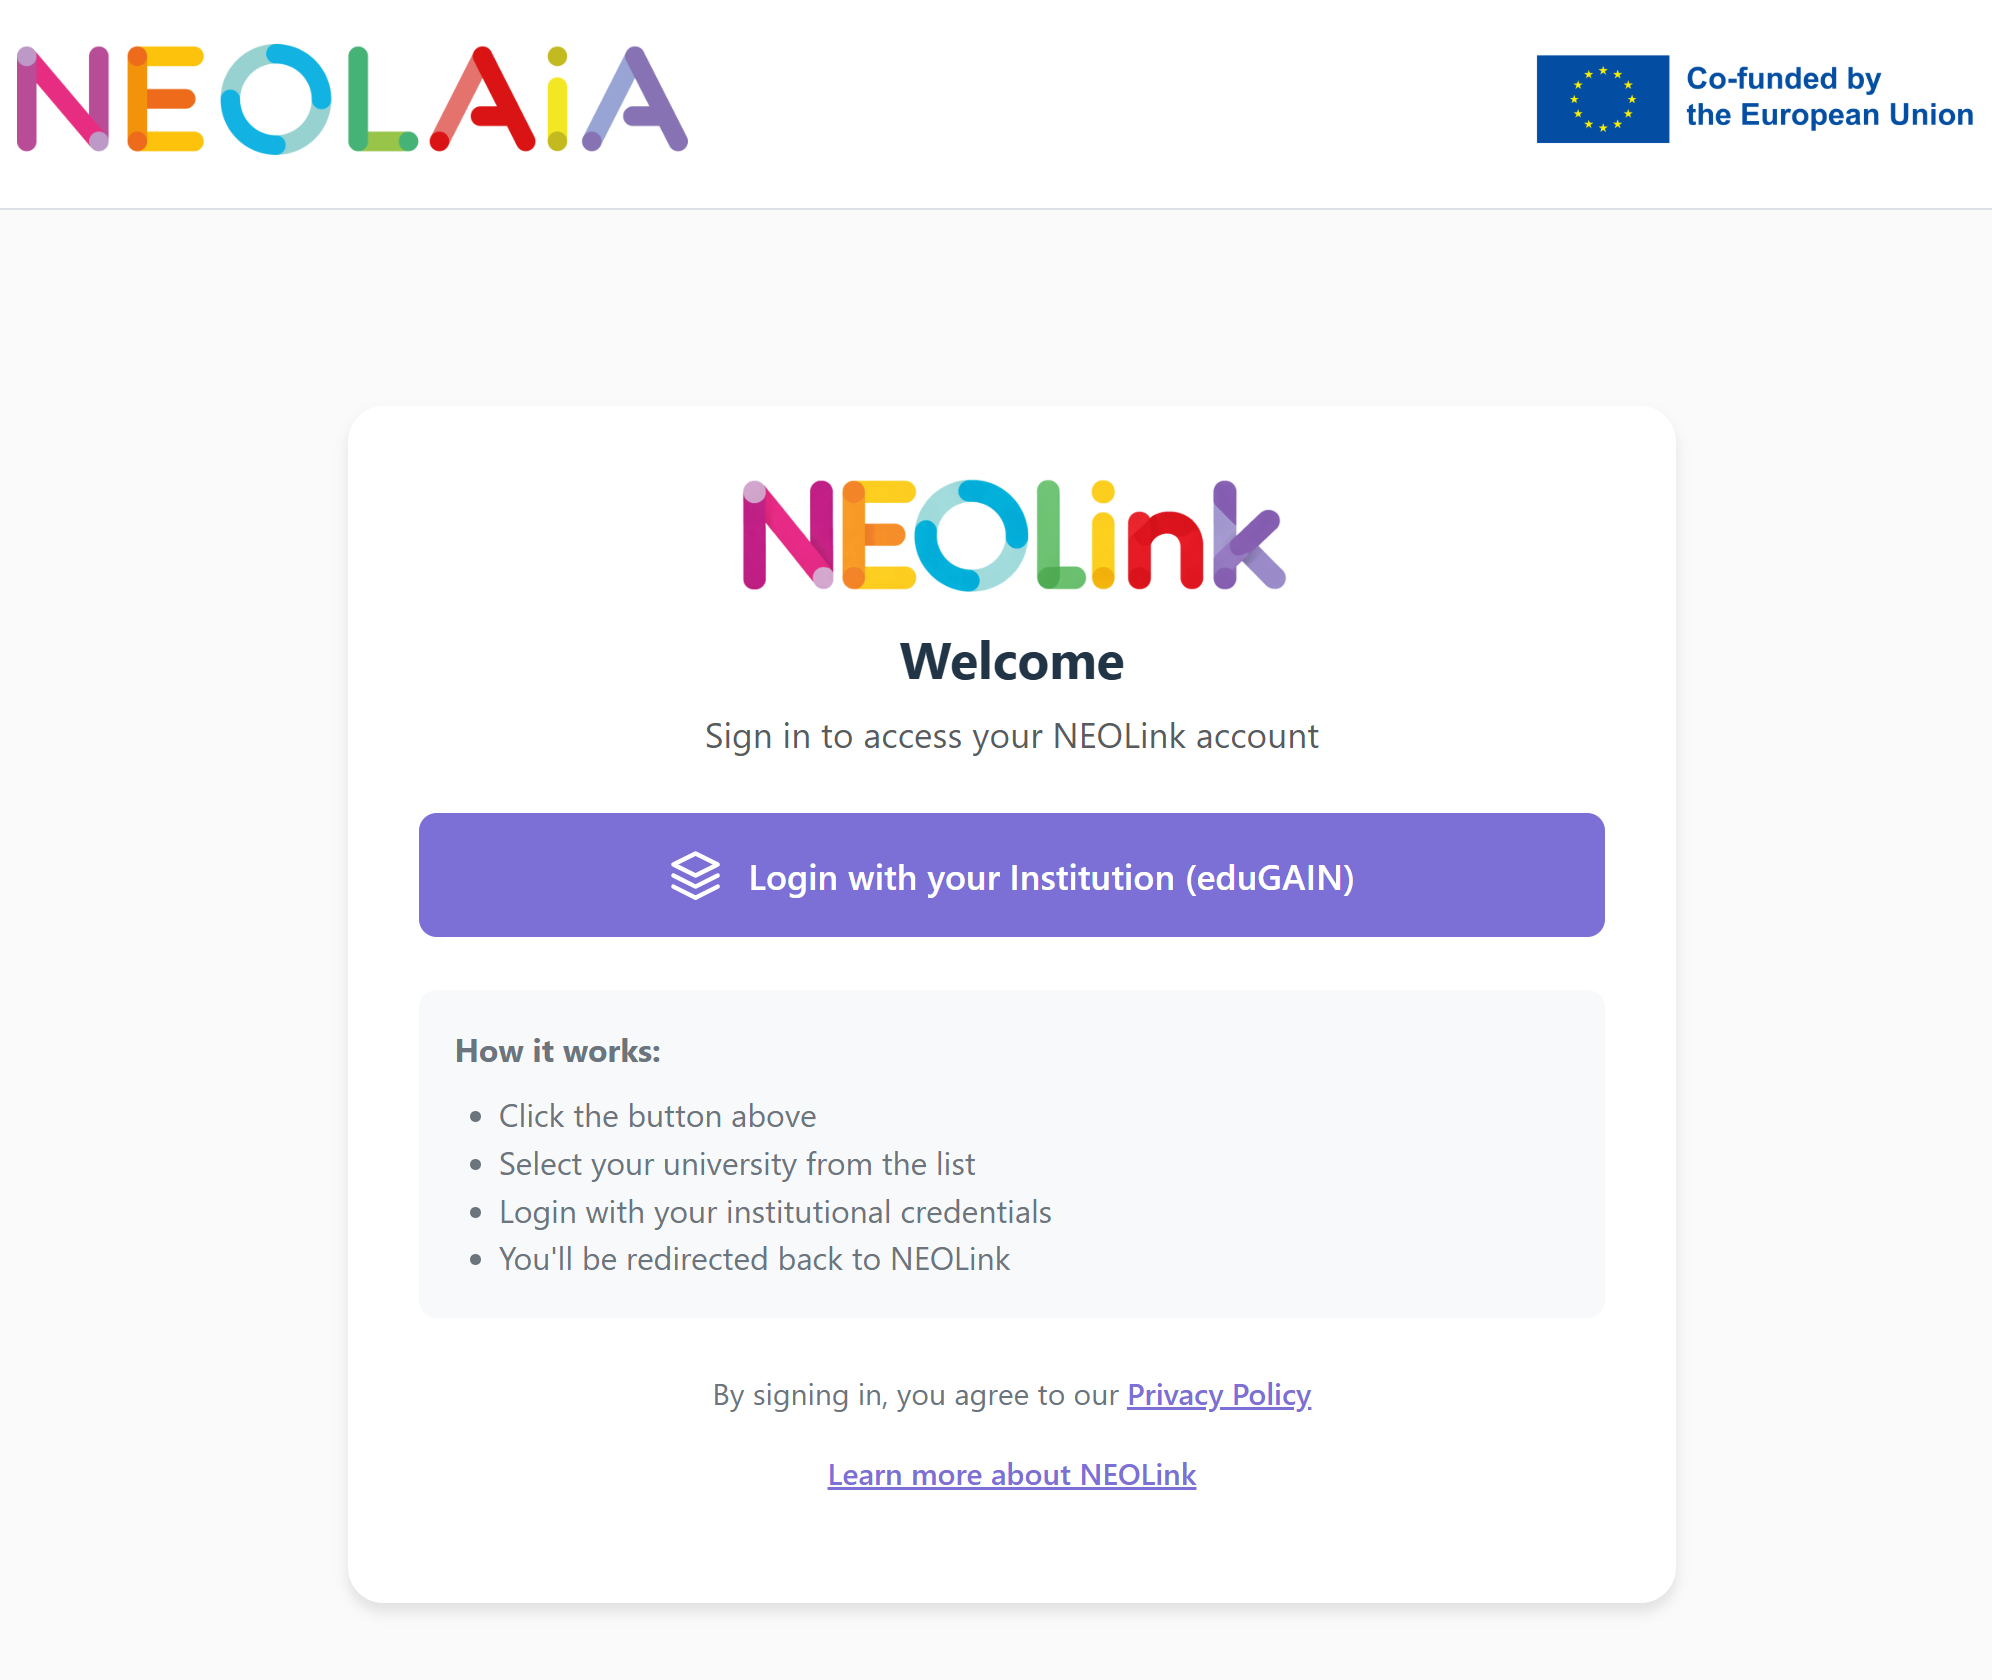
login procedure is the following:
-
Click the Login with your Institution (eduGAIN) button.
-
Select your university from the list provided.
-
Log in using your institutional credentials (the same username and password used for your university services).
-
After successful authentication, you will be automatically redirected back to the NEOLink platform.
At the bottom of the page, users can find a link to the Privacy Policy, confirming that by signing in they agree to the platform’s data protection terms. There is also a “Learn more about NEOLink” link that provides additional information about the project and the platform.
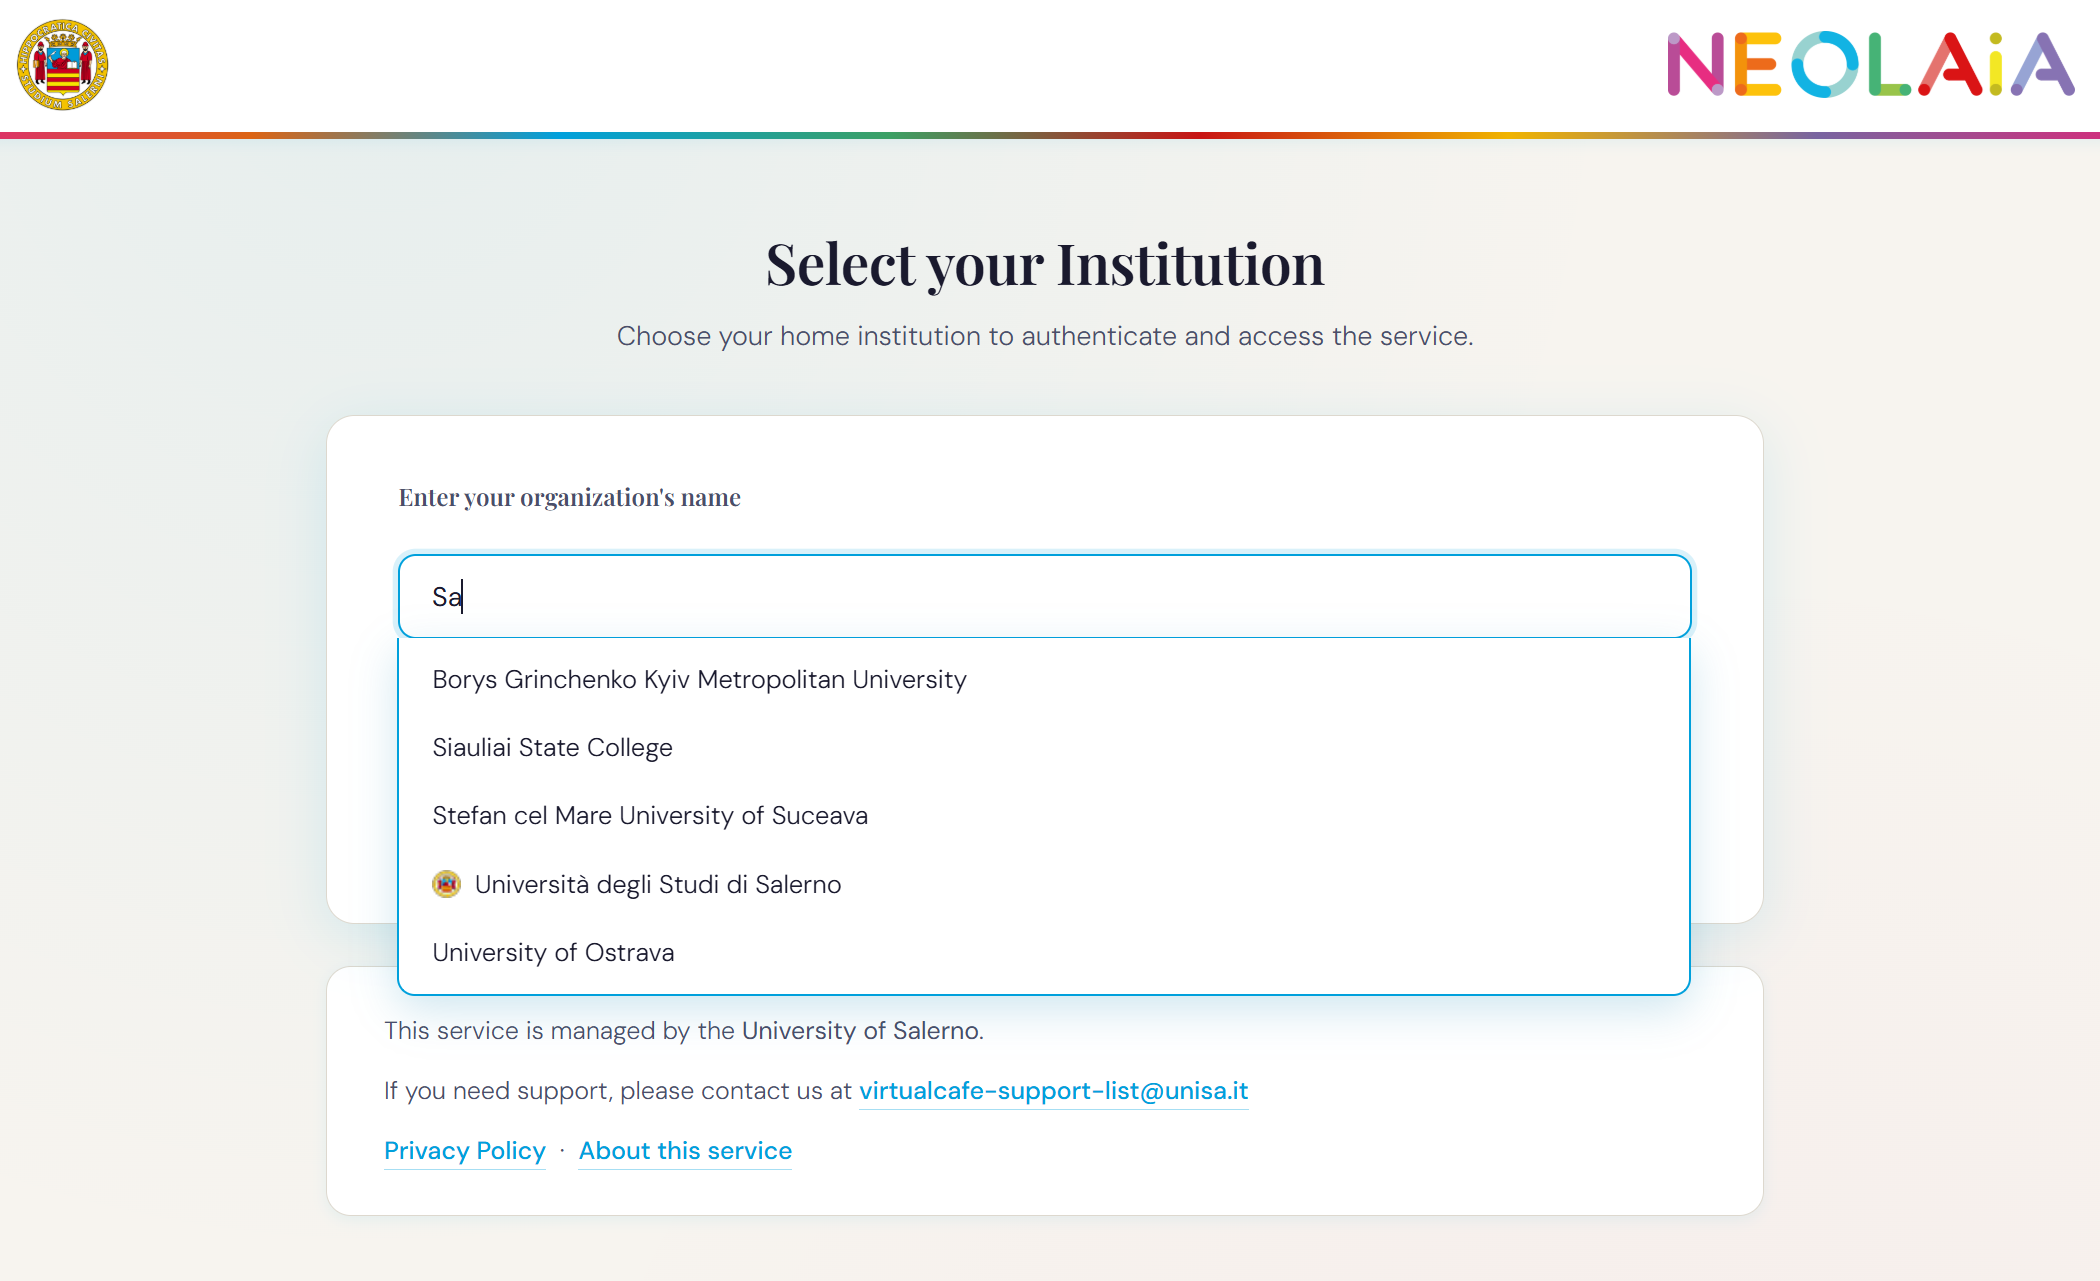
“Login with your Institution (eduGAIN)” on the NEOLink login page allows users to select their home institution in order to authenticate through the federated identity system.
At the top of the page, the title “Select your Institution” is displayed, followed by the instruction “Choose your home institution to authenticate and access the service.” In the central section, users will find a search field labeled “Enter your organization’s name.” This field allows users to type the name or abbreviation of their university or organization. As the user begins typing, a drop-down list of matching institutions automatically appears. Once the institution is selected, the system redirects the user to the authentication page of the chosen university, where they must enter their institutional username and password.
After successful authentication, the user is presented with a Welcome home page to begin using the platform:
Dashboard
Structure
NEOLink Personal Page – Functional Overview
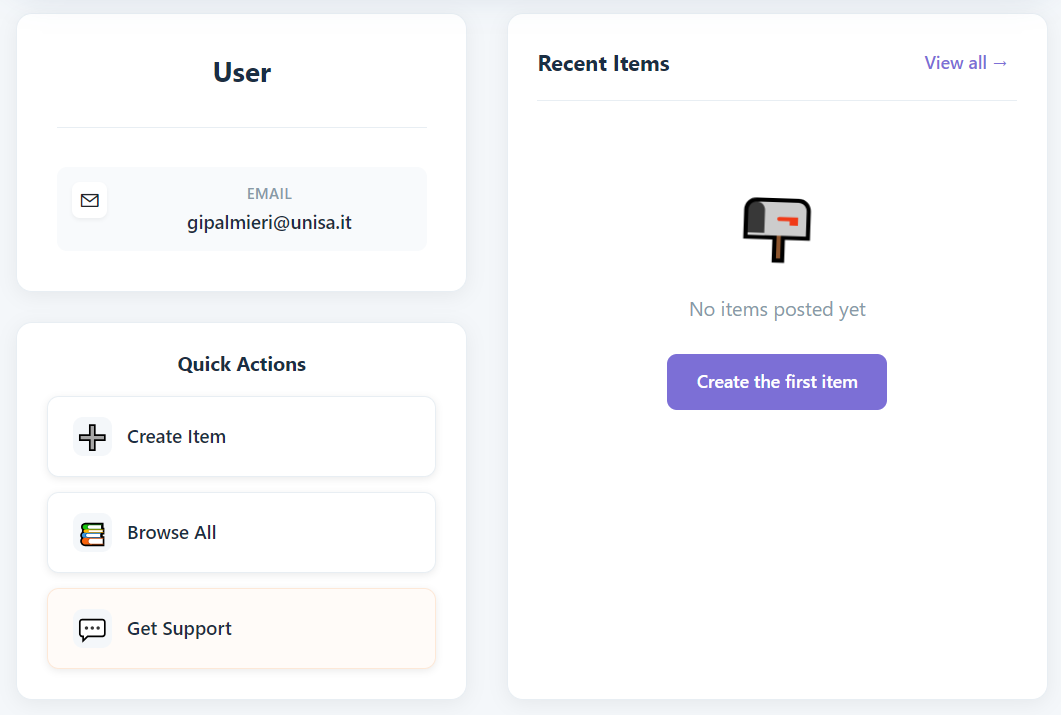
 The NEOLink Personal Page acts as the main user dashboard within the NEOLink platform. From this page, users can access and manage their activities and content.
The page provides the following functionalities:
-
Dashboard overview
Displays a welcome panel summarizing the user’s activity and providing quick access to key sections. -
User information panel
Shows basic account details, such as the registered email address. -
Quick Actions
Provides direct shortcuts to the most common tasks, allowing users to quickly:-
Create a new item
-
Access their personal items
-
Navigate to core platform features without using the main menu
-
-
Navigation menu
Allows users to:-
Return to the Home page
-
Browse items available on the platform
-
Create new items (e.g. Focus Academy, BIP, Collaborative Online International Learning (COIL), Virtual Exachange Courses and NEOTeach )
-
Access My Items, which lists content created or owned by the user
-
-
Recent Items section
Displays the most recently created or accessed items, with a link to view the full list. -
Session management
Includes a Logout button to safely end the user session.
This page serves as the central access point for managing personal content and navigating the NEOLink platform.

Your Personal Workspace
A quick overview of the user’s profile and main actions. On the left side, the User panel displays the registered email address and offers a set of Quick Actions, including creating a new item, browsing all items, and accessing support.
On the right side, the Recent Items panel shows the most recently created entries. Since no items have been posted yet, the area displays an illustration and a prompt encouraging the user to create their first item. A link allows viewing all items once available.
Create Item
The Create Item function allows users to add new content to the NEOLink platform.
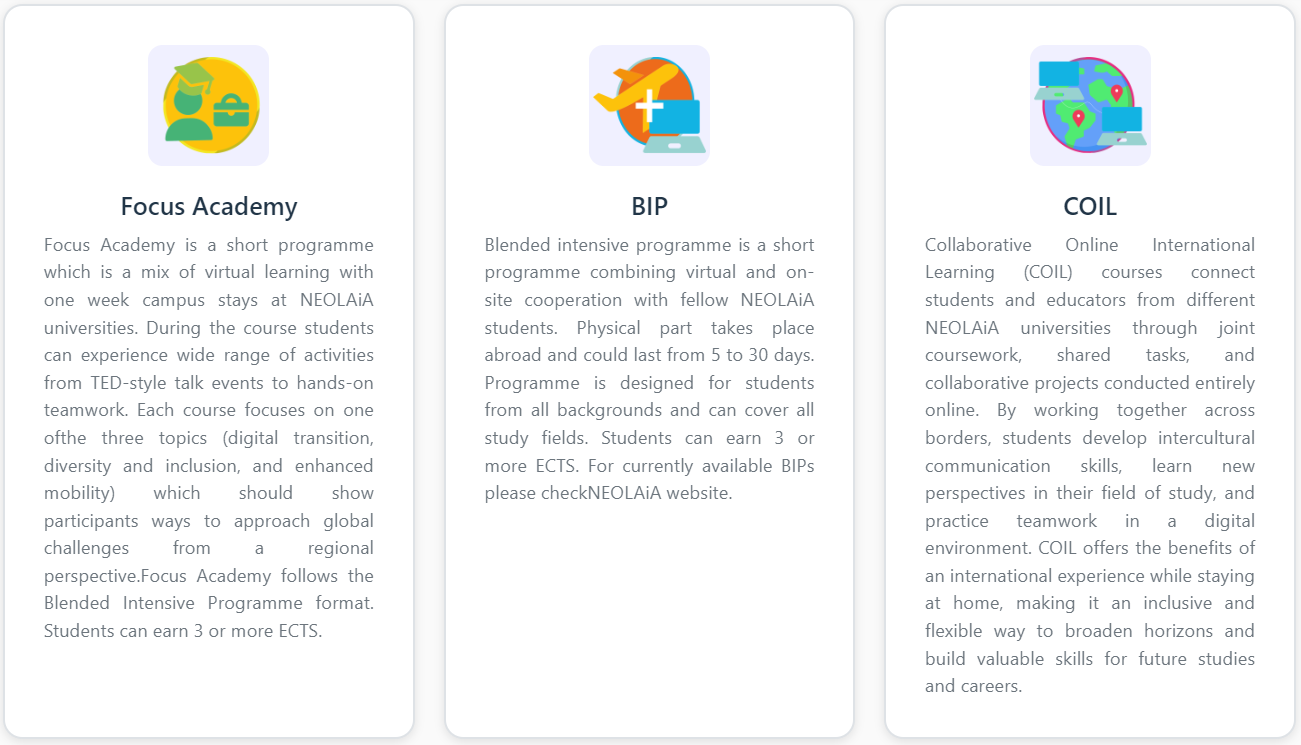
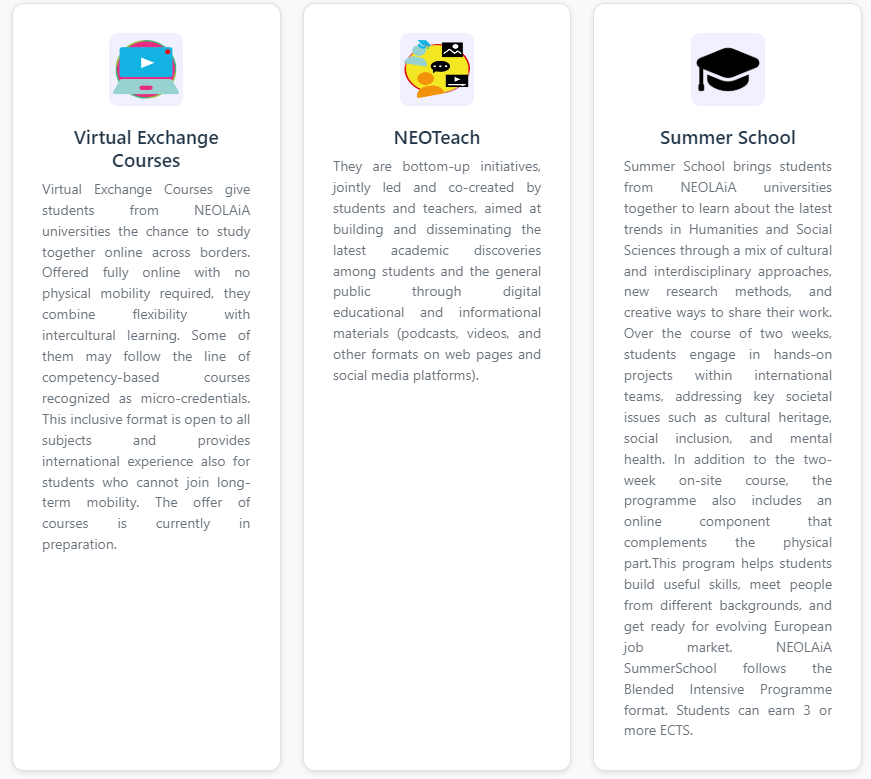
When creating an item, users are asked to select the item type, such as Focus Academy, Blended Intensive Programme (BIP), or Collaborative Online International Learning (COIL), Virtual Exchange Courses, NEOTech and Summer School. Each item type corresponds to a specific educational or collaborative activity within the NEOLAiA Alliance.
After selecting the item type, users can proceed to:
-
Enter the required information related to the selected programme or activity
-
Provide a description and relevant details
-
Save and submit the item so that it becomes available within the platform.
The item creation categories available in NEOLink, displayed as selectable cards:
My items
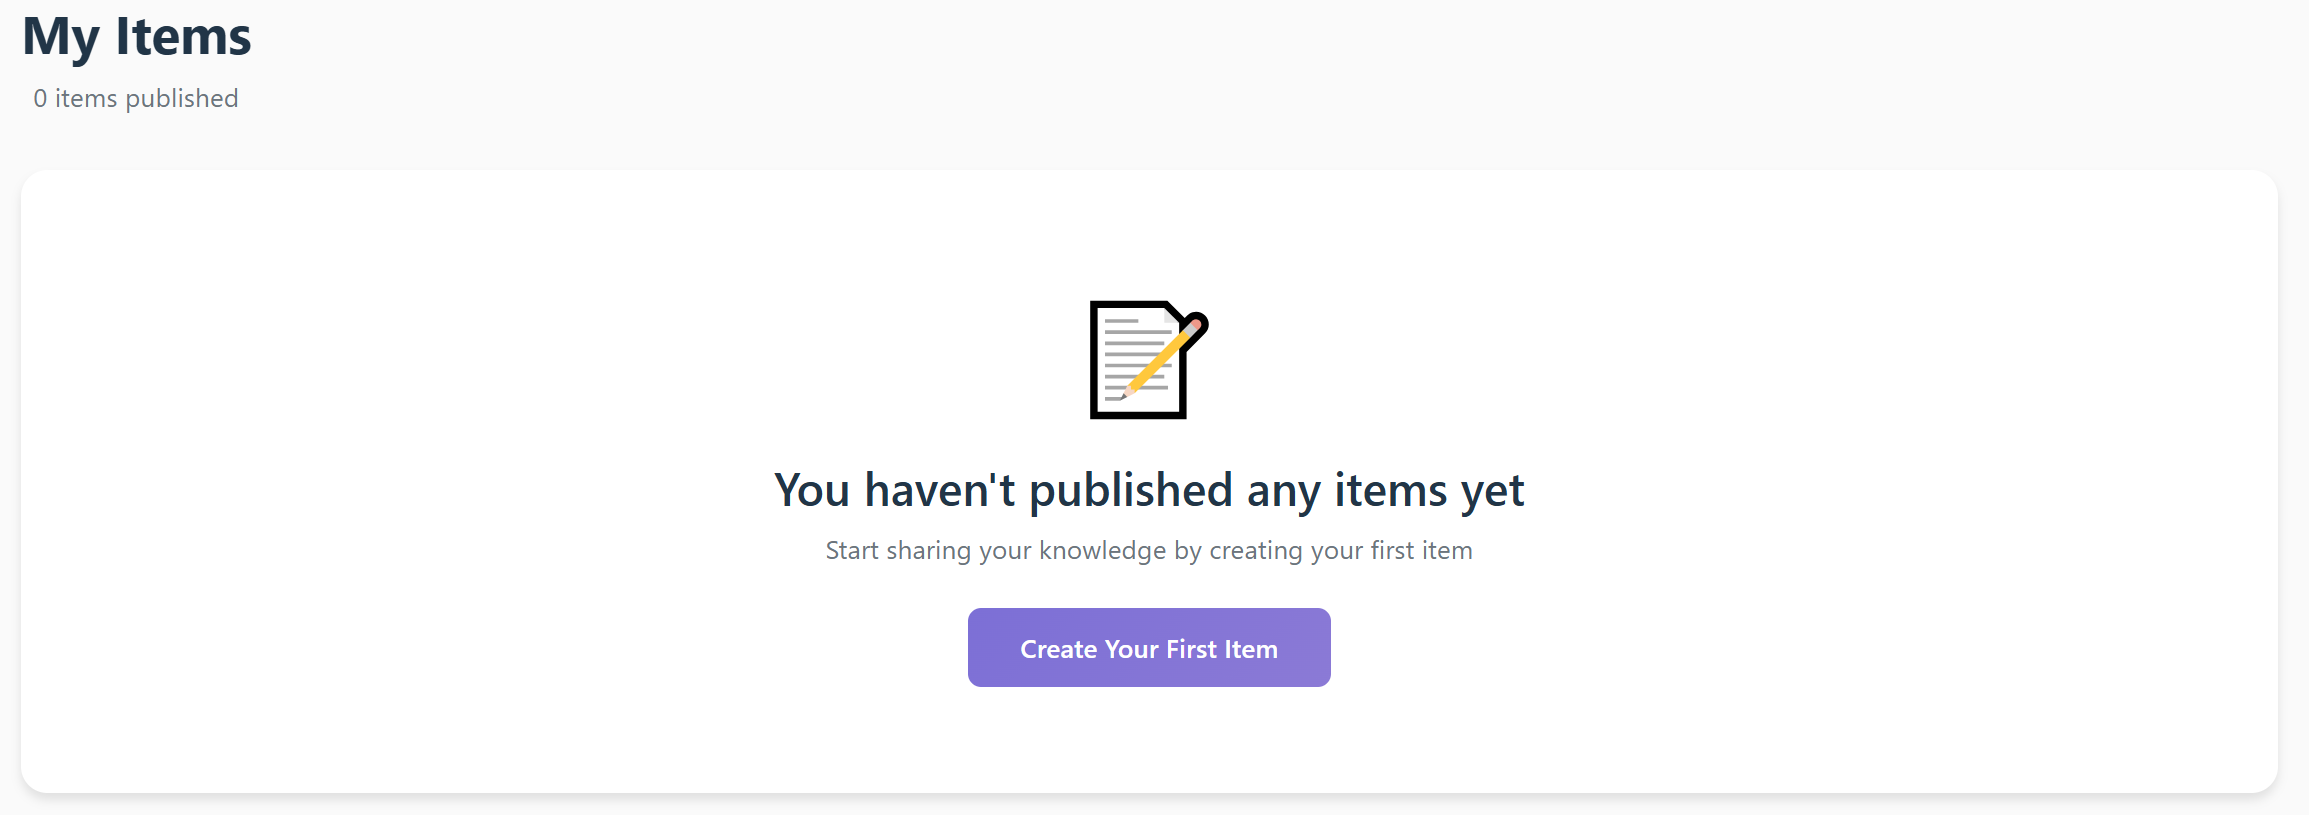
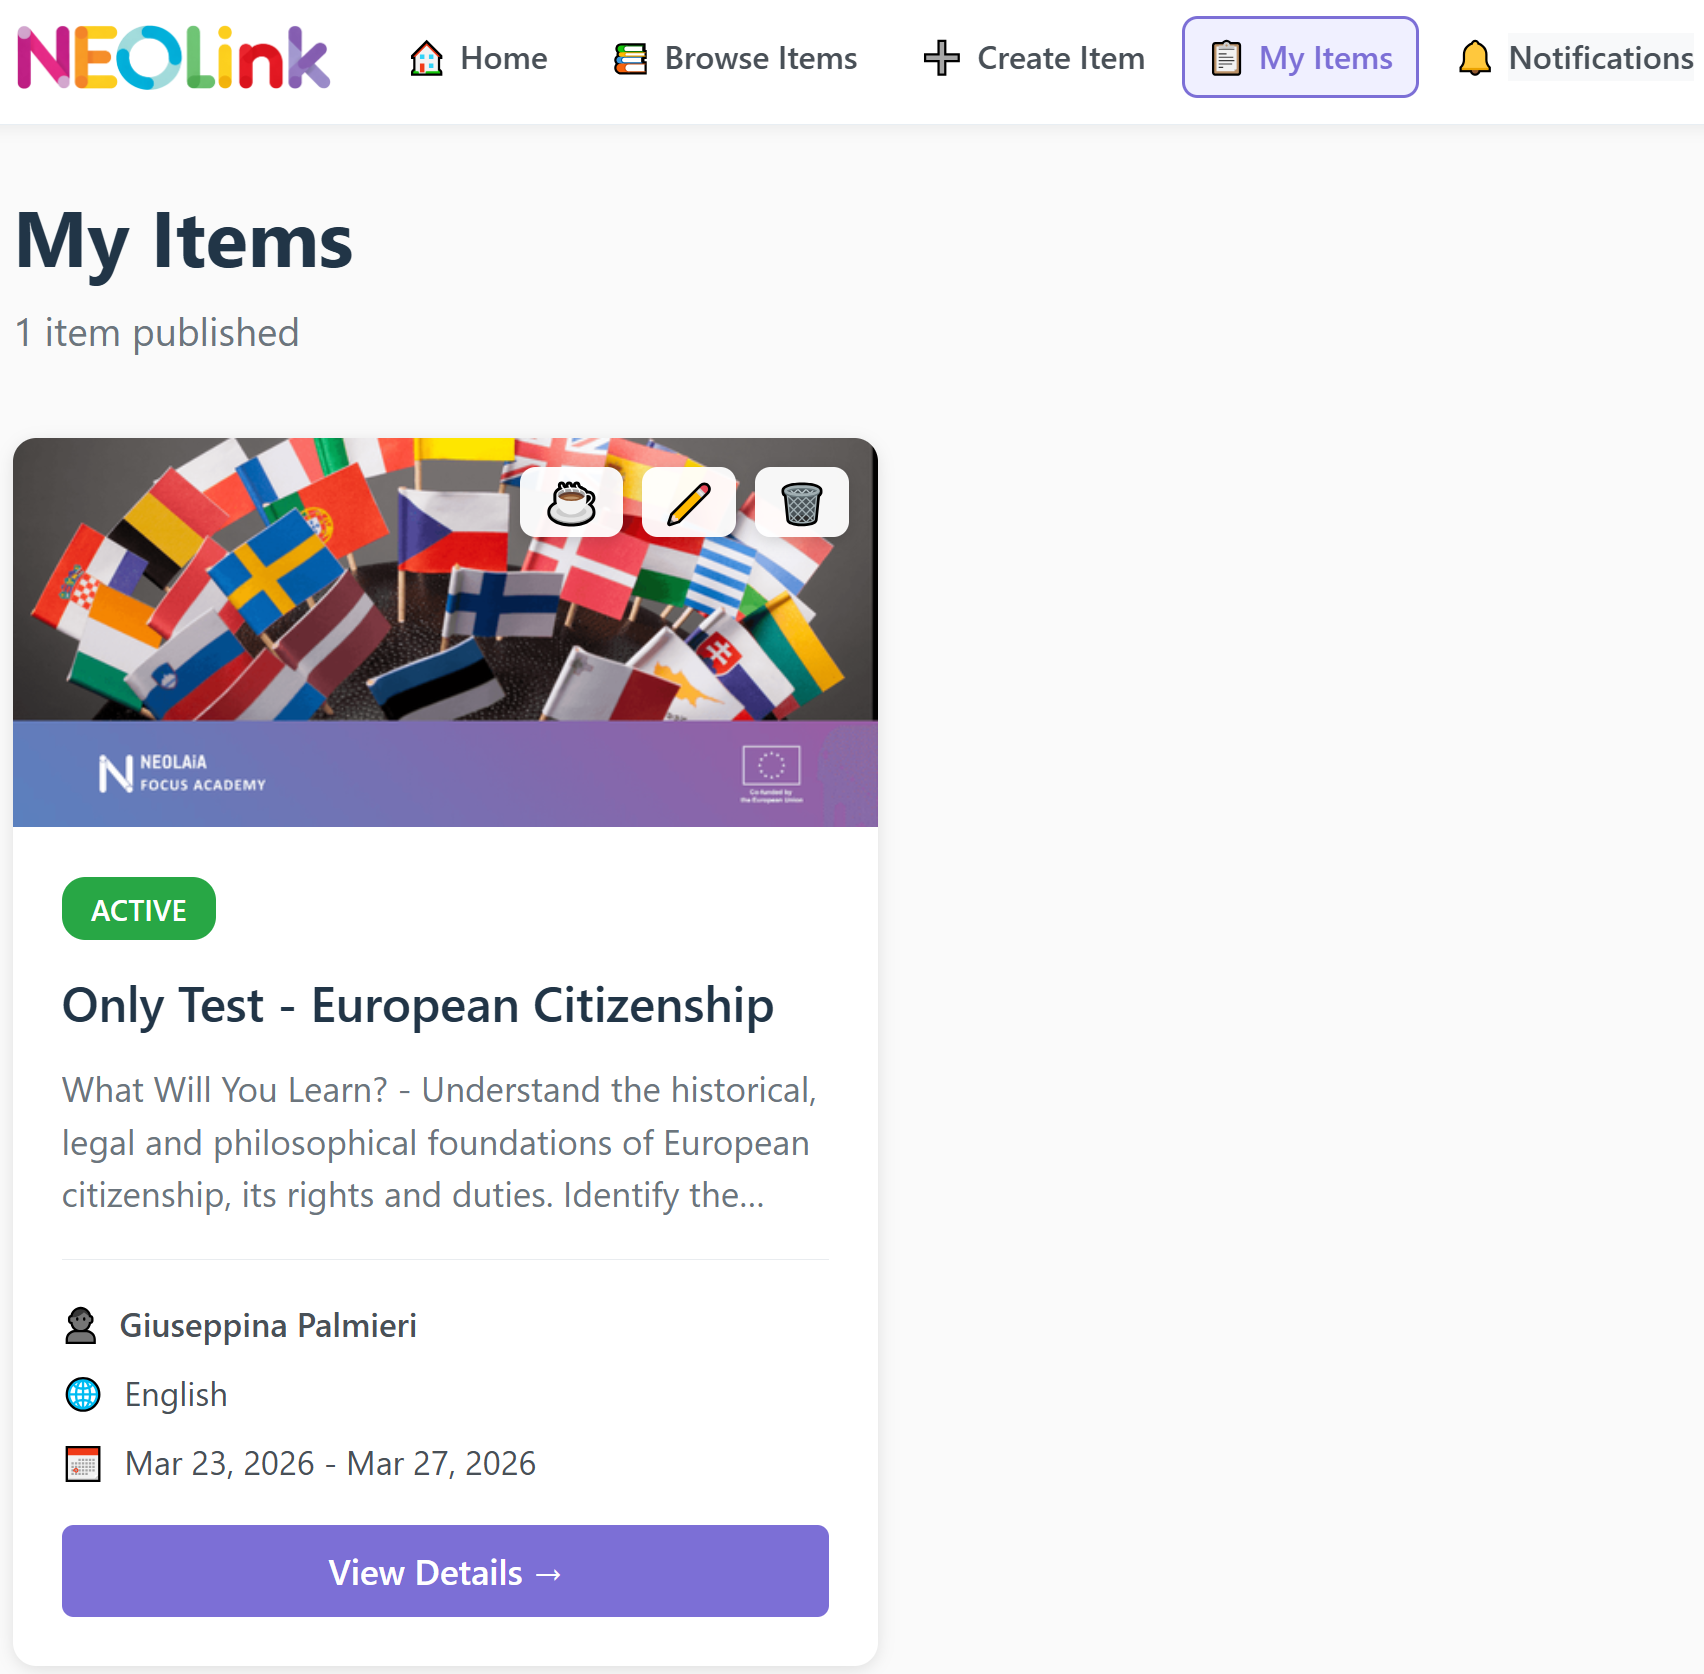
The My Items section displays all the items you have created on the NEOLink platform. Here you can find information about your published and draft content, including Focus Academy, BIPs, COIL courses, Virtual Exchange Courses, and NEOTeach initiatives.
If you have not created any items yet, this section will appear empty. You can start creating your first item at any time by clicking Create Your First Item, which will guide you through the creation process.
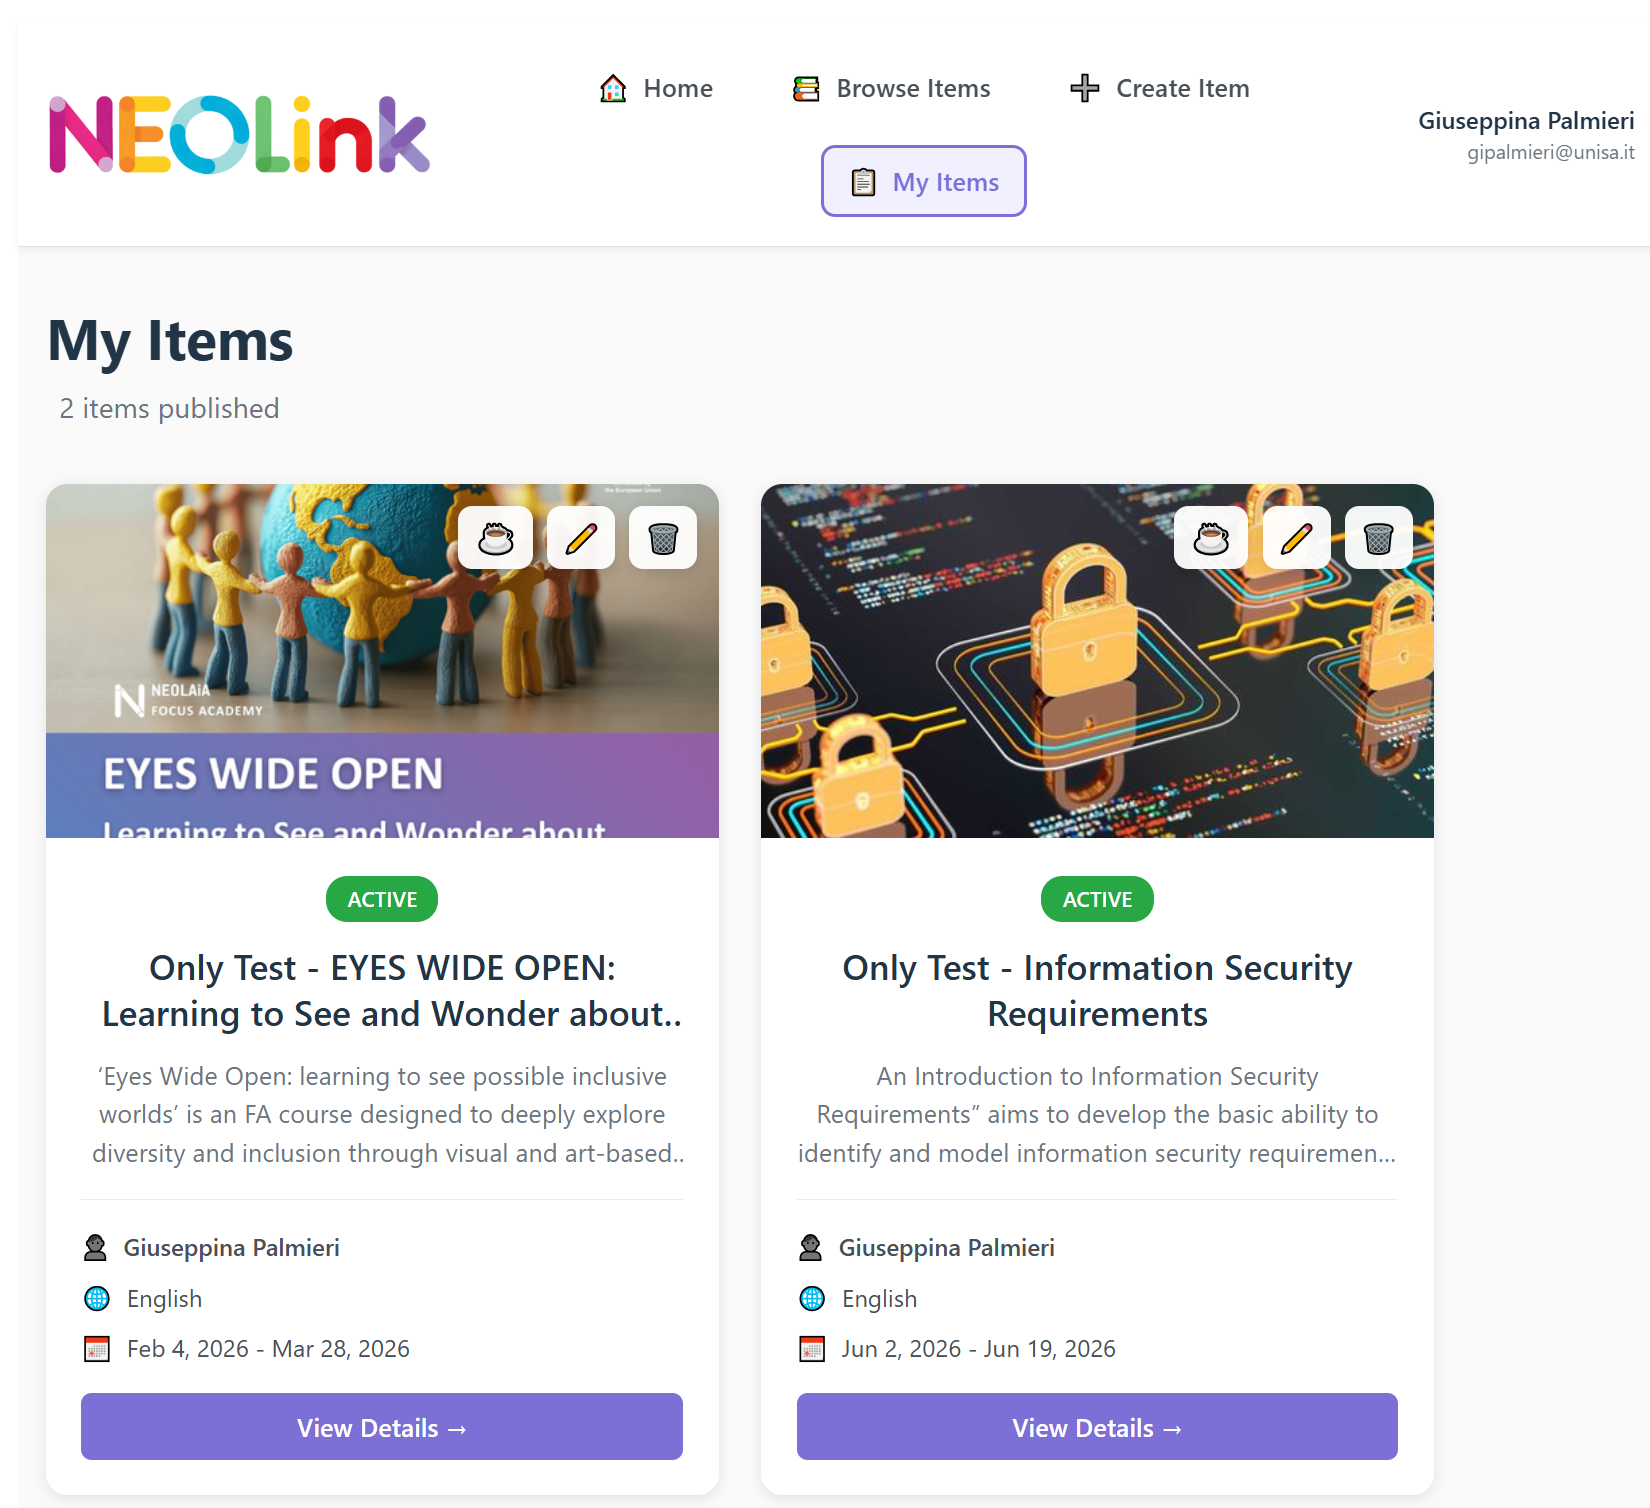
Item Cards Overview
Each card includes:
-
Header Image
A visual banner representing the item. -
Status Badge
A green “ACTIVE” label indicates that the item is currently published and visible. -
Item Title & Summary
The main title of the item and a short description summarizing its content or purpose. -
Author Information
The author’s name is displayed to indicate ownership of the item. -
Language
The language in which the item is written or delivered. -
Date Range
The start and end dates associated with the course or activity.
Actions Available
At the top-right of each item card, two management icons allow the user to:
-
Edit Item (pencil icon)
Opens the editor to update the content, description, or settings. -
Delete Item (trash icon)
Removes the item permanently from the system (a confirmation step may be required).
View Details
Each card includes a “View Details” button, which redirects to the detailed page of the item, where full content, materials, and related information can be accessed.
By clicking Create Your First Item, you will be redirected to the item creation process (described in the following section).
Once an item is created, it will appear in this page under My Items.
By clicking on the Café icon, you are immediately redirected to the Virtual Café, where you can join discussions, participate in shared activities, or connect with other participants.
Show Filters: Discover Relevant Items and Set Up Notifications
The Browse Items page allows users to explore all available items (such as courses, programs, or activities) published on the platform. This page is accessed by clicking “Browse Items” in the top navigation bar.
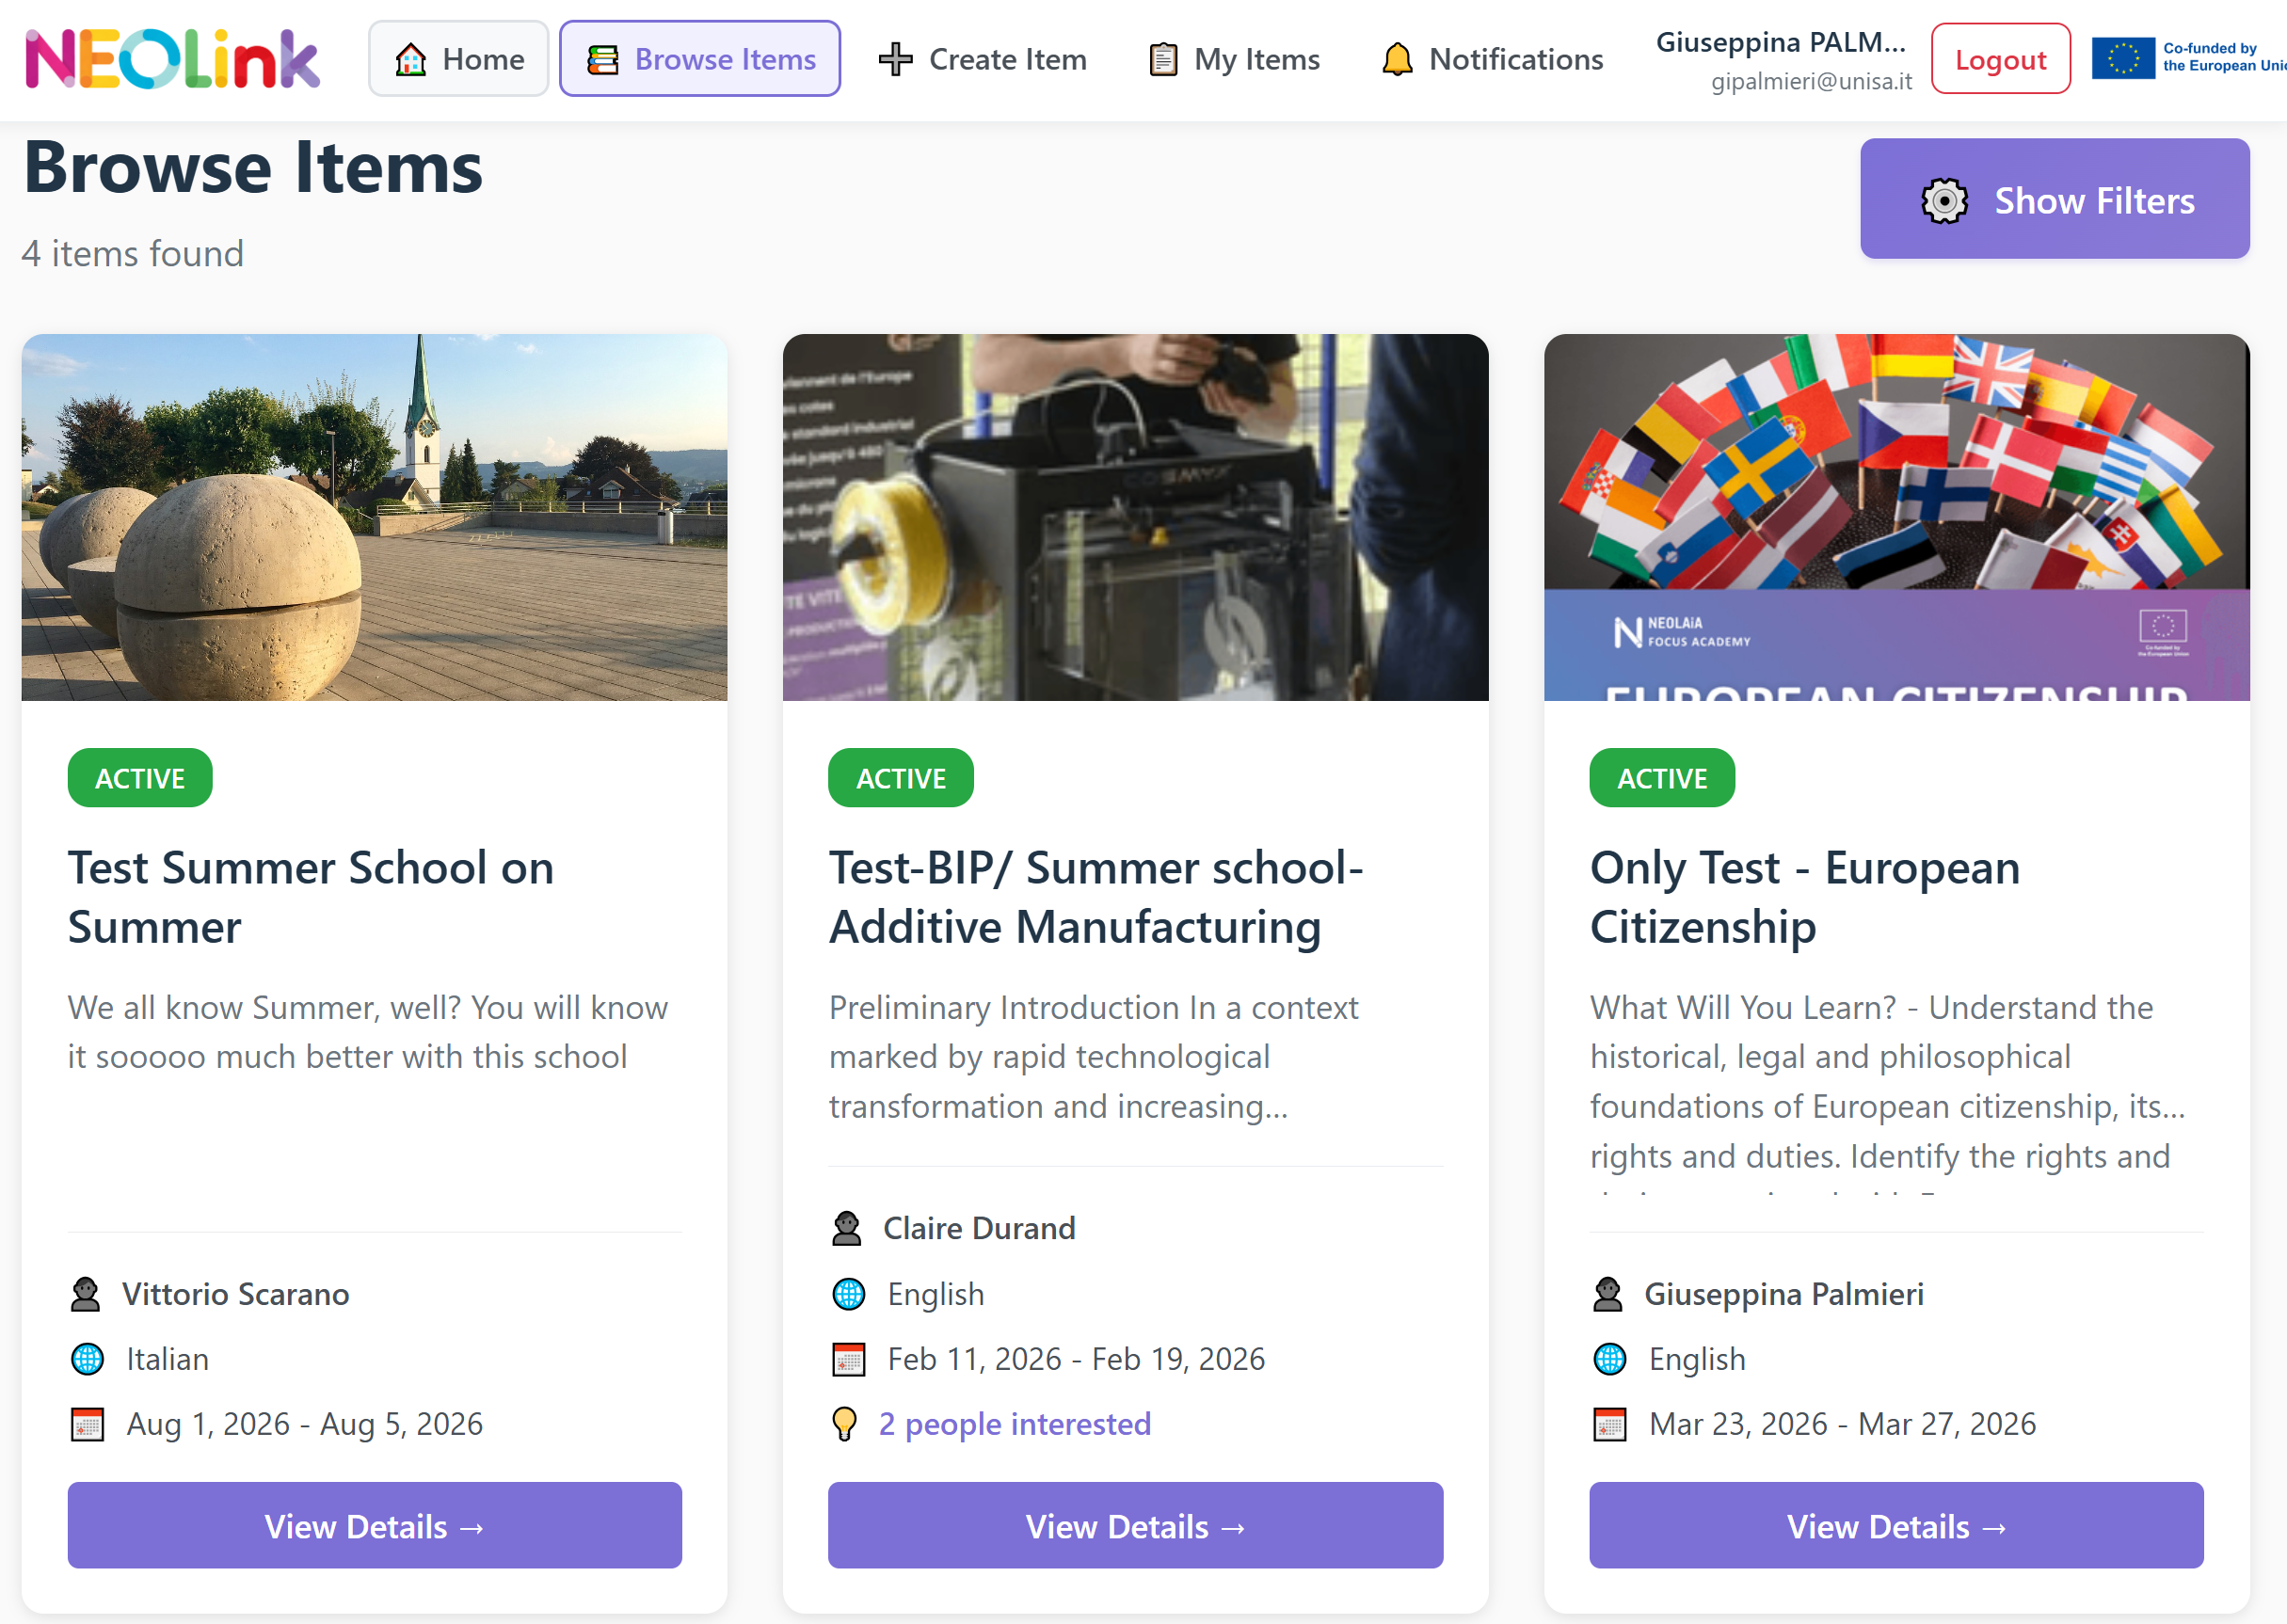
On the right side of the page, the Show Filters button allows users to open filtering options to refine the list of displayed items.
 With the Show Filter feature, users can search and explore existing items already available on the platform such as Focus Academy, BIP, COIL, Virtual Exchange Courses, and NEOTeach—in order to identify opportunities that may match their interests and participation goals.
Through this functionality, users can:
-
search for items by name using the search bar;
-
filter content by category (e.g. Focus Academy, BIP, COIL, Virtual Exchange Courses, NEOTeach);
-
quickly reset all selected filters using the Clear All option.
This feature enhances usability and efficiency by helping users quickly locate relevant content, especially when managing a large number of items.
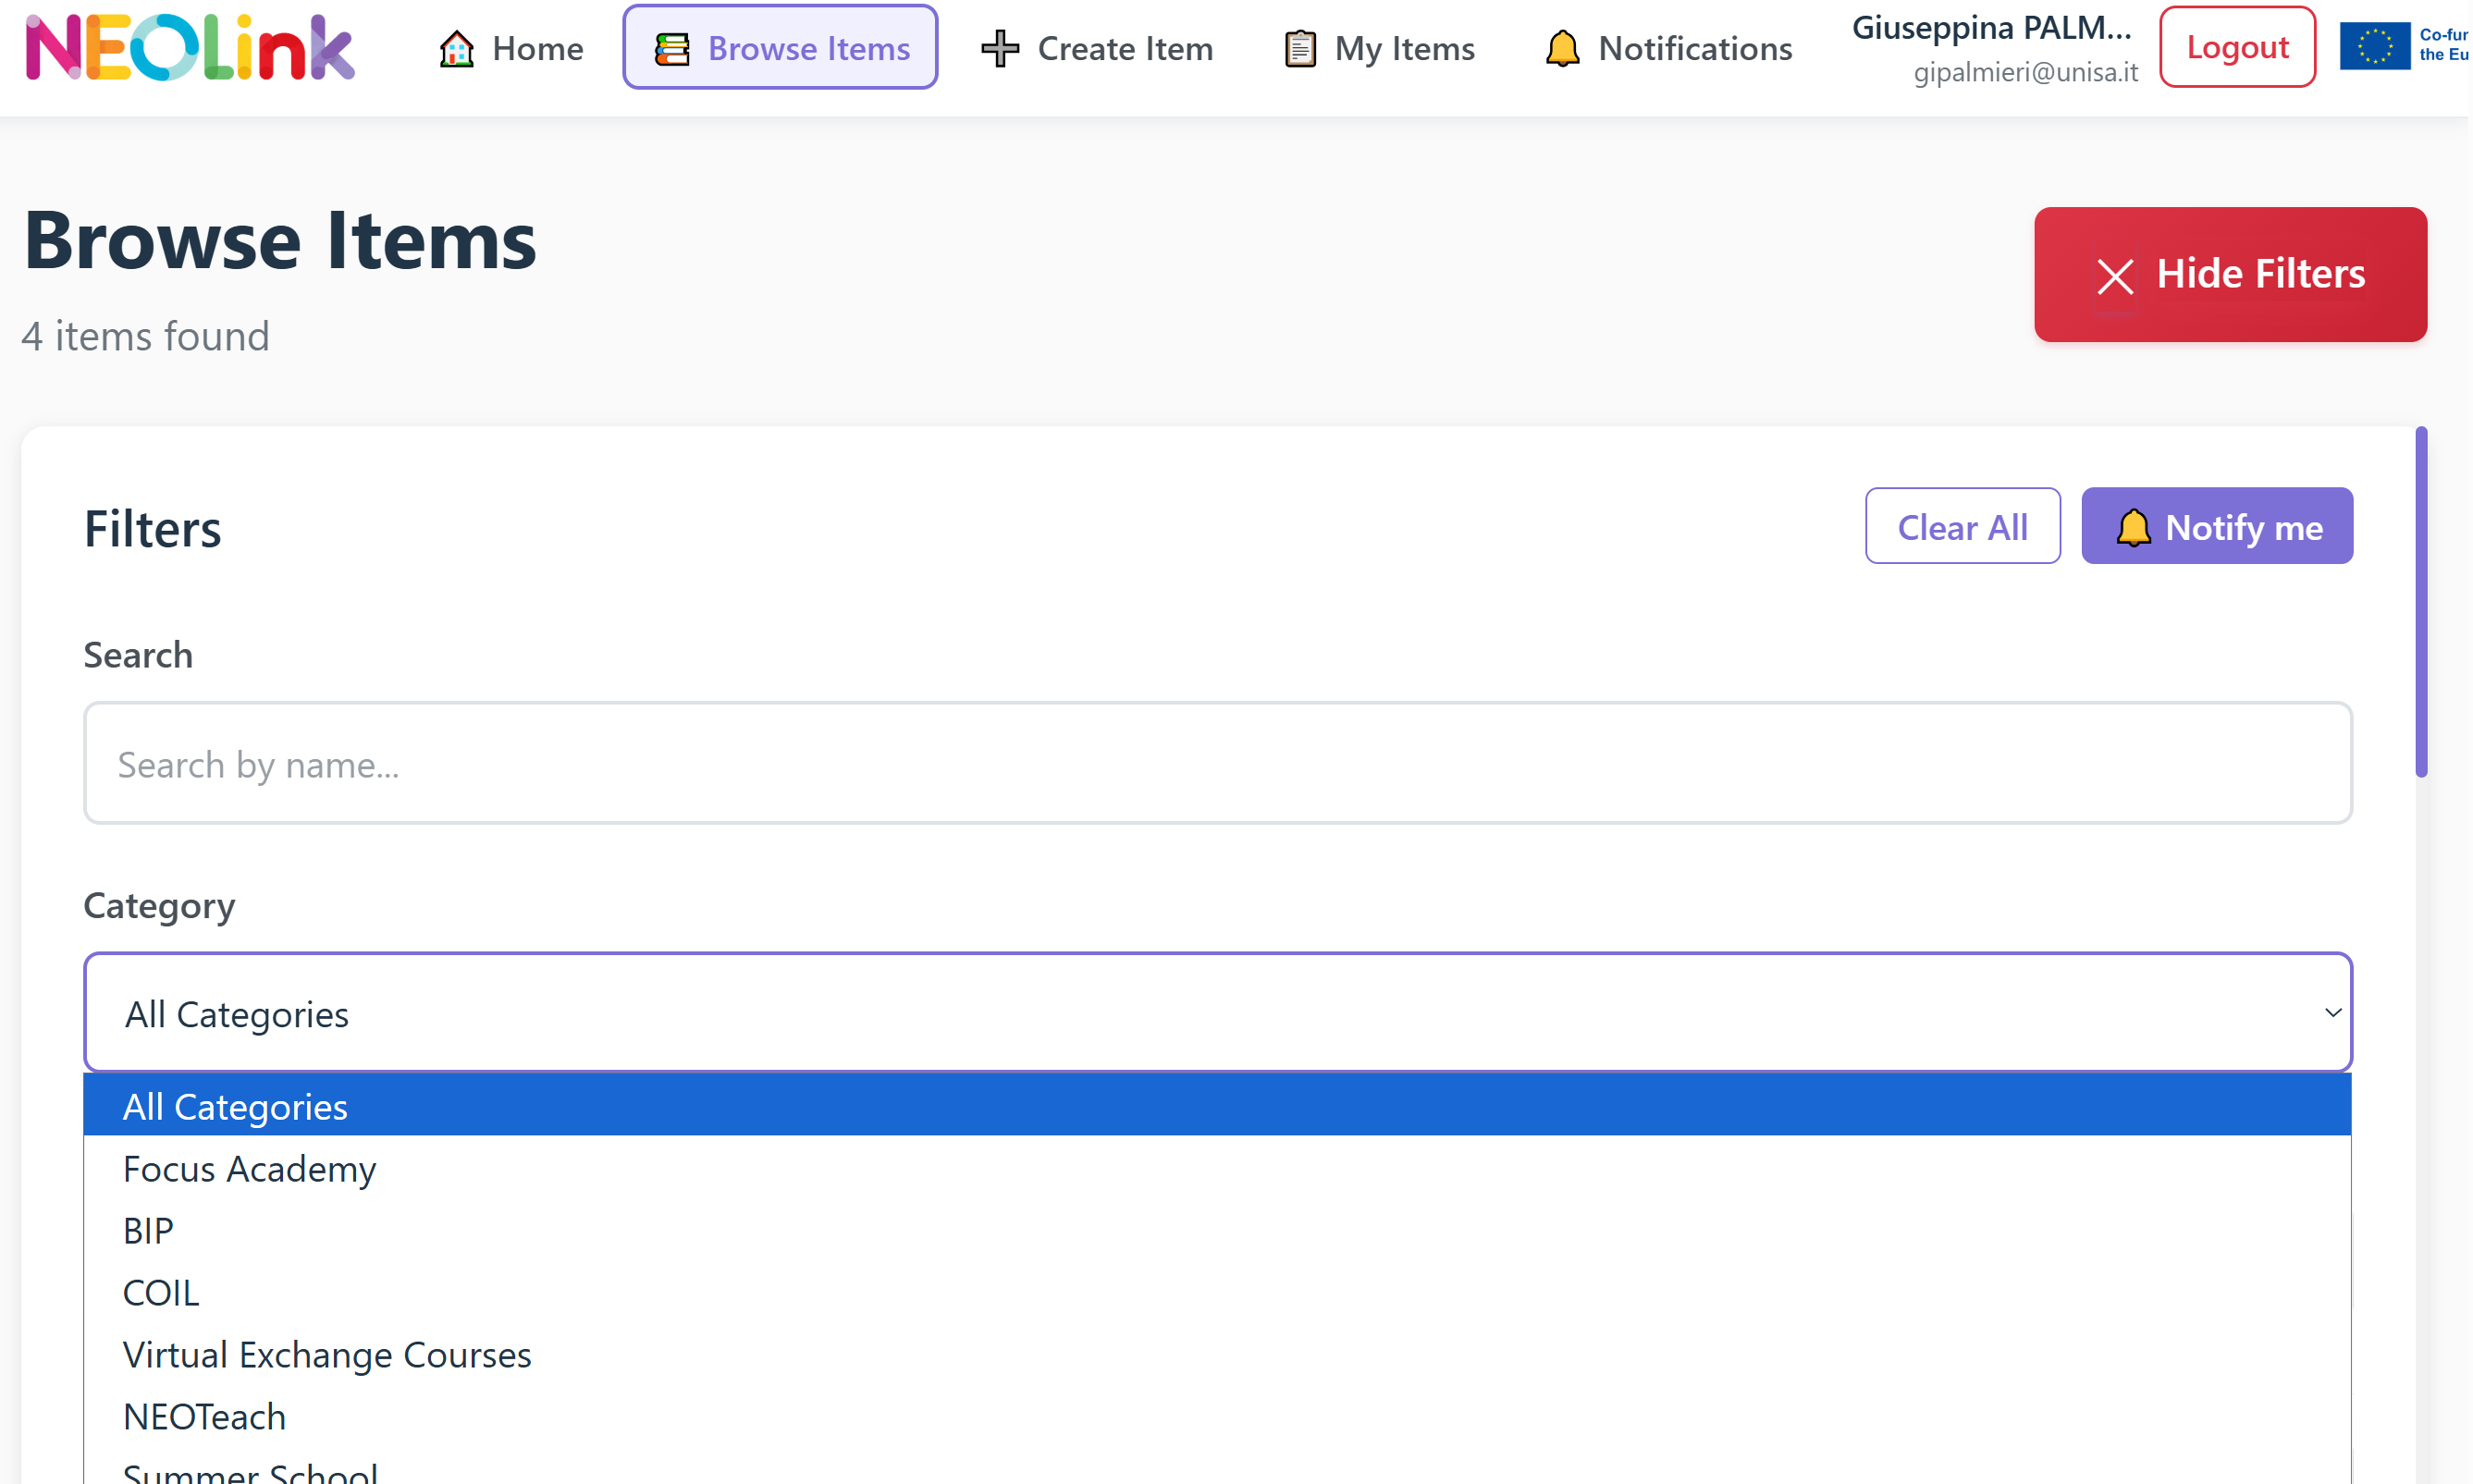
📌Advanced Filtering by Category
The Browse Items page provides users with advanced filtering options to efficiently explore available items on the platform.
The Category filter allows users to view items across all categories or limit results to a specific category.
Users can show or hide the filter panel using the Hide Filters button, maintaining a clean and adaptable interface. These combined filtering options enhance usability by supporting targeted searches and improving content discoverability.
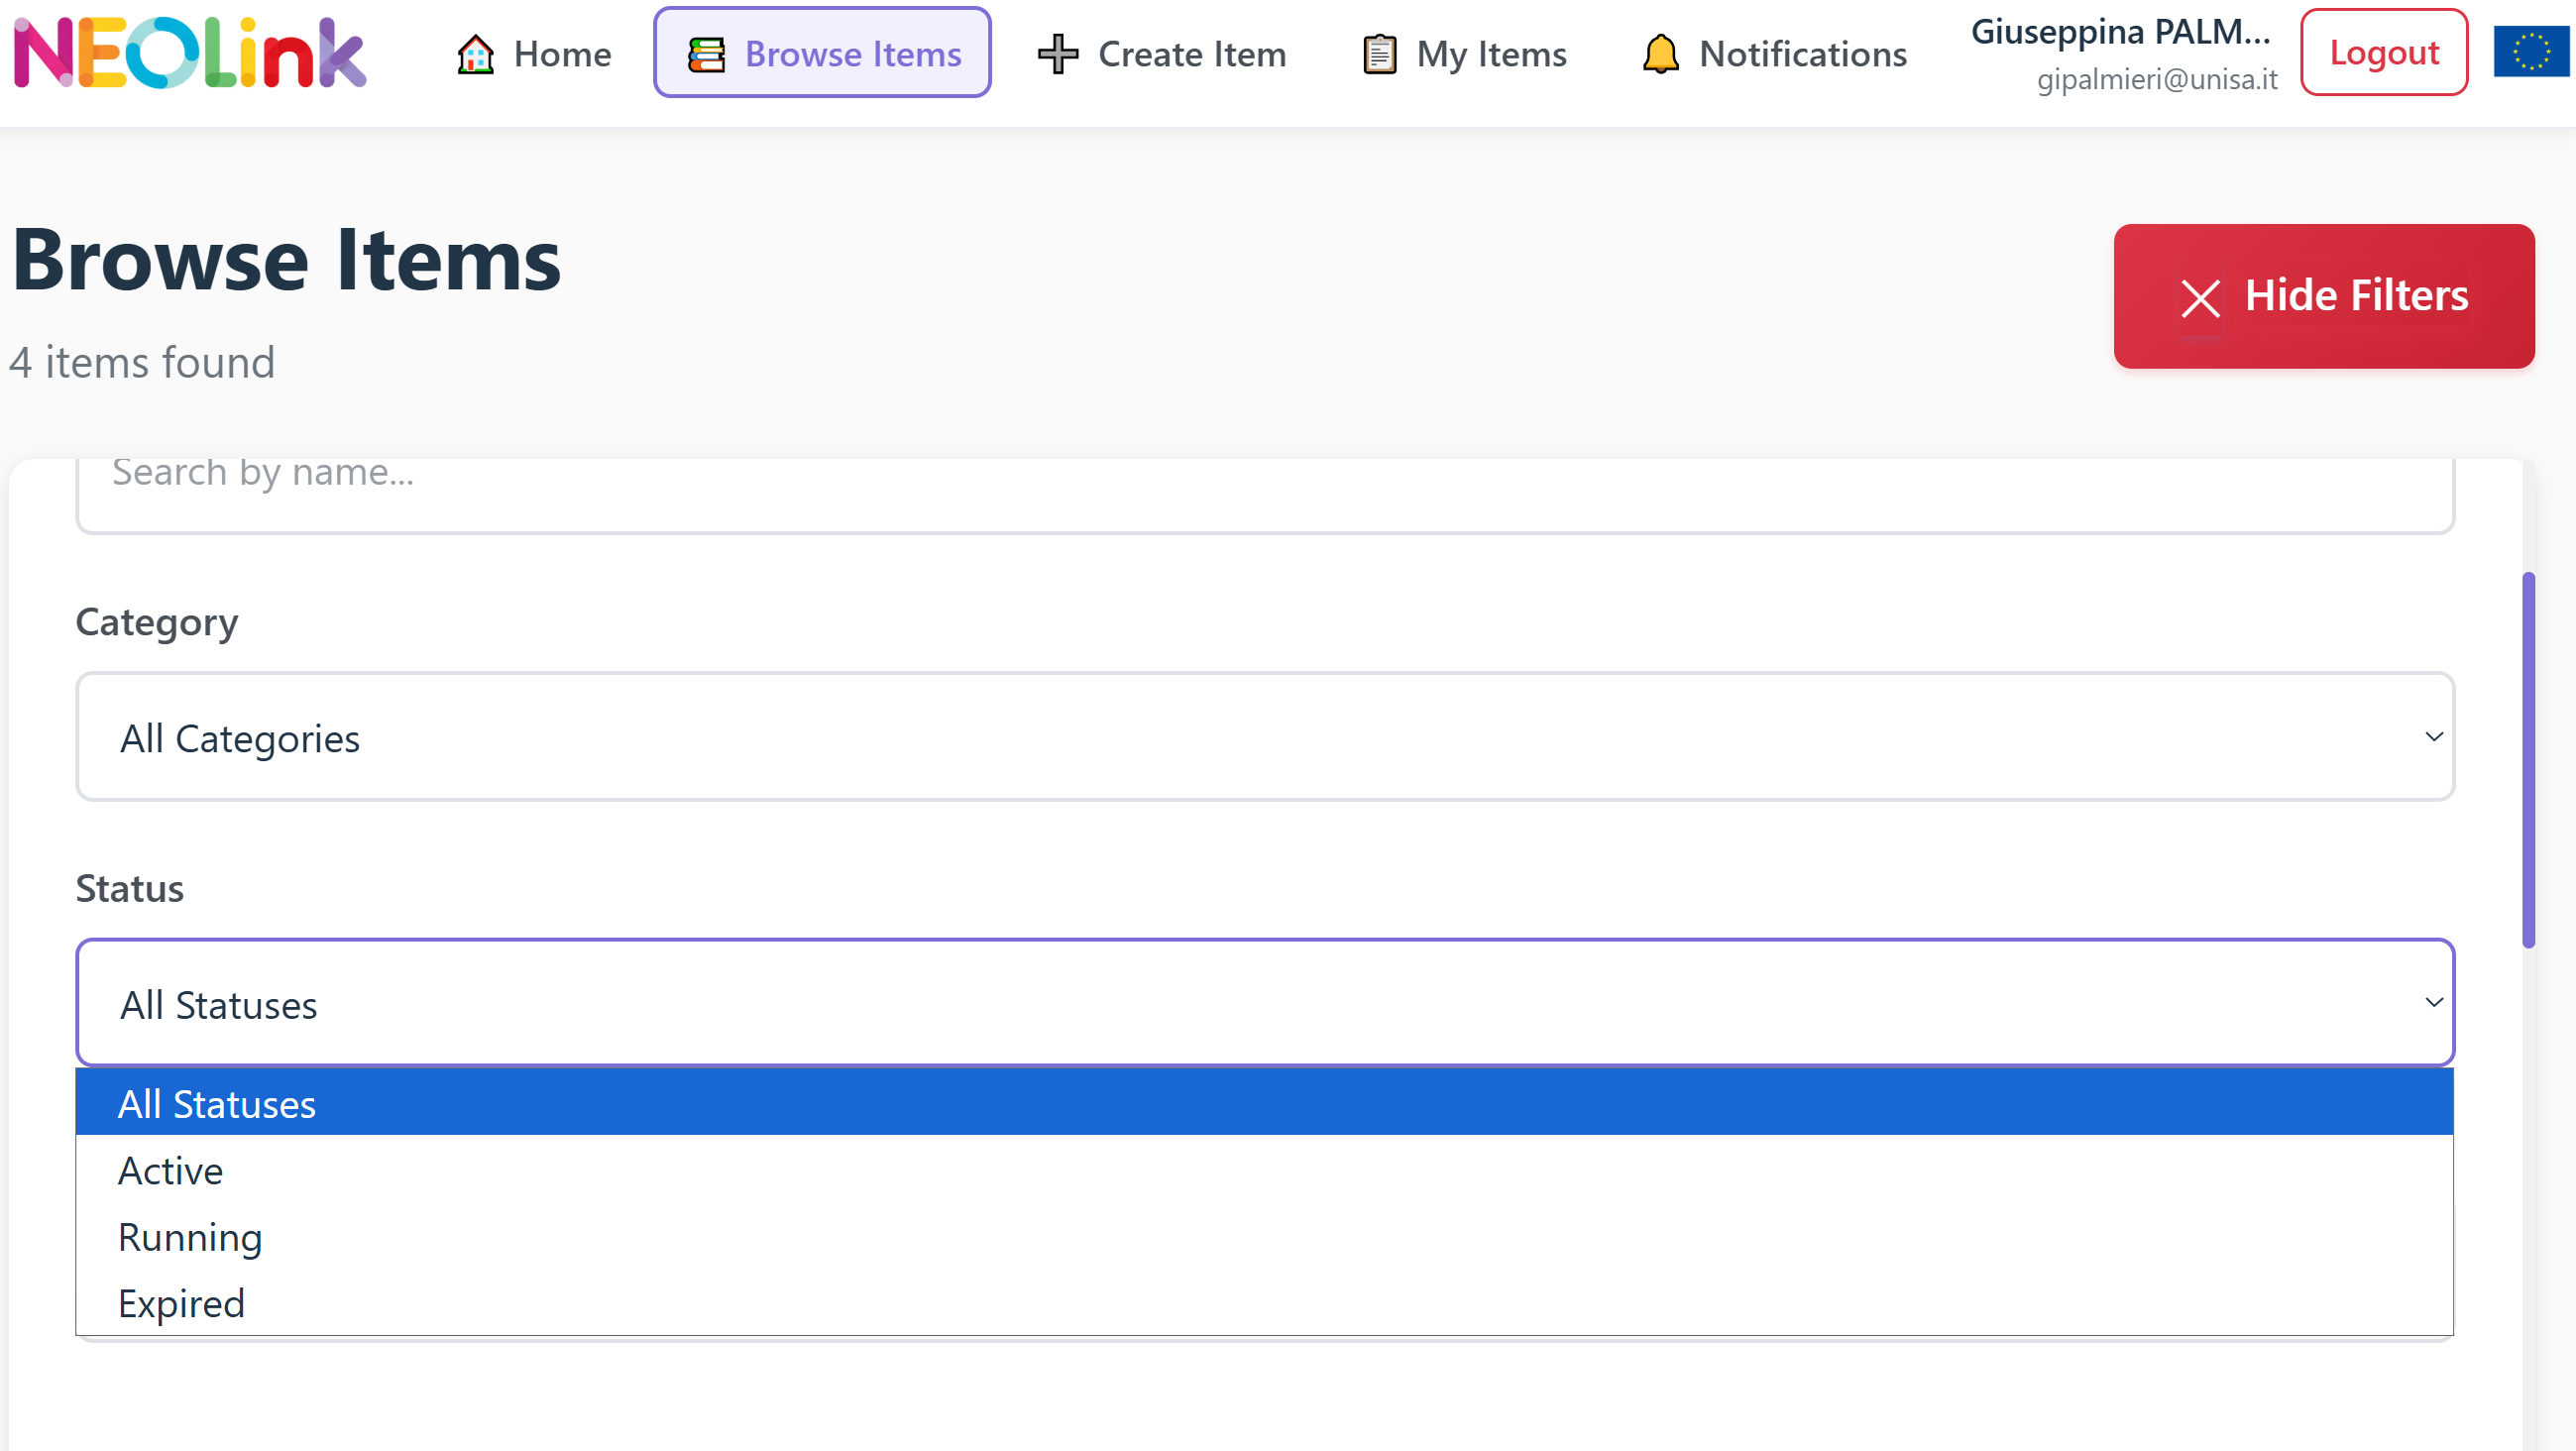
In addition to category-based filtering, users can refine their search using a Status filter.
📌Advanced Filtering by Status
The Status filter enables users to select the current state of items—such as Active, Running, or Expired—making it easier to identify opportunities that are currently available or relevant.
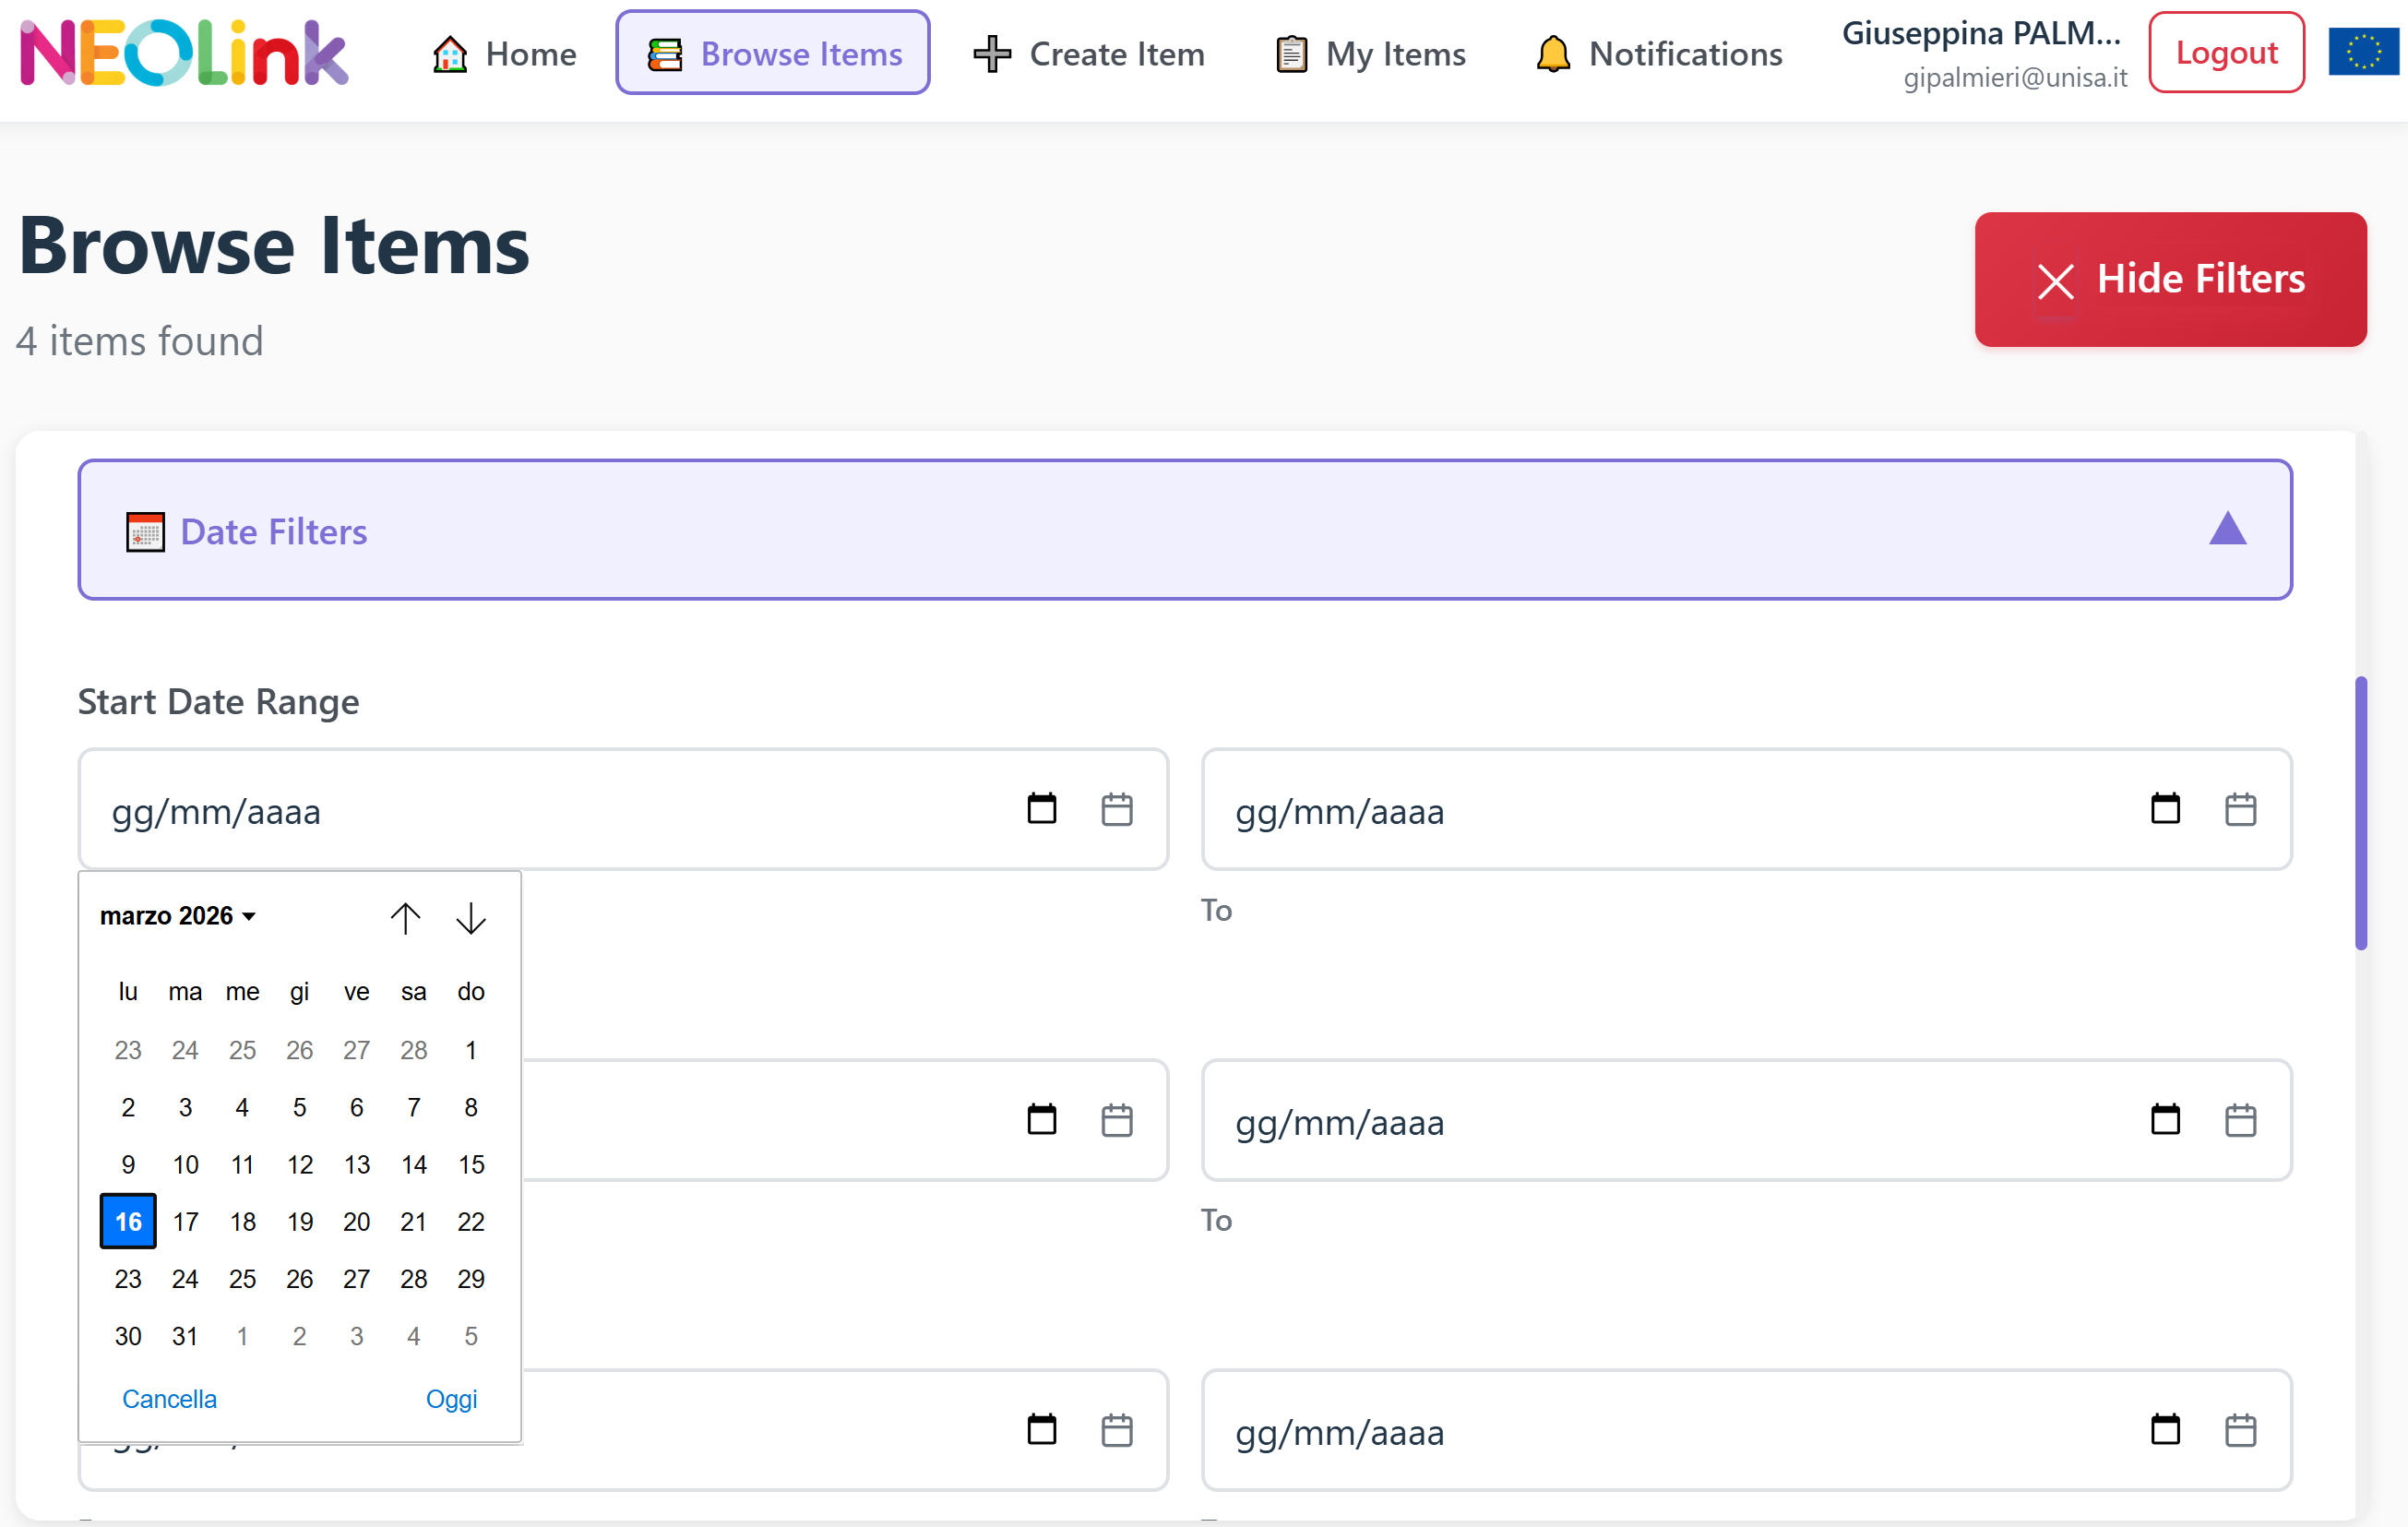
📌Advanced Filtering by Date Filters
NEOLink Date Filters let users narrow "Browse Items" by date ranges: Start (From/To), End (From/To), and Expiration (From/To), using calendars or manual entry (e.g., Feb 2026)
-
Main Section: A purple-framed "Date filters" panel expandable via a toggle.
-
Start Date Range: Fields for "From" (dd/mm/yyyy) and "To," with a calendar picker (showing February 2026, highlighted on the 5th).
-
End Date Range: Similar paired fields for defining end periods.
-
Expiration Date Range: Dedicated "From" and "To" fields for filtering by expiry dates.
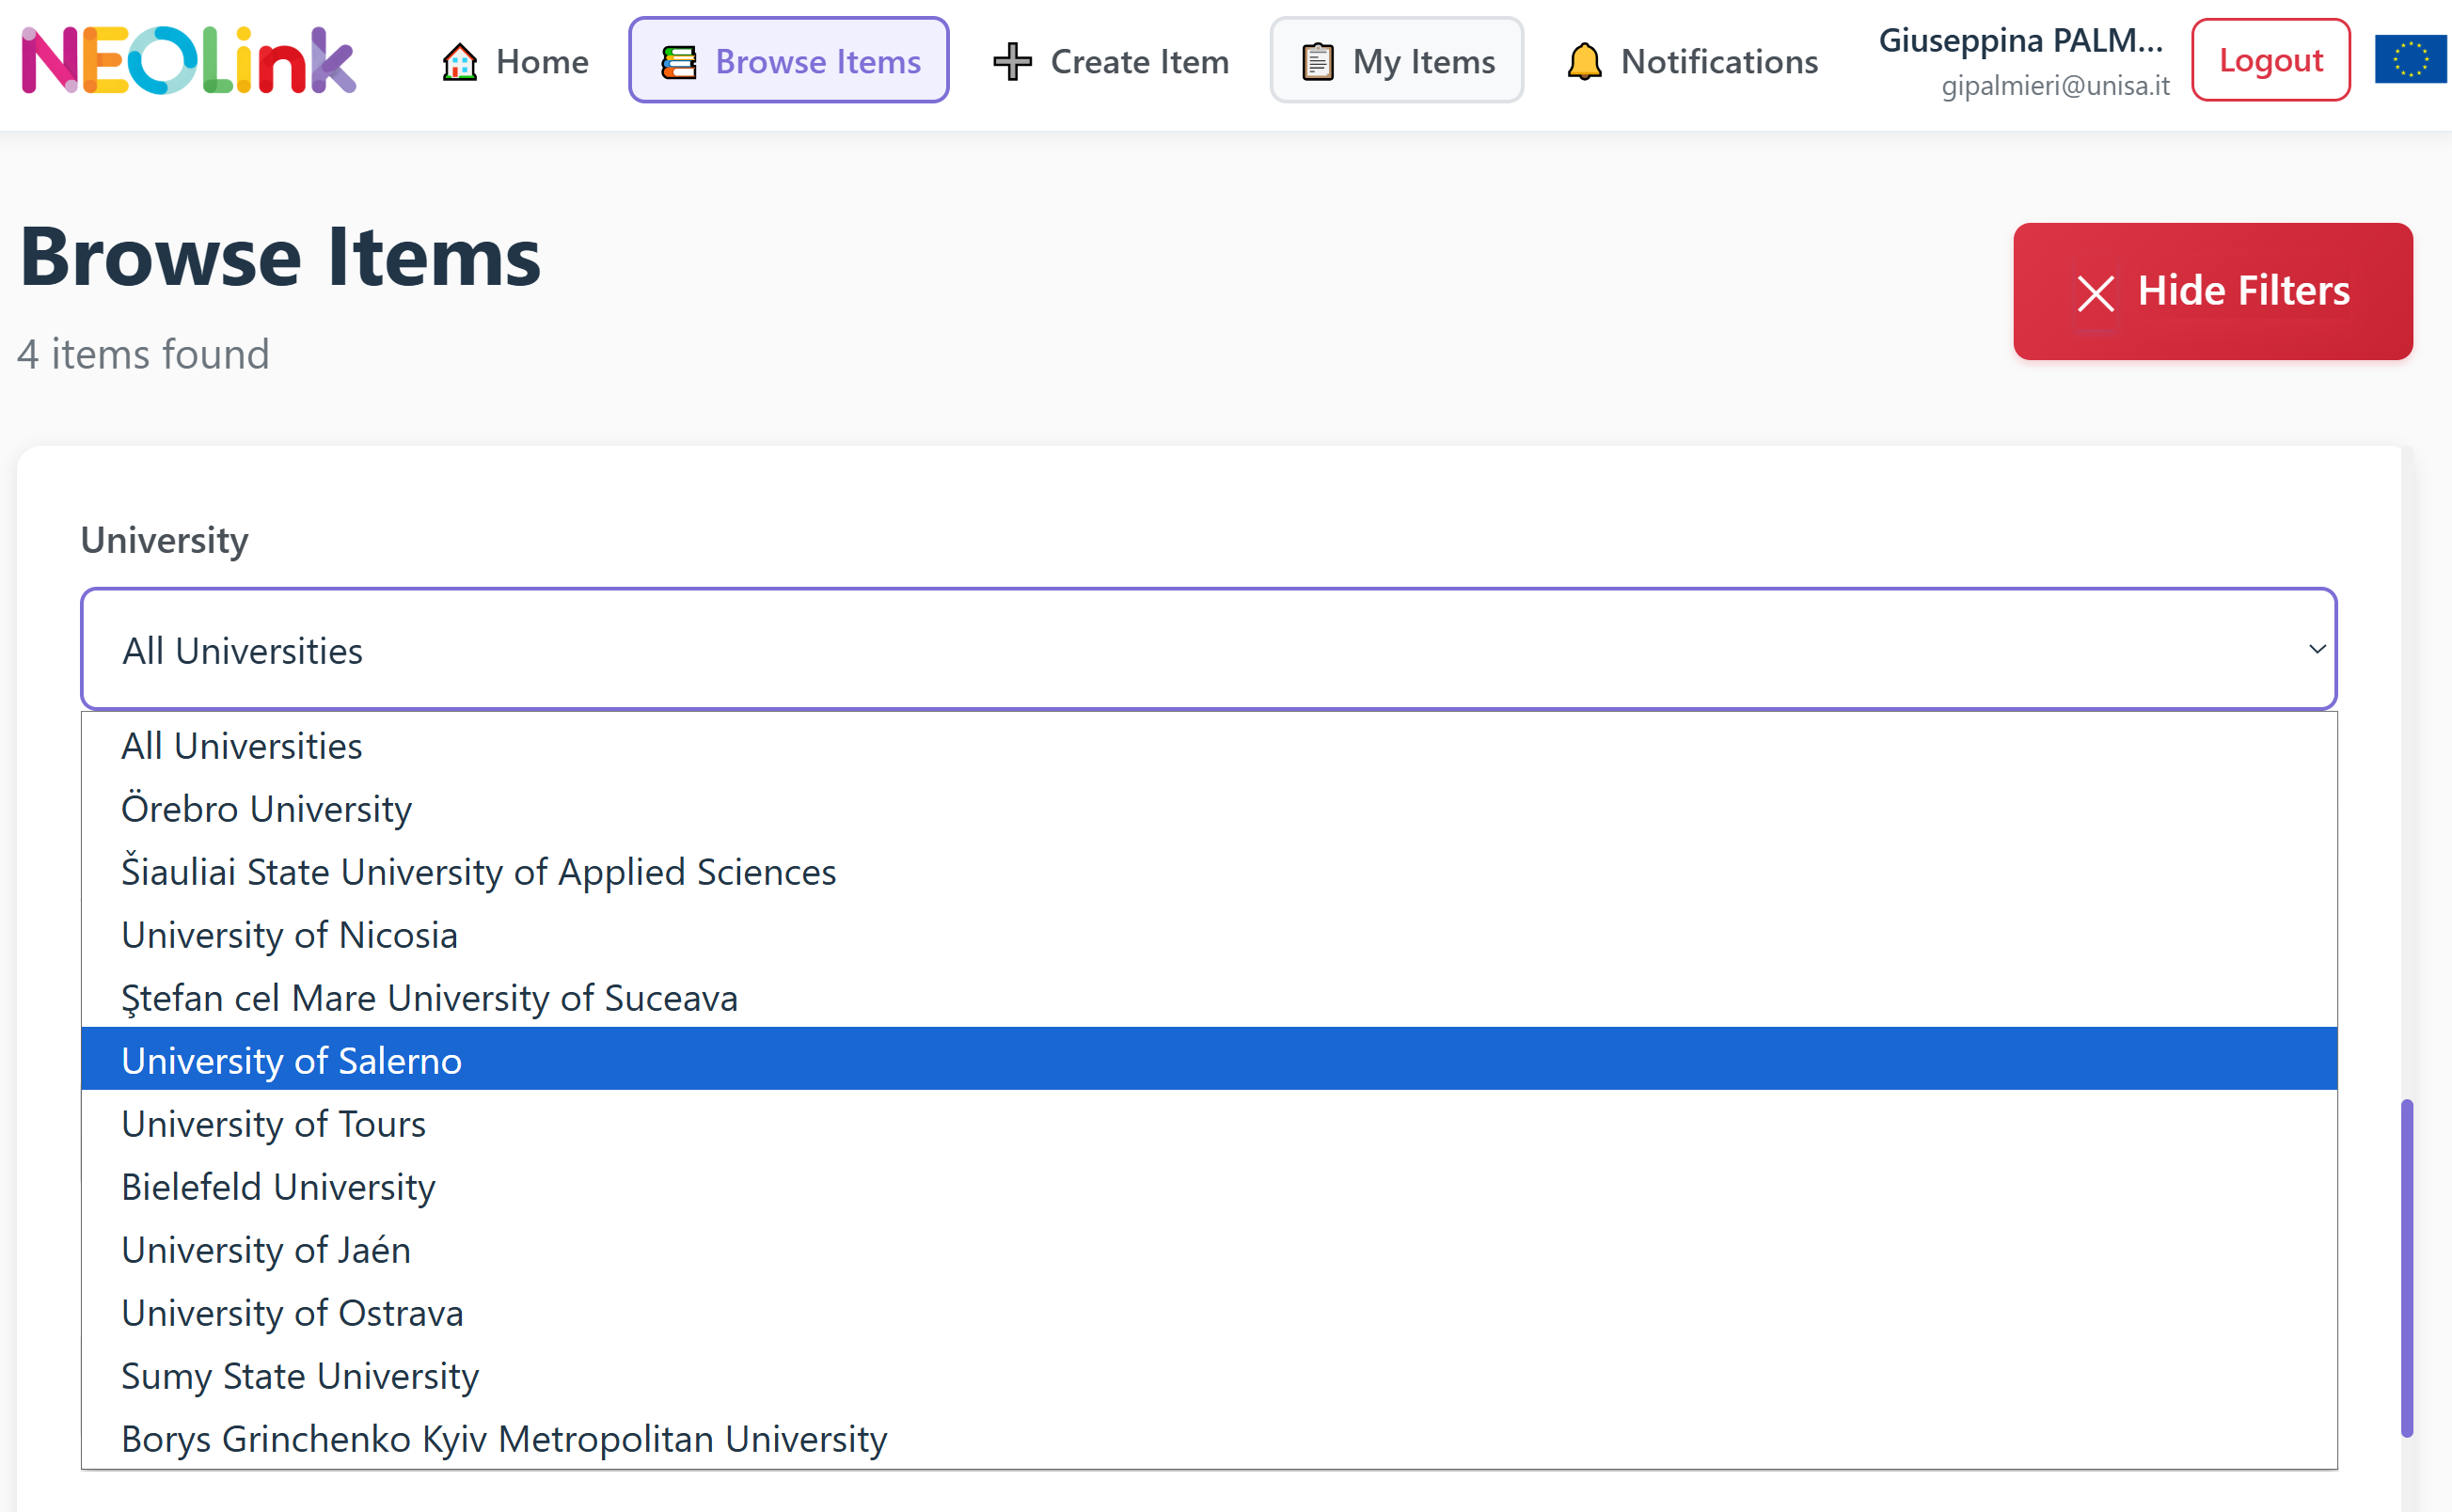
📌Advanced Filtering by University
📌Advanced Filtering by ERC Area
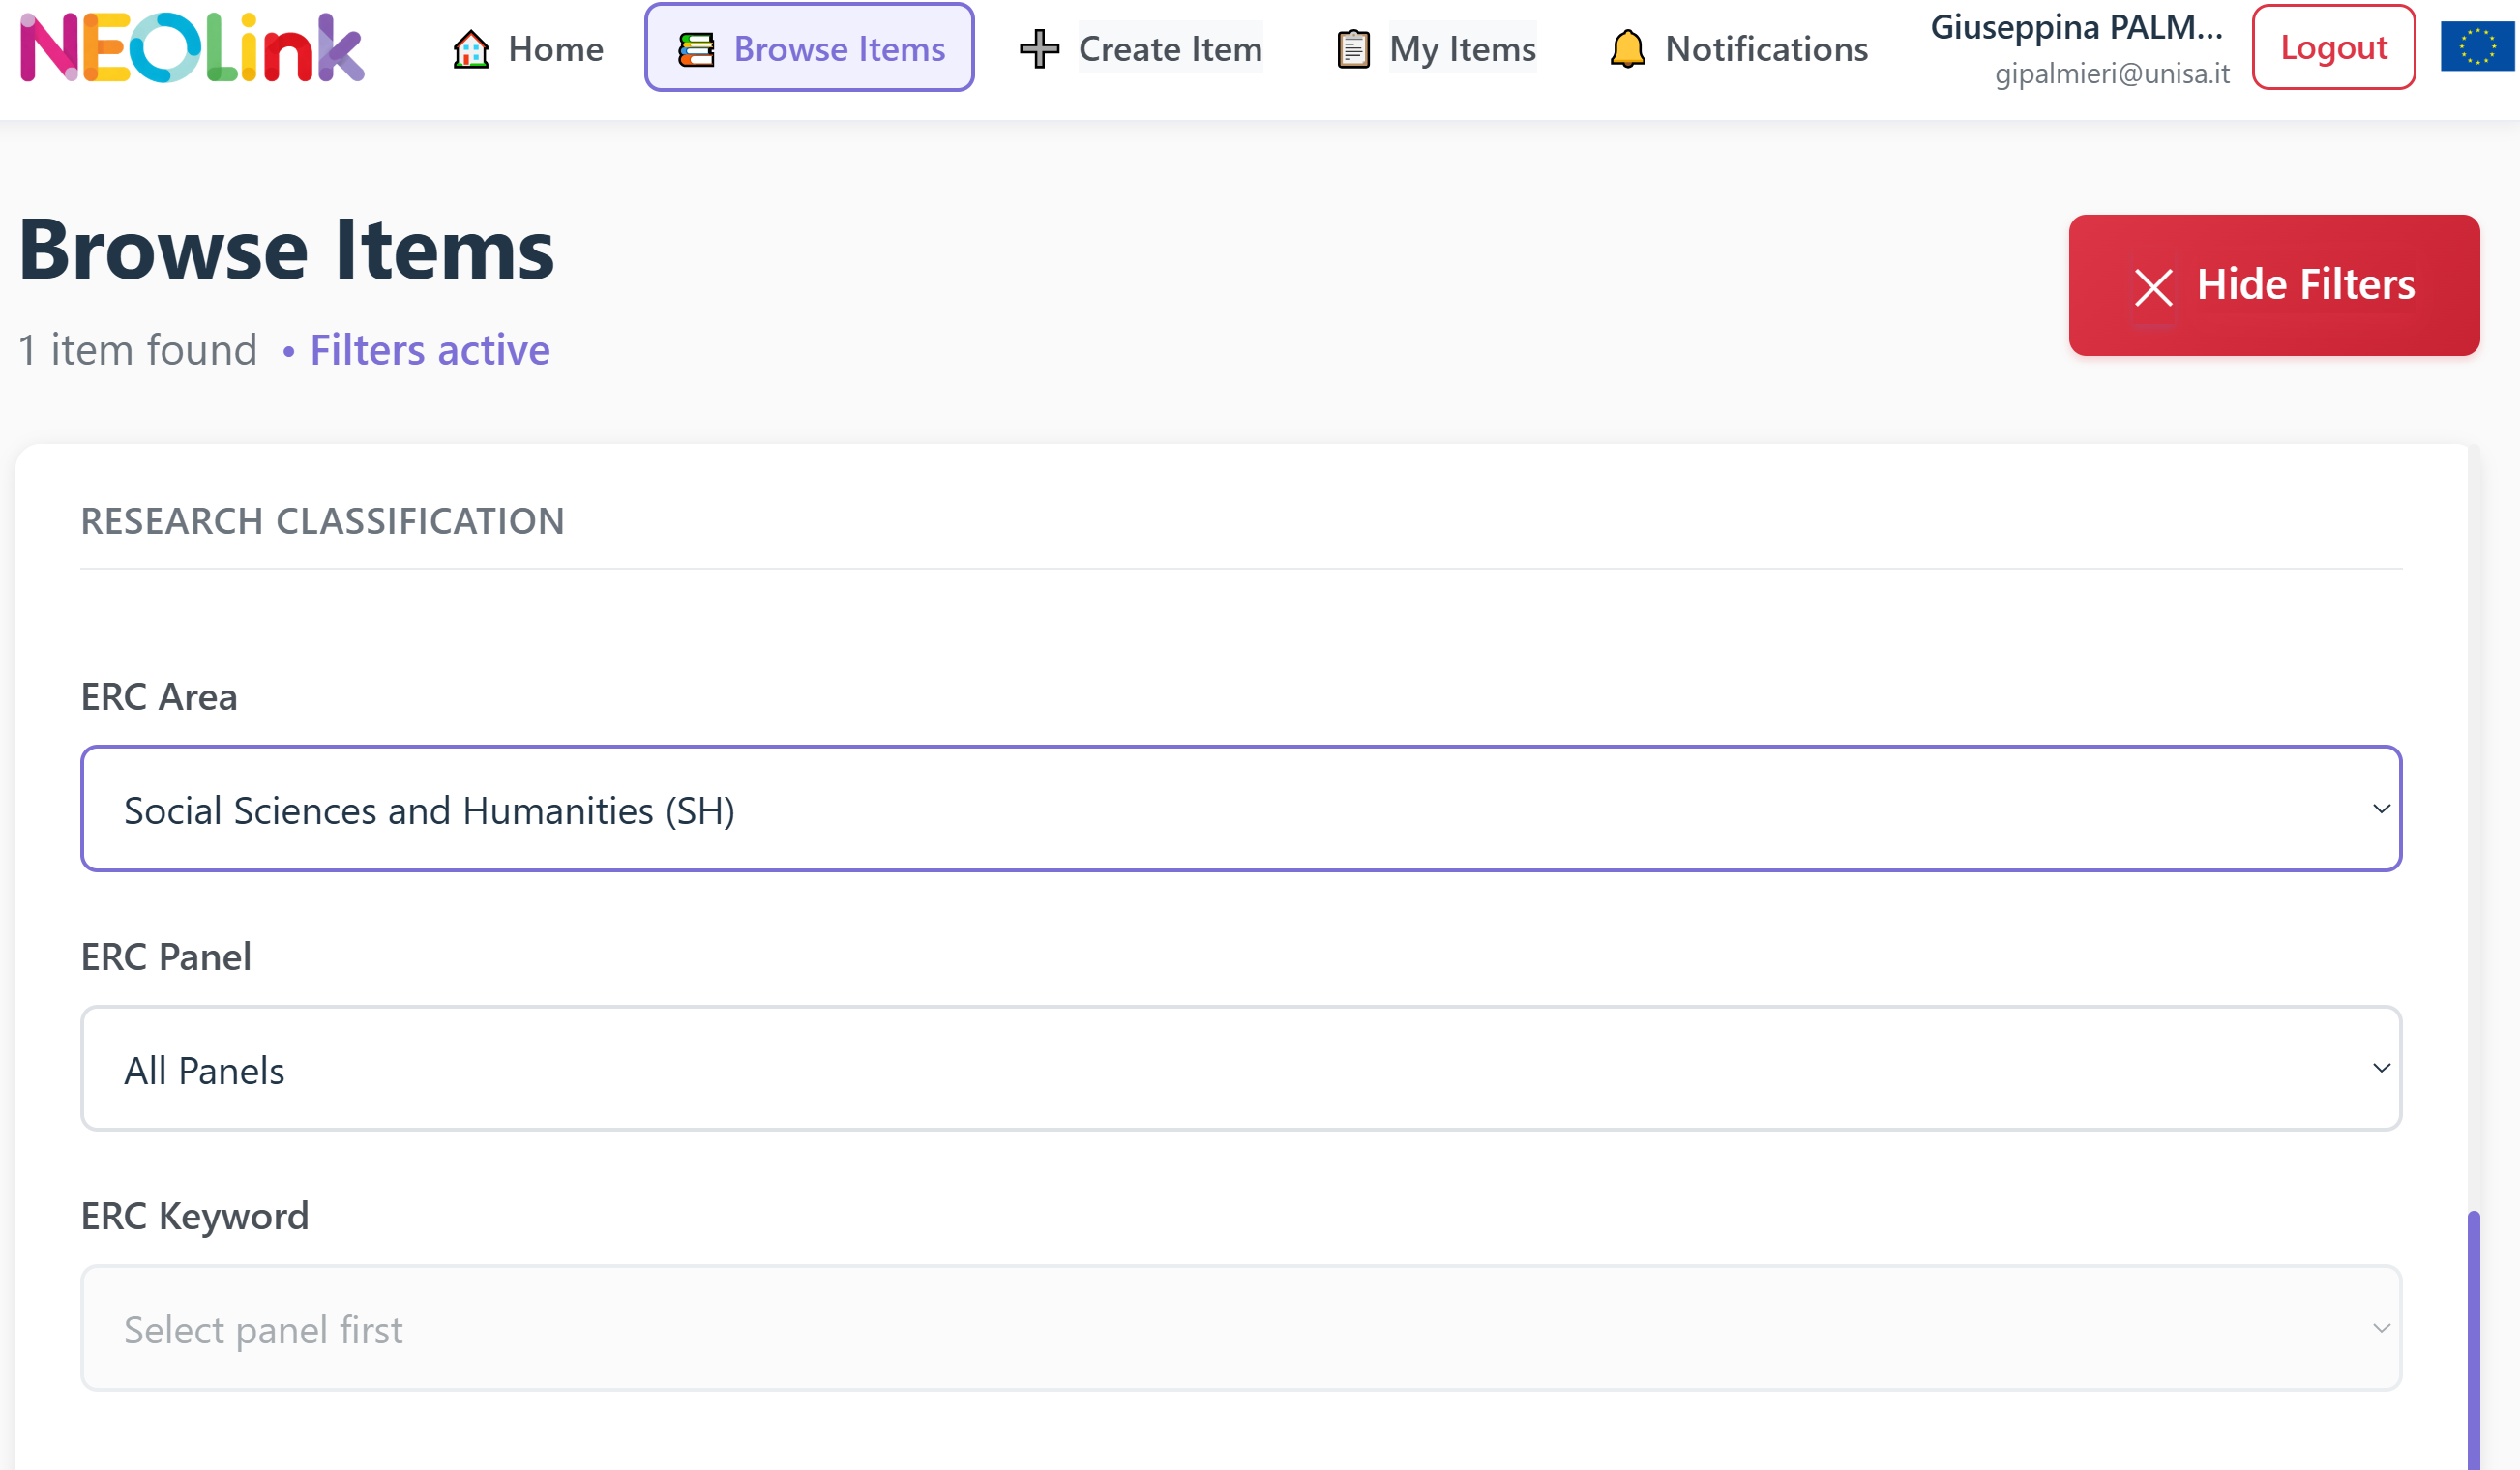
This section of the NEOlink platform provides a research classification filter based on the official ERC (European Research Council) framework.
This section of the NEOlink platform provides a multi‑level research classification filter based on the ERC (European Research Council) taxonomy.
The user has selected the ERC Area “Social Sciences and Humanities (SH)”, which activates two additional dropdown menus:
- ERC Panel – allows the user to refine the search by choosing one of the specific SH panels (e.g., SH1, SH2, etc.).
- ERC Keyword – becomes available only after a panel is selected, enabling even more detailed filtering based on official ERC descriptors.
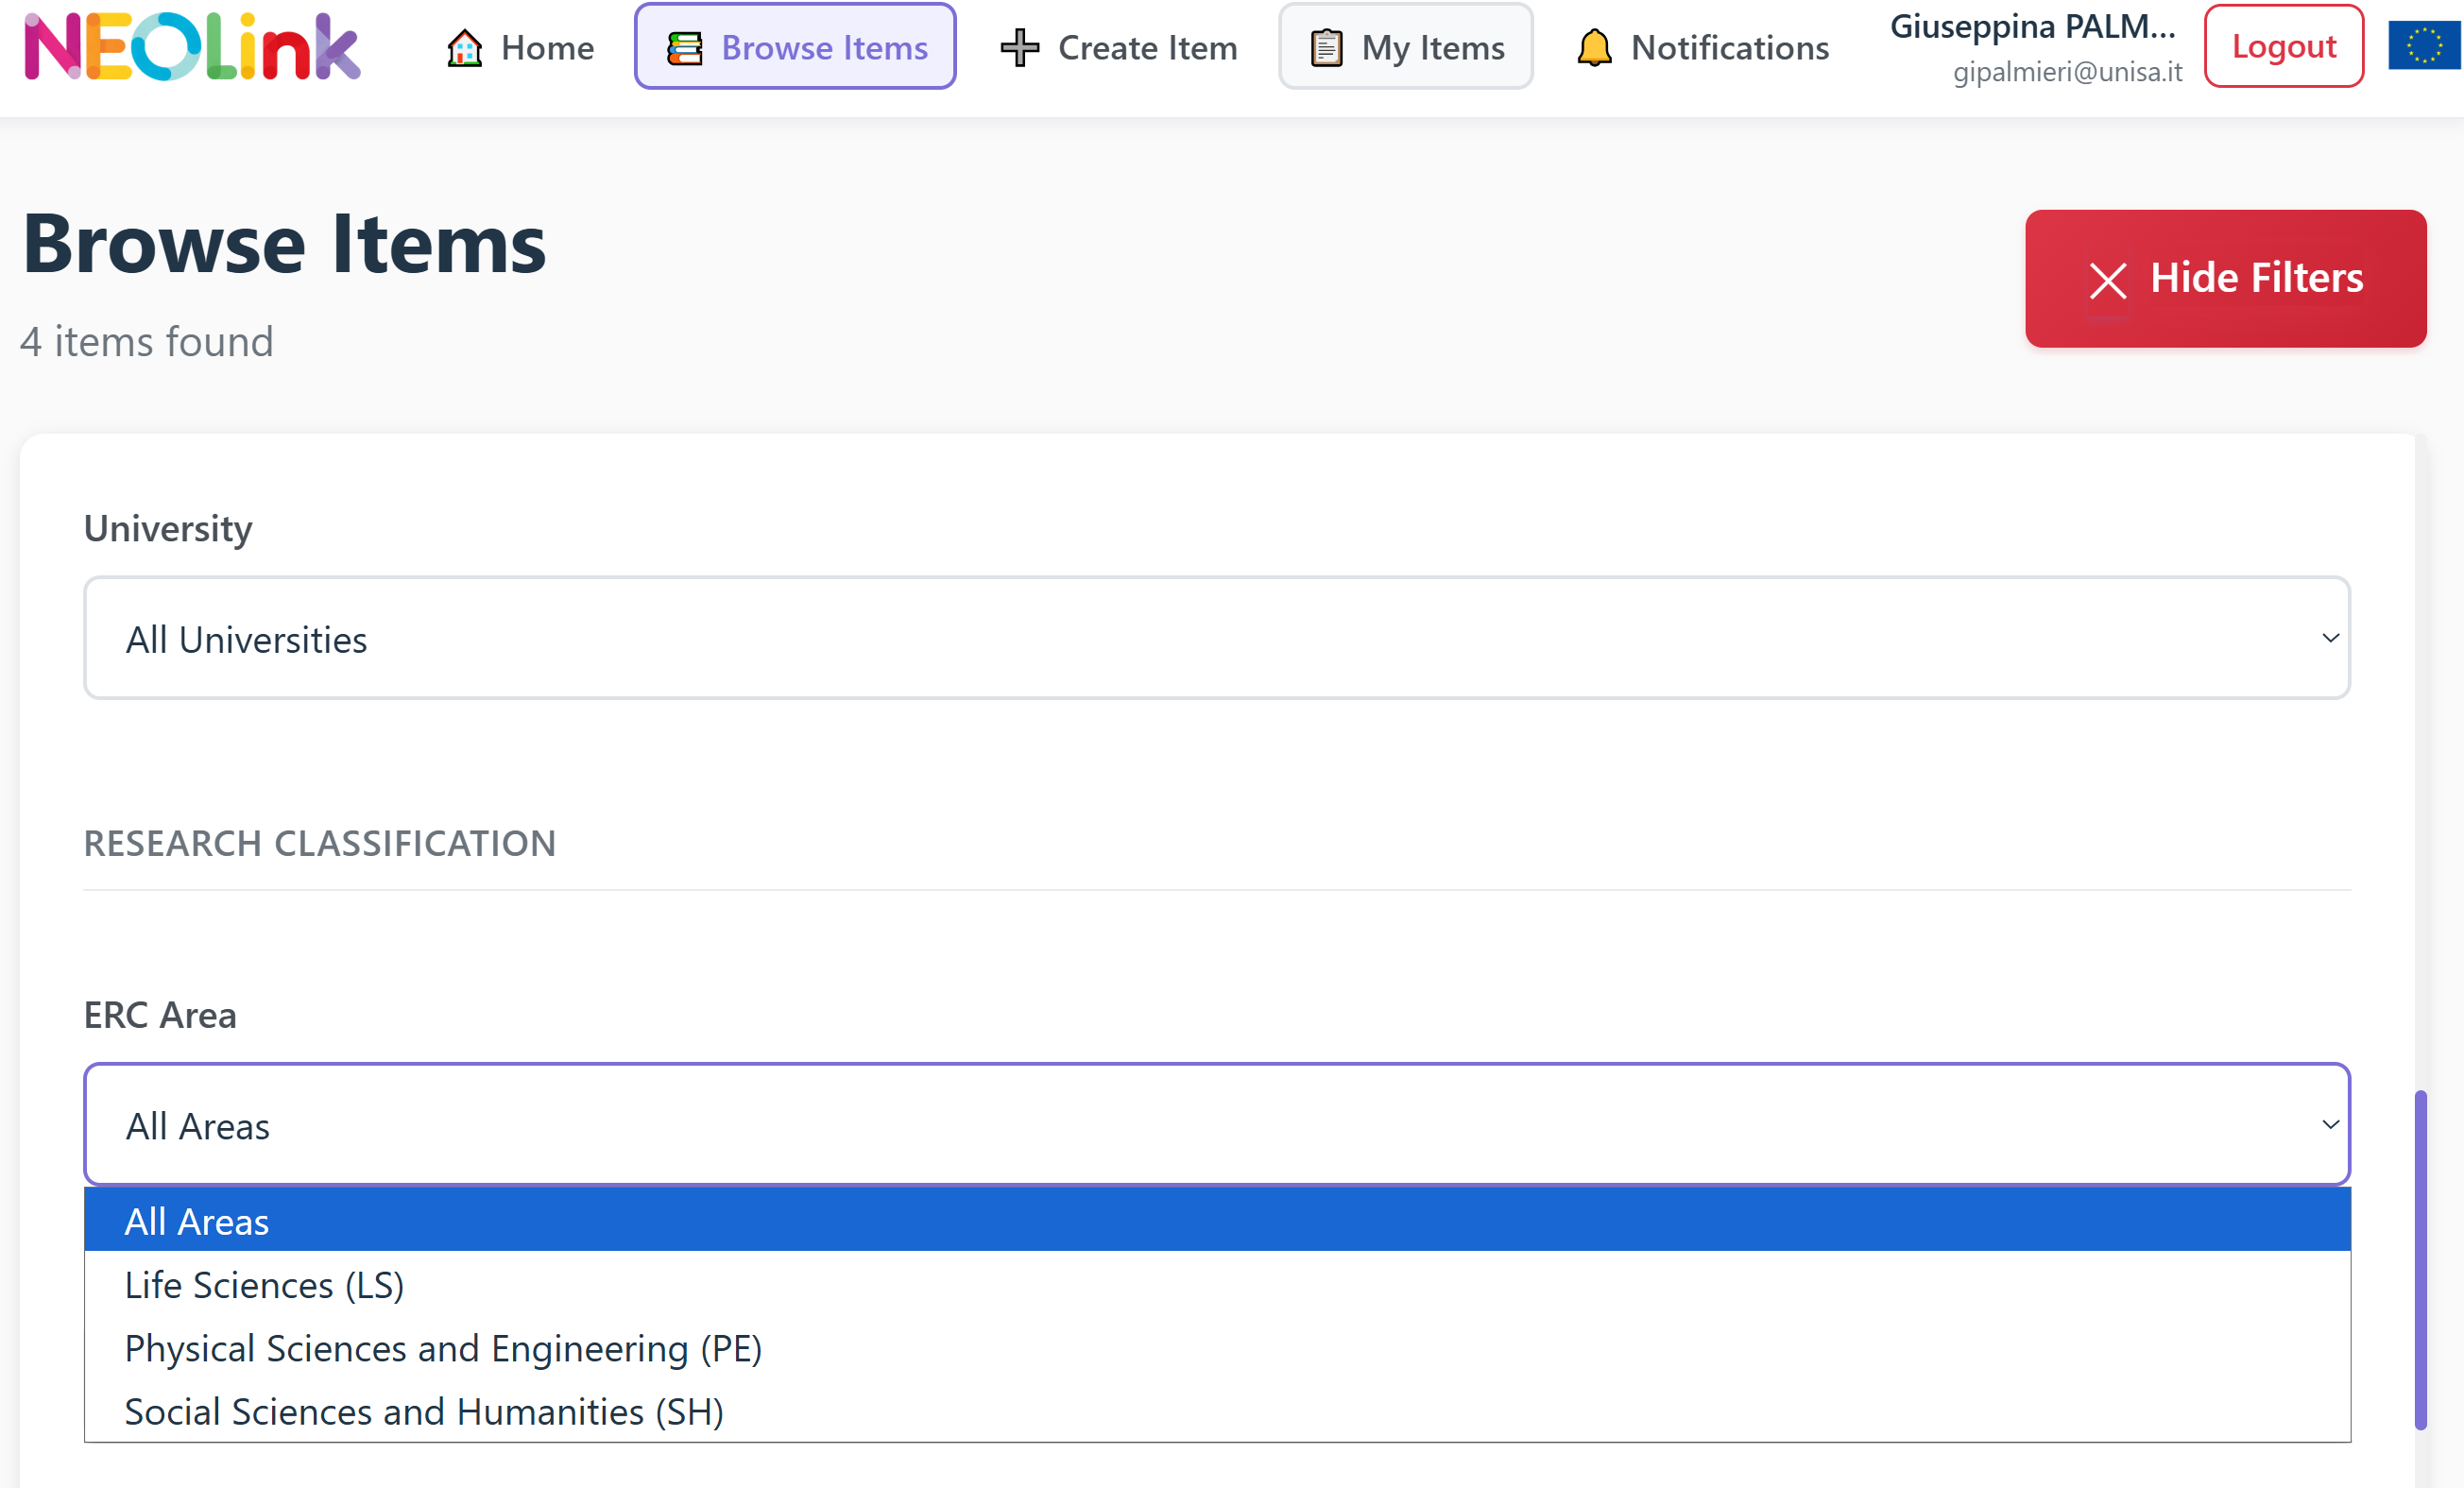
At the top, users can select an ERC Area from a dropdown menu. The available options include:
- All Areas
- Life Sciences (LS)
- Physical Sciences and Engineering (PE)
- Social Sciences and Humanities (SH)
Selecting an ERC Area will determine which ERC Keywords become available in the dropdown below, guiding users to refine their search more precisely.
📌Advanced Filtering by Languages
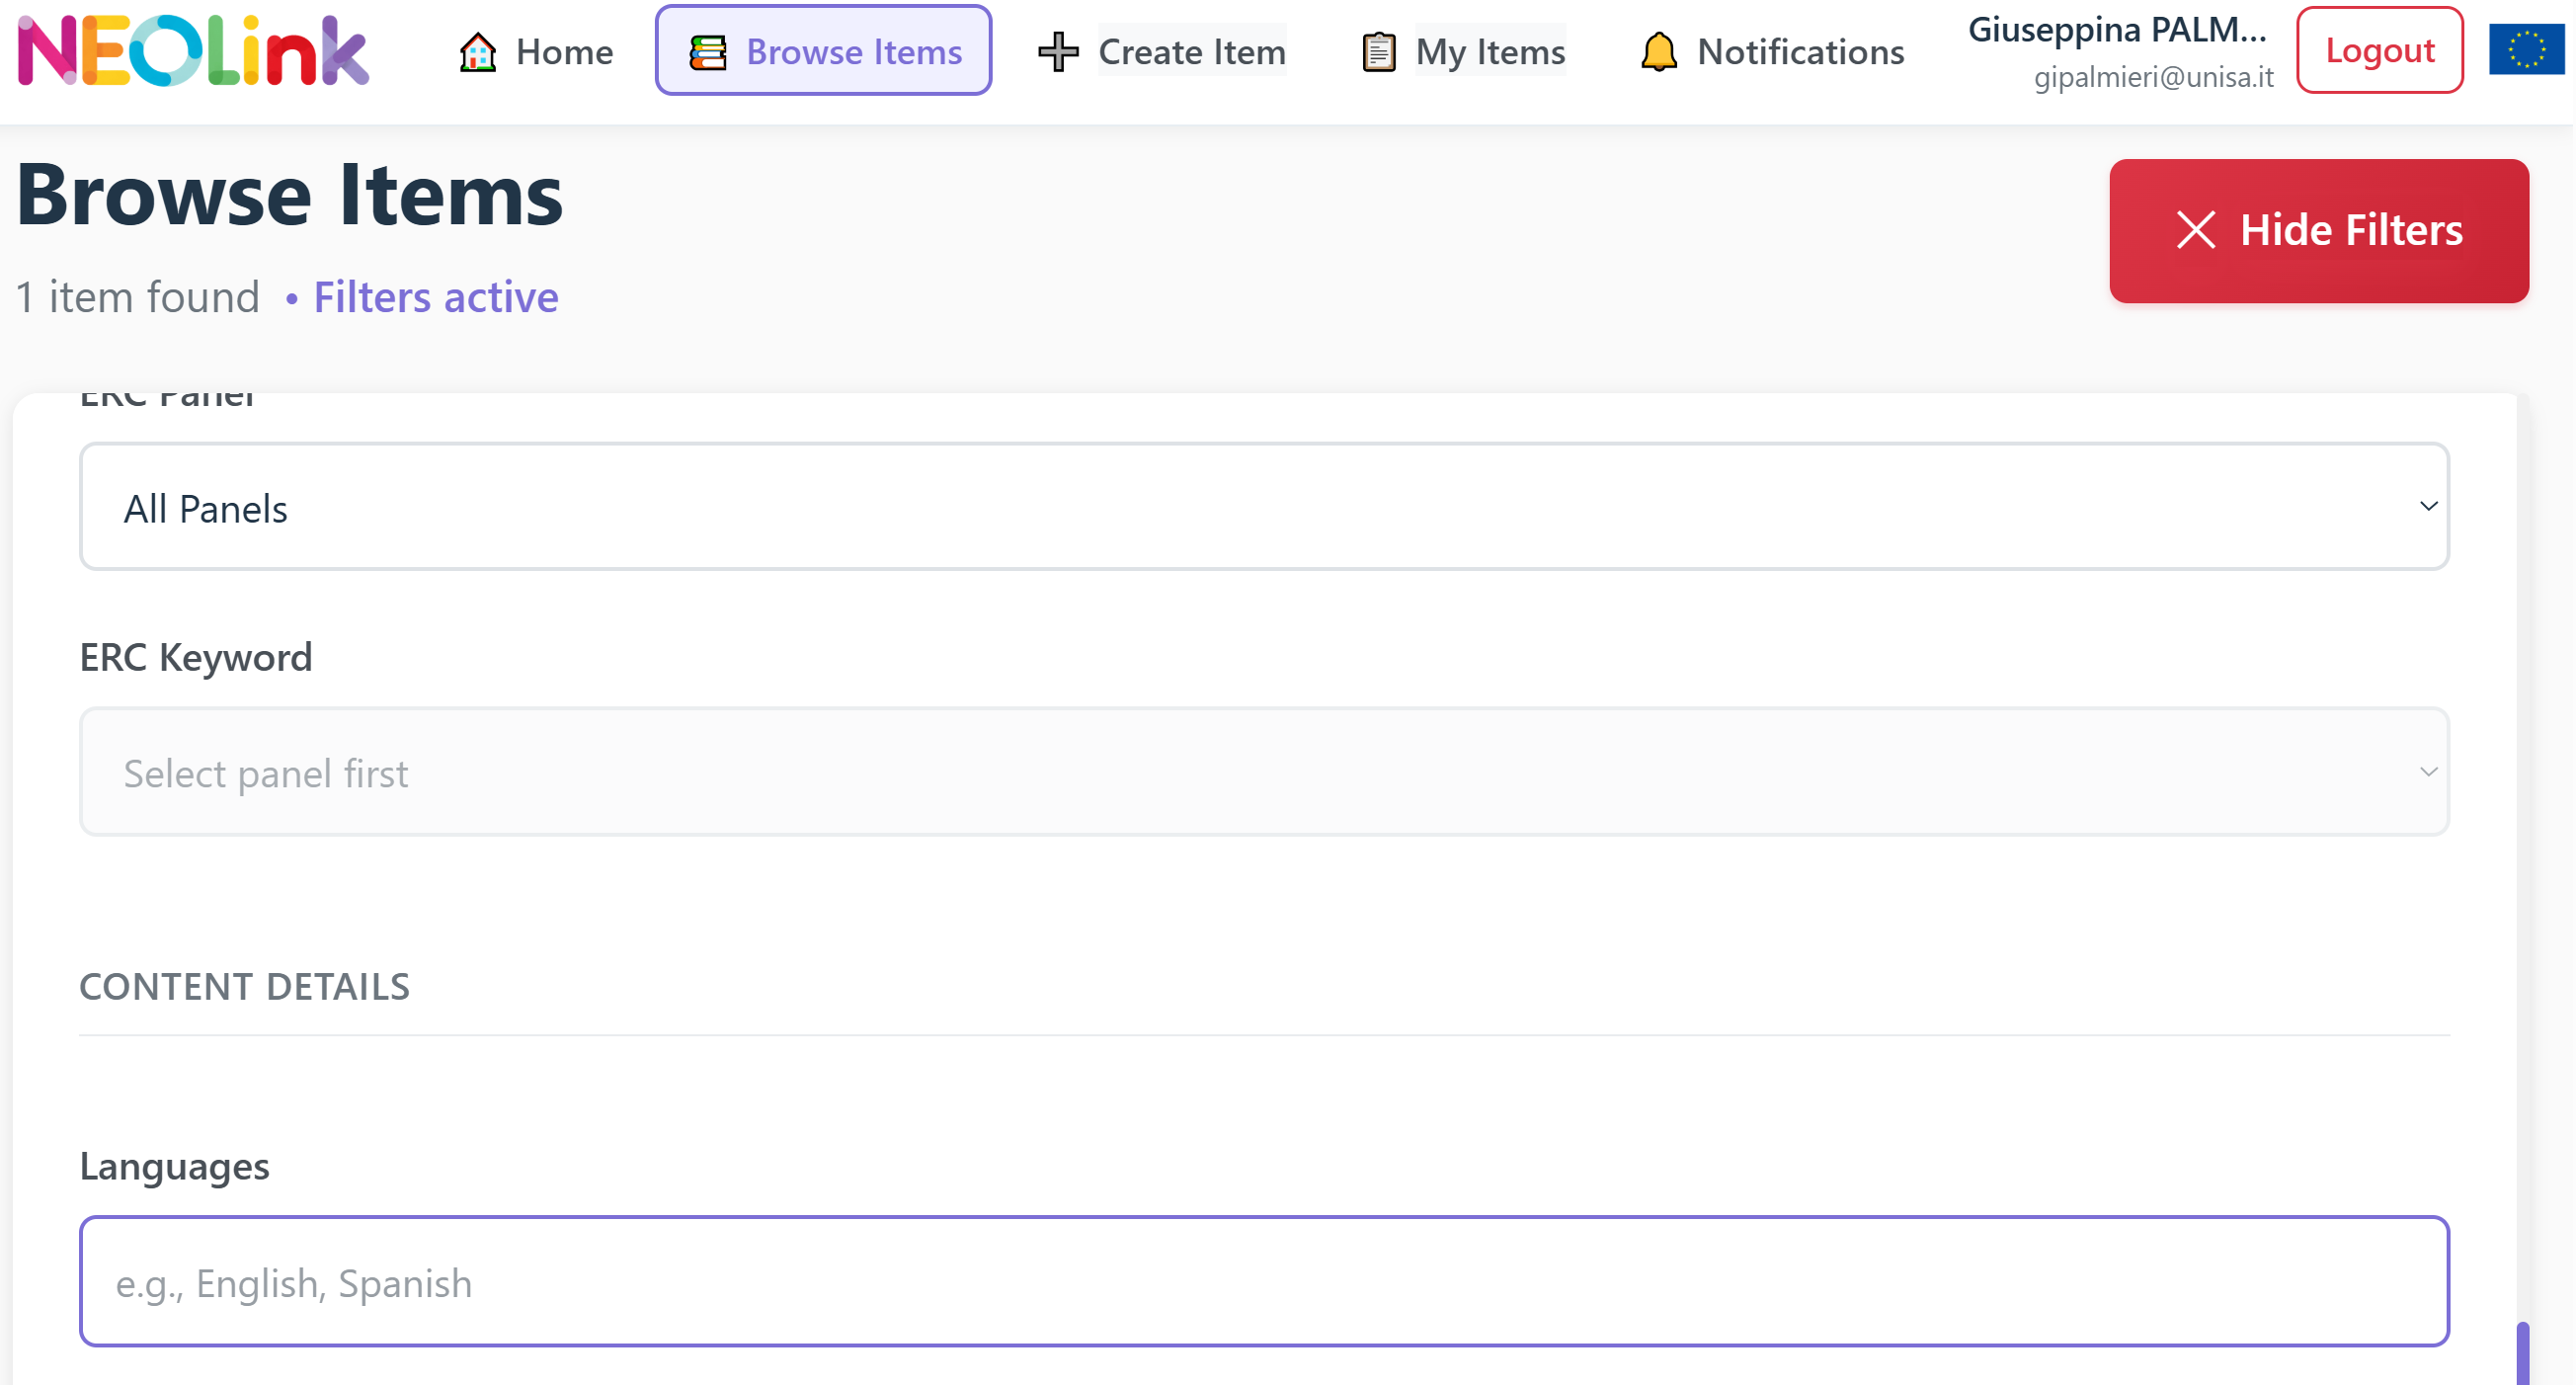
Recent items
All recent items created on NEOLink to join discussions hosted on the VirtualCafè platform.
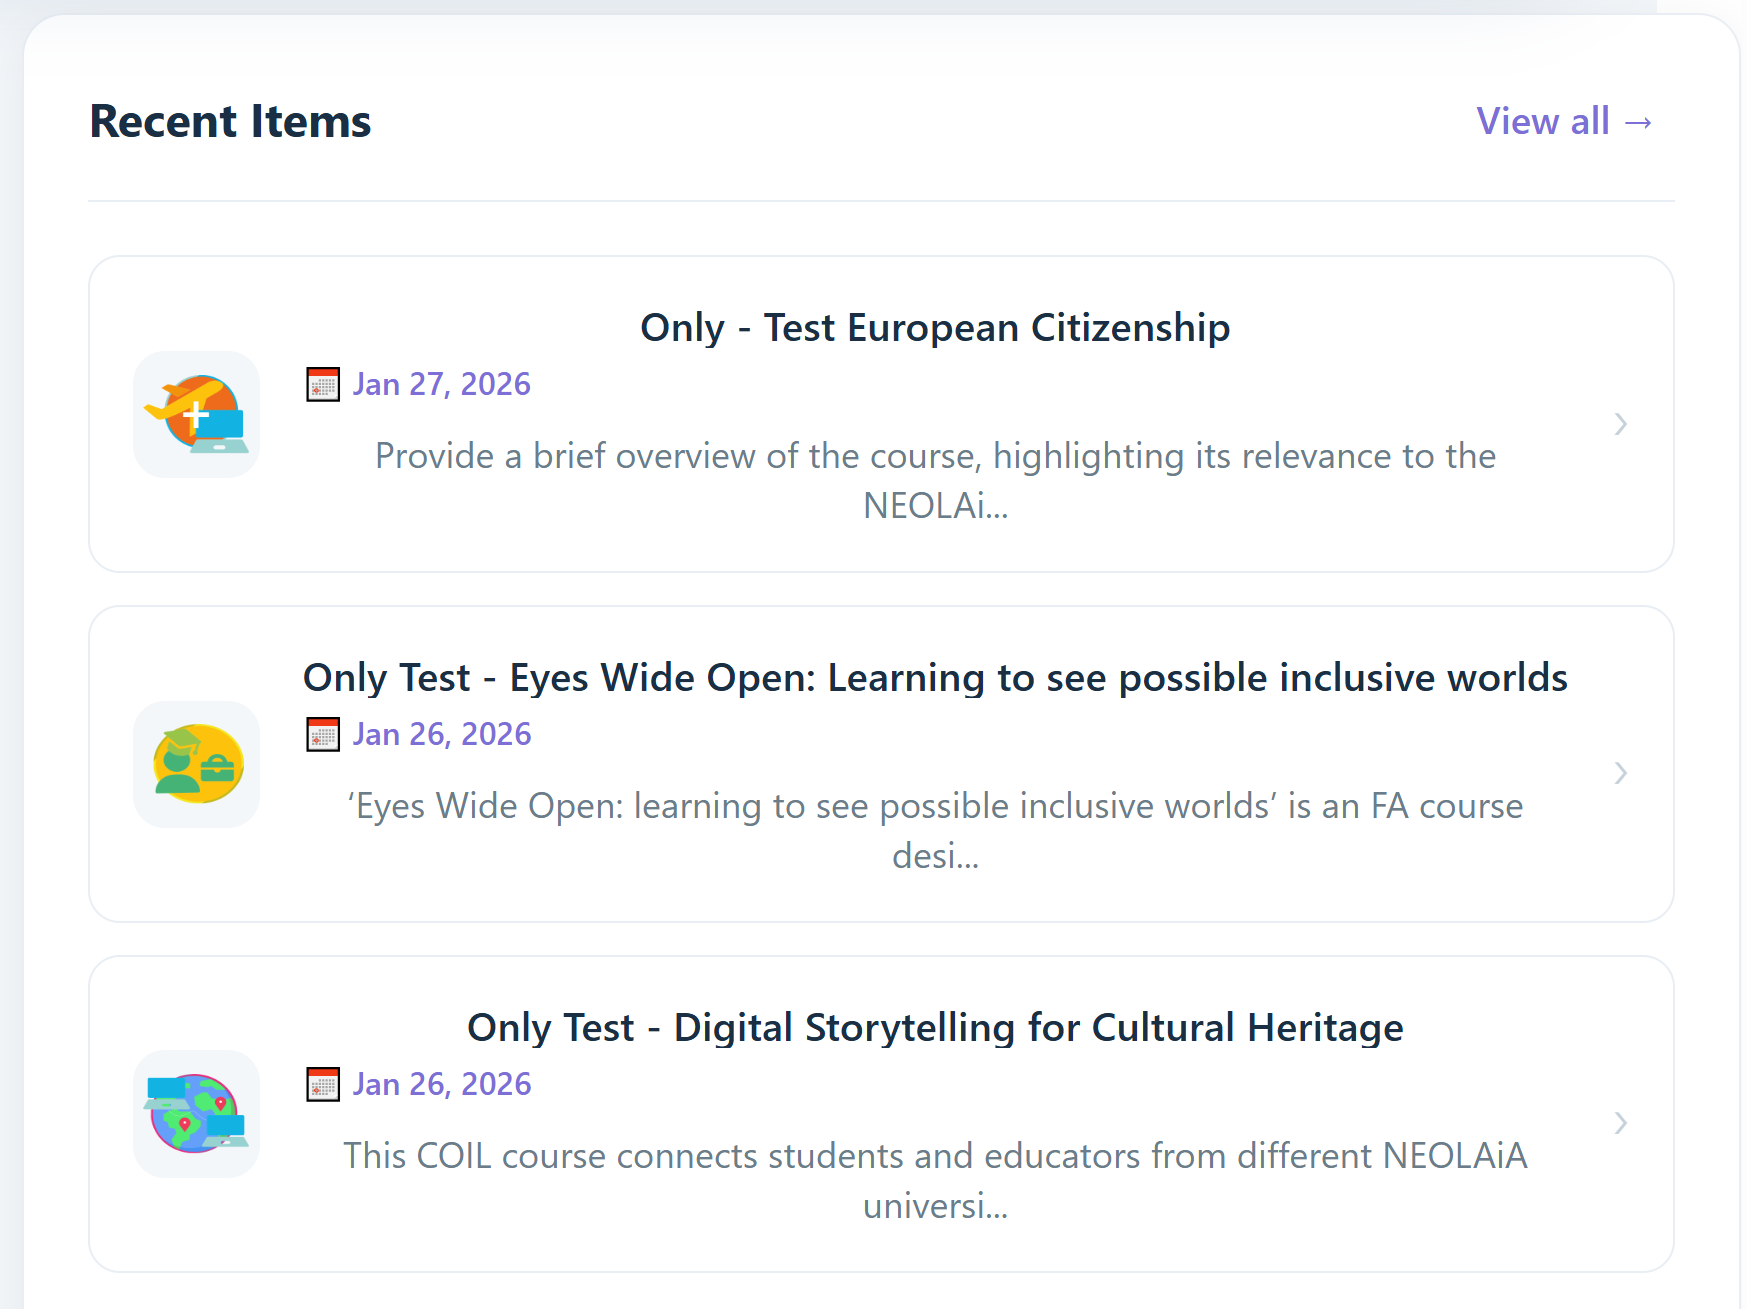
Browse Items
The Browse Items section, in the top navigation bar, allows you to explore all available items on the platform.
Through this feature, you can:
- View your own items, including the events and activities you have created.
- Browse items created by other users, giving you access to all events shared within NEOLink.
- Navigate through event cards that display key details such as title, status, creator, dates, and language.
- Use the Show Filters button to refine your search and quickly find specific items.
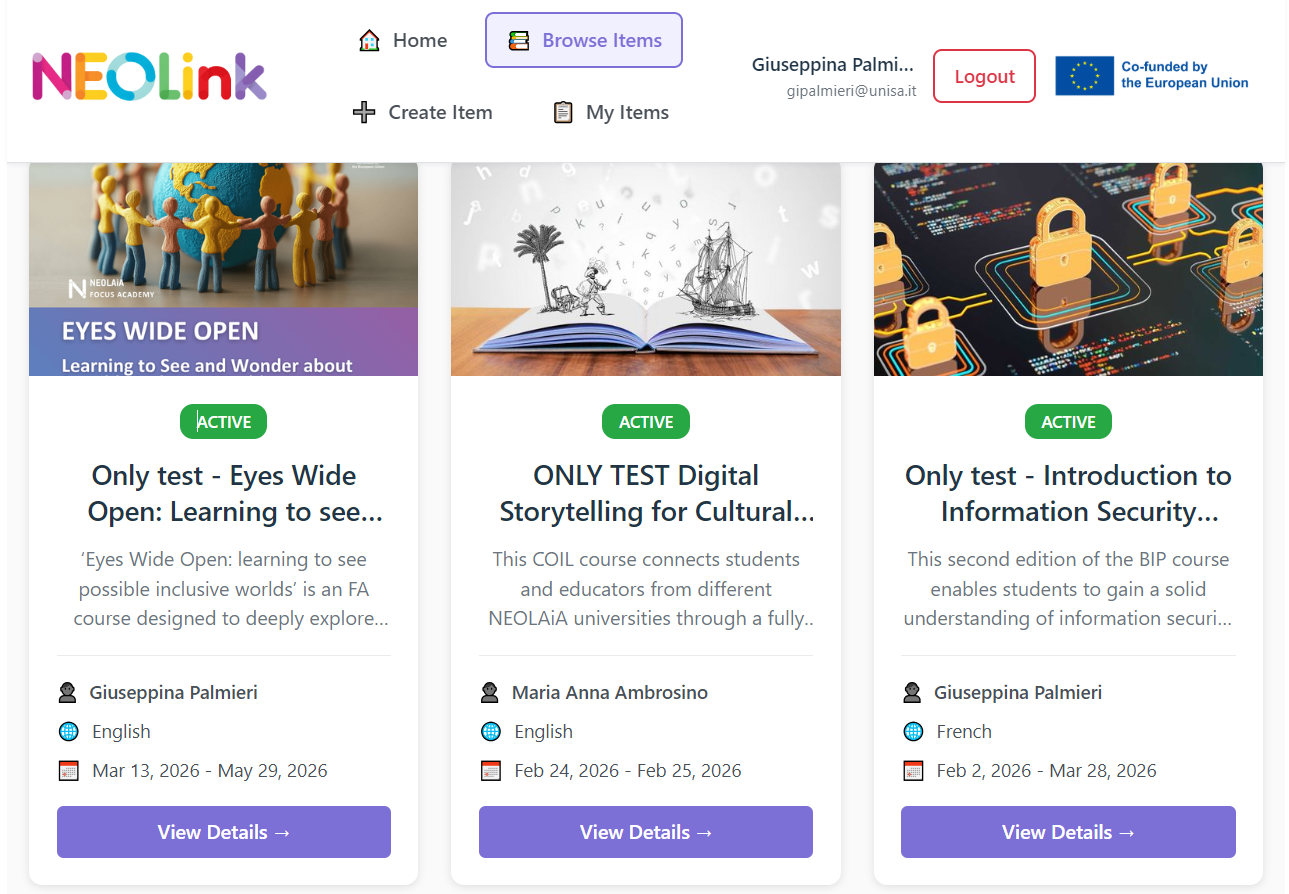
Event Types: Personal vs. Community‑Created
Personal events
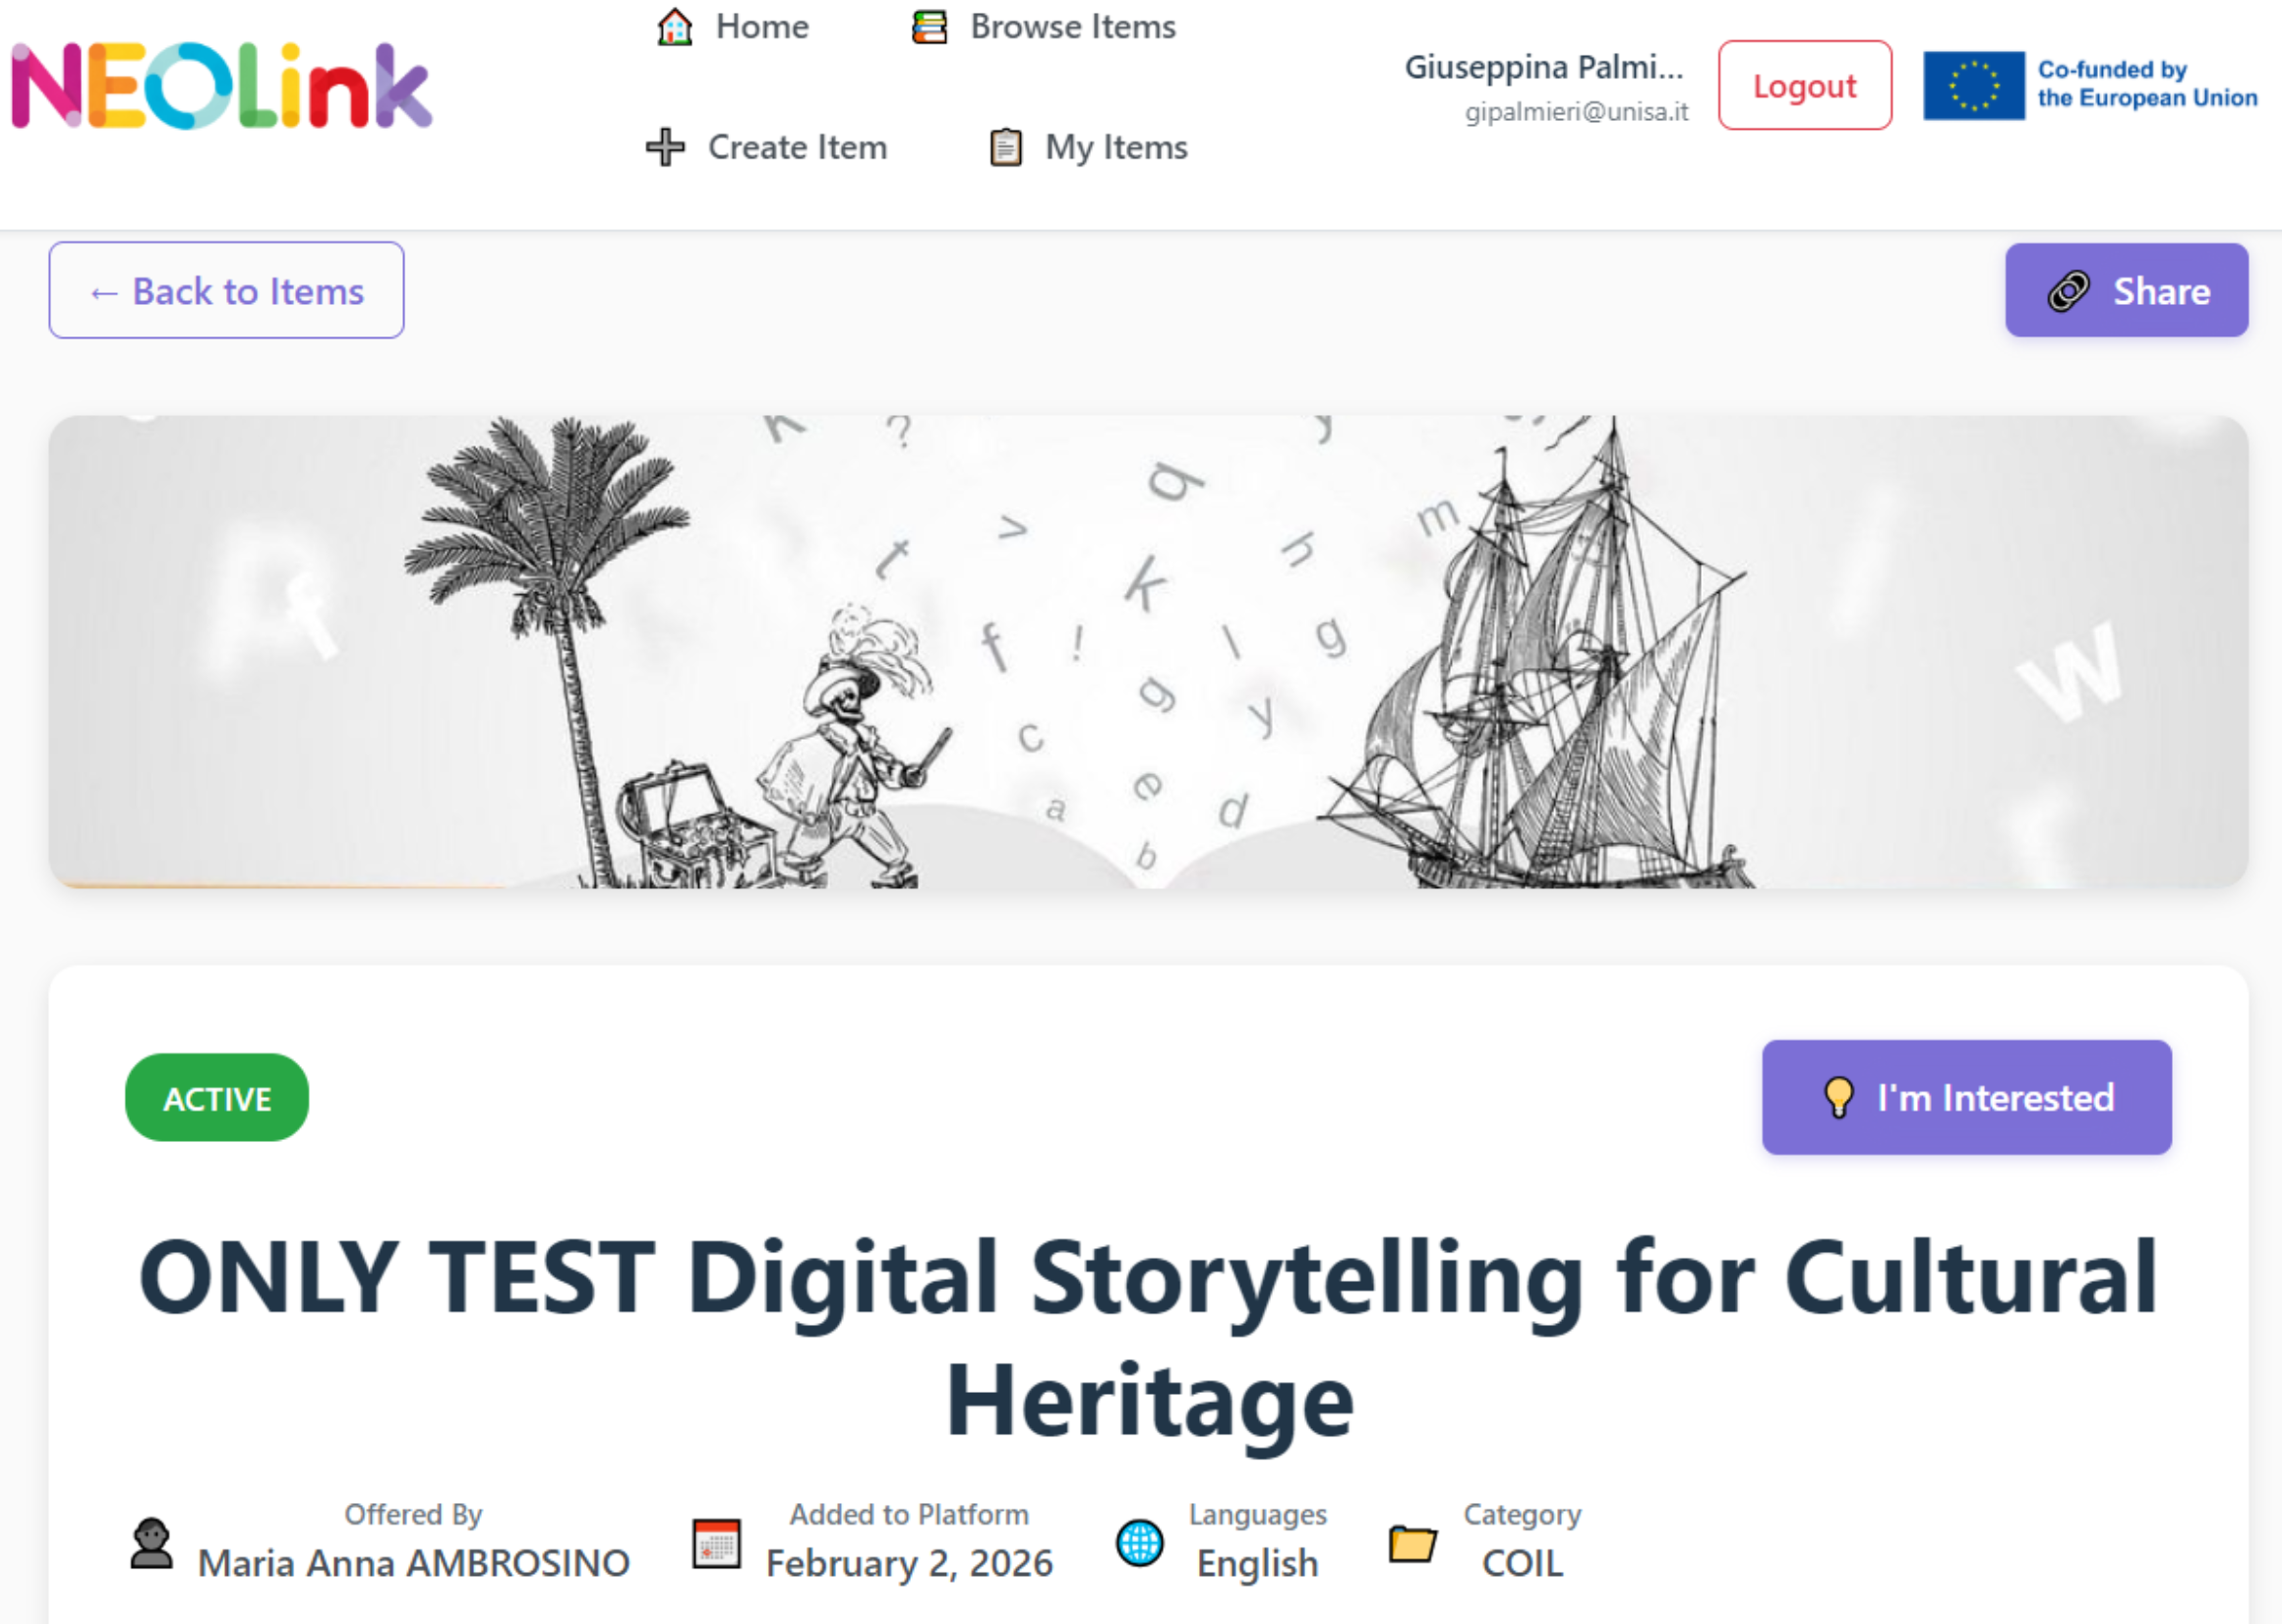
In below screen, the user is viewing the details of an item within the NEOLink platform. At the top, navigation options such as Home, Browse Items, Create Item, and My Items are displayed, together with a Back to Items button.
Below the header image, a dedicated “Virtual Café Discussion” section is prominently shown.
This area highlights that a discussion space is available for the selected item. A short message invites the user to “Join the conversation about this item”.
On the right side of this section, a clear action button labeled “Open Discussion →” allows the user to directly access the related discussion topic in the Virtual Café. This button serves as the gateway to the conversation group where users can read messages, post replies, and interact with others interested in the same event.
The section is visually distinct and designed to guide users smoothly from the event view into the collaborative discussion environment.
Community‑Created: Joinable Events from Other Users
When you open an event created by another user, the interface displays two main action buttons on the right side:
 The Share button allows you to distribute the event easily.
By selecting it, you can share the item either through:
- a QR code, which can be scanned to access the event directly, or
- a copy link option, allowing you to share the event URL through any communication channel.
I’m Interested Button
 In addition to the Share button, events created by other users also include an “I’m Interested” button.
By clicking this button, you can express your interest in the event. This action:
- registers your interest in the activity,
- adds you to the dedicated discussion group for the event inside the Virtual Café platform,
- and may trigger a notification informing the event creator of your participation.
This feature ensures that participants can easily join collaborative conversations and stay connected to events organized by other members of the NEOLink community.
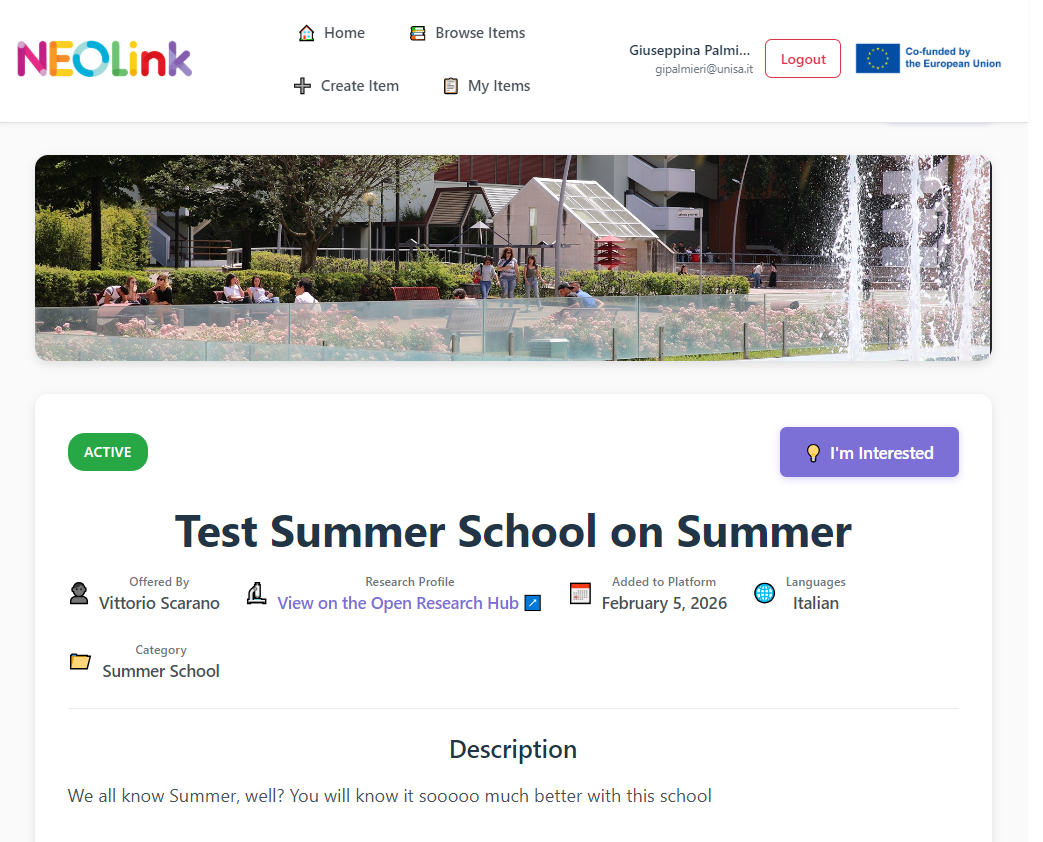
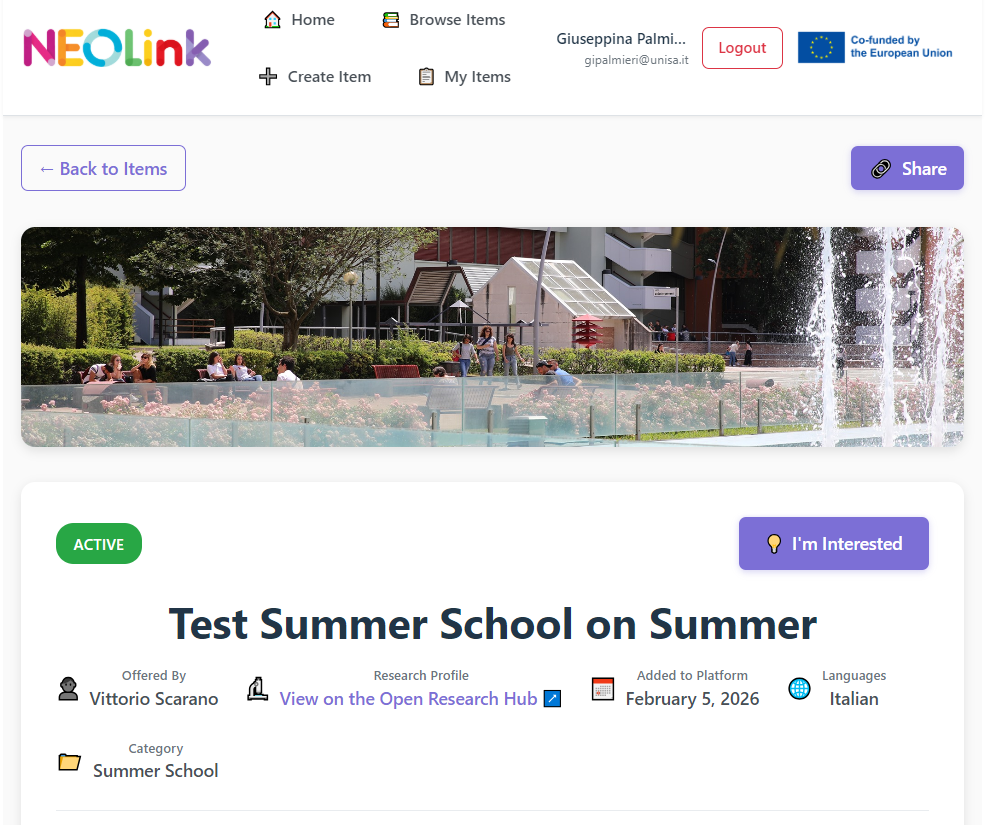
Publisher Research Profile Visibility
The screenshot demonstrates that:
- When the publisher HAS an OpenResearchHub profile →
✅ the “Research Profile” row appears with a blue link: “View on the Open Research Hub” - When the publisher DOES NOT HAVE a profile →
❌ No row is shown.
Notifications
Dual Notification Flow: Users and Event Creators
On one side, users can define notification criteria based on the characteristics of events they are interested in.
By selecting specific filters (such as category, location, or date), users can choose to receive notifications when a matching event is created. These notifications can be delivered on the platform, via email.
On the other side, event creators can choose to be notified when interest is shown in their event. Creators can configure how they want to receive these notifications—through the platform or via email—whenever a user marks the event as interesting or follows it. This allows creators to monitor engagement and stay informed about audience interest in real time.
How to Set Up a Notification: in Browse Items - "Notify me" button
 On the "Browse Items" page, by clicking the "Show Filter" button, users can select which notifications they wish to receive using the Filters section and confirm their request by clicking the
 "Notify me" button in the top-right corner .

After defining the notification details, this feature allows users to create an alert based on the currently active filters.
A popup window displays:
- The alert name, automatically generated from the selected filters (with the option to edit it).
- An email notification option, which can be enabled to receive an email whenever a matching item is published.

When a match is found, a red badge will appear over the Notifications bell icon in the main navigation bar.
Modifying Search: To change the criteria of your alert, simply adjust the filters and click Notify me again to update your preferences.
Clearing Filters: Use the Clear All button to reset your search parameters at any time.

The event matching the specified criteria will be displayed at the bottom of the page.

Notification Settings During Event Creation

Notifications page
 The Notifications page displays the list of all notifications related to the requested events.

 In the section

An example of notifications
Define the data required to trigger and deliver notifications when new items match the user’s selected filters (see attached image).

Finally, click the "Notify me" button and and this window appears that allows the user to save the current search filters and receive notifications when new matching items are published. The user can assign a name to the alert, choose to be notified by email, and review the active filters applied to the search. Finally, the alert can be saved or cancelled using the corresponding buttons.


In NEOLink, a new notification is available


Focus Academy
Description
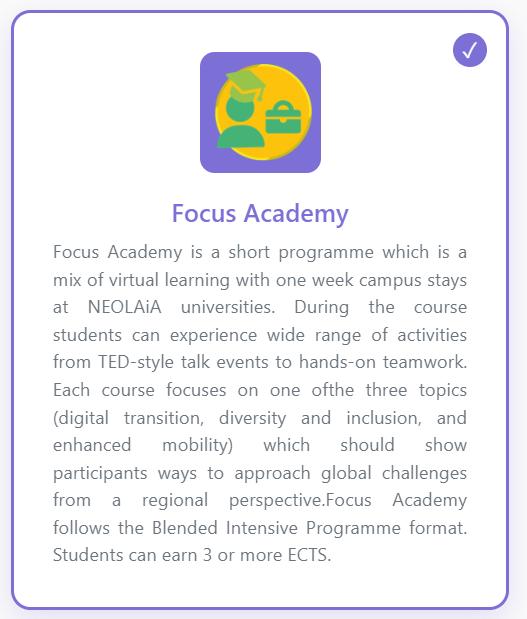
Focus Academy is a short programme which is a mix of virtual learning with one week campus stays at NEOLAiA universities. During the course students can experience wide range of activities from TED-style talk events to hands-on teamwork. Each course focuses on one of the three topics (digital transition, diversity and inclusion, and enhanced mobility) which should show participants ways to approach global challenges from a regional perspective. Focus Academy follows the Blended Intensive Programme format. Students can earn 3 or more ECTS.
Basic Info
The page allows the user to enter all required information associated with the Focus Academy programme.
General Event Description

- Focus Academy Status *
- Focus Academy Name *
A text input field where the user must enter the name of the Focus Academy item.
This field is required.
- Inserted By*
This field is automatically pre-filled with the user’s name from their profile.
It cannot be edited and includes a note: “Pre-filled from your profile (cannot be edited).”
- Focus Academy Description
Below the initial fields, there is a large text box labeled “Enter item description.”
Here, the user can provide a detailed description of the item, including objectives, context, or any information needed to present the item clearly within the platform.

Event Duration
- Start Date*
- End Date*
- Expiration Date*

Academic information
The form provides three cascading dropdown menus:
- ISCED Broad Field
The user selects a general academic area (e.g., Education, Arts, Engineering).
Selecting a broad field enables the next dropdown.
-
ISCED Narrow Field
This dropdown becomes active after choosing a broad field and displays more specific subfields.
Selecting a narrow field enables the detailed field selection.
- ISCED Detailed Field
The most specific classification level, filtered based on the previous selections.
- Level of Study
A text field where the user specifies the academic level (e.g., Undergraduate, Graduate, Postgraduate).
- Learning Outcomes
A large text box where the user enters the expected learning outcomes.
- Pedagogical Objectives
This section provides a large text field where the user can enter the pedagogical objectives of the item.

Example: ISCED Broad Field Dropdown Menu
When the user opens the ISCED Broad Field dropdown menu, a list of available broad academic fields is displayed. Each option corresponds to an official ISCED (International Standard Classification of Education) category.
For example, the dropdown includes options such as:
- 00 – Generic programmes and qualifications
- 01 – Education
- 02 – Arts and humanities
- 03 – Social sciences, journalism and information
- 04 – Business, administration and law
- 05 – Natural sciences, mathematics and statistics
- 06 – Information and Communication Technologies (ICTs) (highlighted in the image)
- 07 – Engineering, manufacturing and construction
- 08 – Agriculture, forestry, fisheries and veterinary
- 09 – Health and welfare
- 10 – Services
- 99 – Field unknown
Selecting one of these broad fields (e.g., 06 – Information and Communication Technologies) will automatically filter and activate the ISCED Narrow Field dropdown with related subcategories.

Research Classification
This section allows the user to classify the item according to the ERC (European Research Council) categories. The fields are organized in a cascading structure to ensure accurate filtering and selection.
- ERC Area
- ERC Panel
This dropdown becomes available after choosing an ERC Area.
It displays the specific panels associated with the selected area.
Selecting a panel enables the keyword field.

Content Details
This section allows the user to provide key information about the content of the item, including languages, contributors, and any supporting materials.
- Languages*
A required text field where the user enters the languages in which the item is available.
- Speakers
A text field for listing the names of the speakers, presenters, or contributors involved in the activity or course.
- Multimedia Material Provided
A large text box where the user can describe any multimedia resources included in the item, such as videos, podcasts, slides, images, or digital documents.
This section ensures that users supply all relevant content-related details to provide a complete overview of the item.
The “Languages *” field is a multi-select dropdown (as indicated by the placeholder text “Select one or more languages”), which means you can choose multiple options rather than being limited to just one. This is useful if your event is multilingual or accommodates speakers and attendees from different language backgrounds.

Institutional Information
This section allows the user to specify the institutional details associated with the item. The fields follow a hierarchical structure to ensure consistent and accurate classification.
- University*
- First Level Structure*
A dependent dropdown that becomes active only after a university is selected.
This field may represent major organizational units such as departments, faculties, or schools.
- Second Level Structure*
Another dependent dropdown that becomes available after selecting the first-level structure.
It may include sub-units such as research groups, labs, divisions, or programs.
The label indicates: “Select first level structure to enable.”

Example: University Dropdown Menu
In the Institutional Information section, the user selects their institution from a dropdown list labeled University*.
When the dropdown is opened, it displays a list of available partner universities and institutions.

Cover Image Upload
At the end of the form, the user is asked to upload a Cover Image for the item.
This image will visually represent the item in listings and previews.
Cover Image
- The user clicks “Choose File” to browse and upload an image from their device.
Notification preferences
The item creation process concludes with the selection of notification preferences, allowing you to choose whether to receive a platform notification or an email when someone shows interest in the item.

Summary & Confirmation
Before the item/event is created, a summary of the created event is displayed, allowing the user to review the information before confirming the creation.

Below is a preview of the notification on the platform.

The 'Notification Hub' page displays your chosen notifications.
By selecting the "Notifications icon" from the menu, you will be directed to the Notification Hub.

Below is a screenshot of the email notification, which includes a direct link to the created Neolink event.

Virtual Cafè Setting
Now you are on a dedicated page for the Virtual Café after completing the basic info page related to the selected category

Learning outcomes and Pedagogical Objectives
 ISCED Classification

Join the NEOLink Event Discussion in the Virtual Cafè
Join the Virtual Café
When an NEOLink event is created, the system automatically displays a ☕ (coffee cup) icon on the upper‑right corner of the event tile.
This icon allows users to directly access the Virtual Café space associated with the event. By clicking the coffee cup, participants can immediately join the dedicated Virtual Café room for informal discussions, networking, or follow‑up conversations related to the event.
Accessing the Virtual Café from NEOLink
- Clicking the ☕ coffee cup icon allows users to quickly access the Virtual Café linked to the event.
- If the user is not logged in, the system automatically redirects them to the Virtual Café authentication page.
- If the user is already logged in, the icon takes them directly to the discussion thread created for the event in Virtual Café.
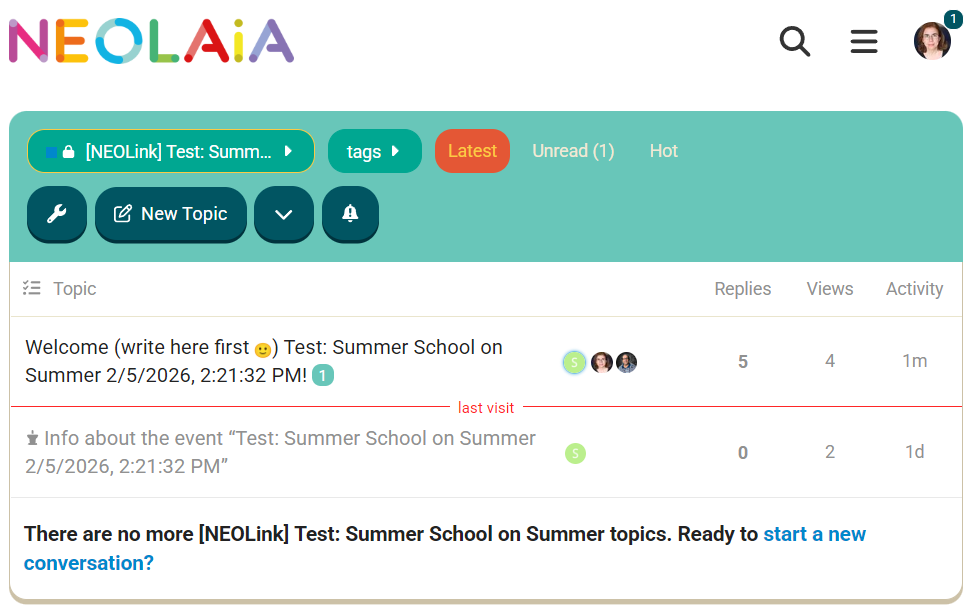
The attached screenshot shows an example of how the discussion area appears once accessed.
Discussion event in Virtual Cafè
The Virtual Café offers a dedicated space where users can exchange ideas, share reflections, and engage in conversations related to a specific item or event. By joining the discussion, you become part of an interactive environment where participants can collaborate, ask questions, and deepen their understanding of the topic.
To access the discussion, simply select "Open Discussion → from" the event page. You will be directed to the conversation thread associated with the event, where you can read.
- Welcome discussion
A short welcome discussion space where the Event Creator can briefly introduce themselves, share a short bio, and provide essential information about how the event is organized. This helps participants understand the context and get oriented before joining the activities.
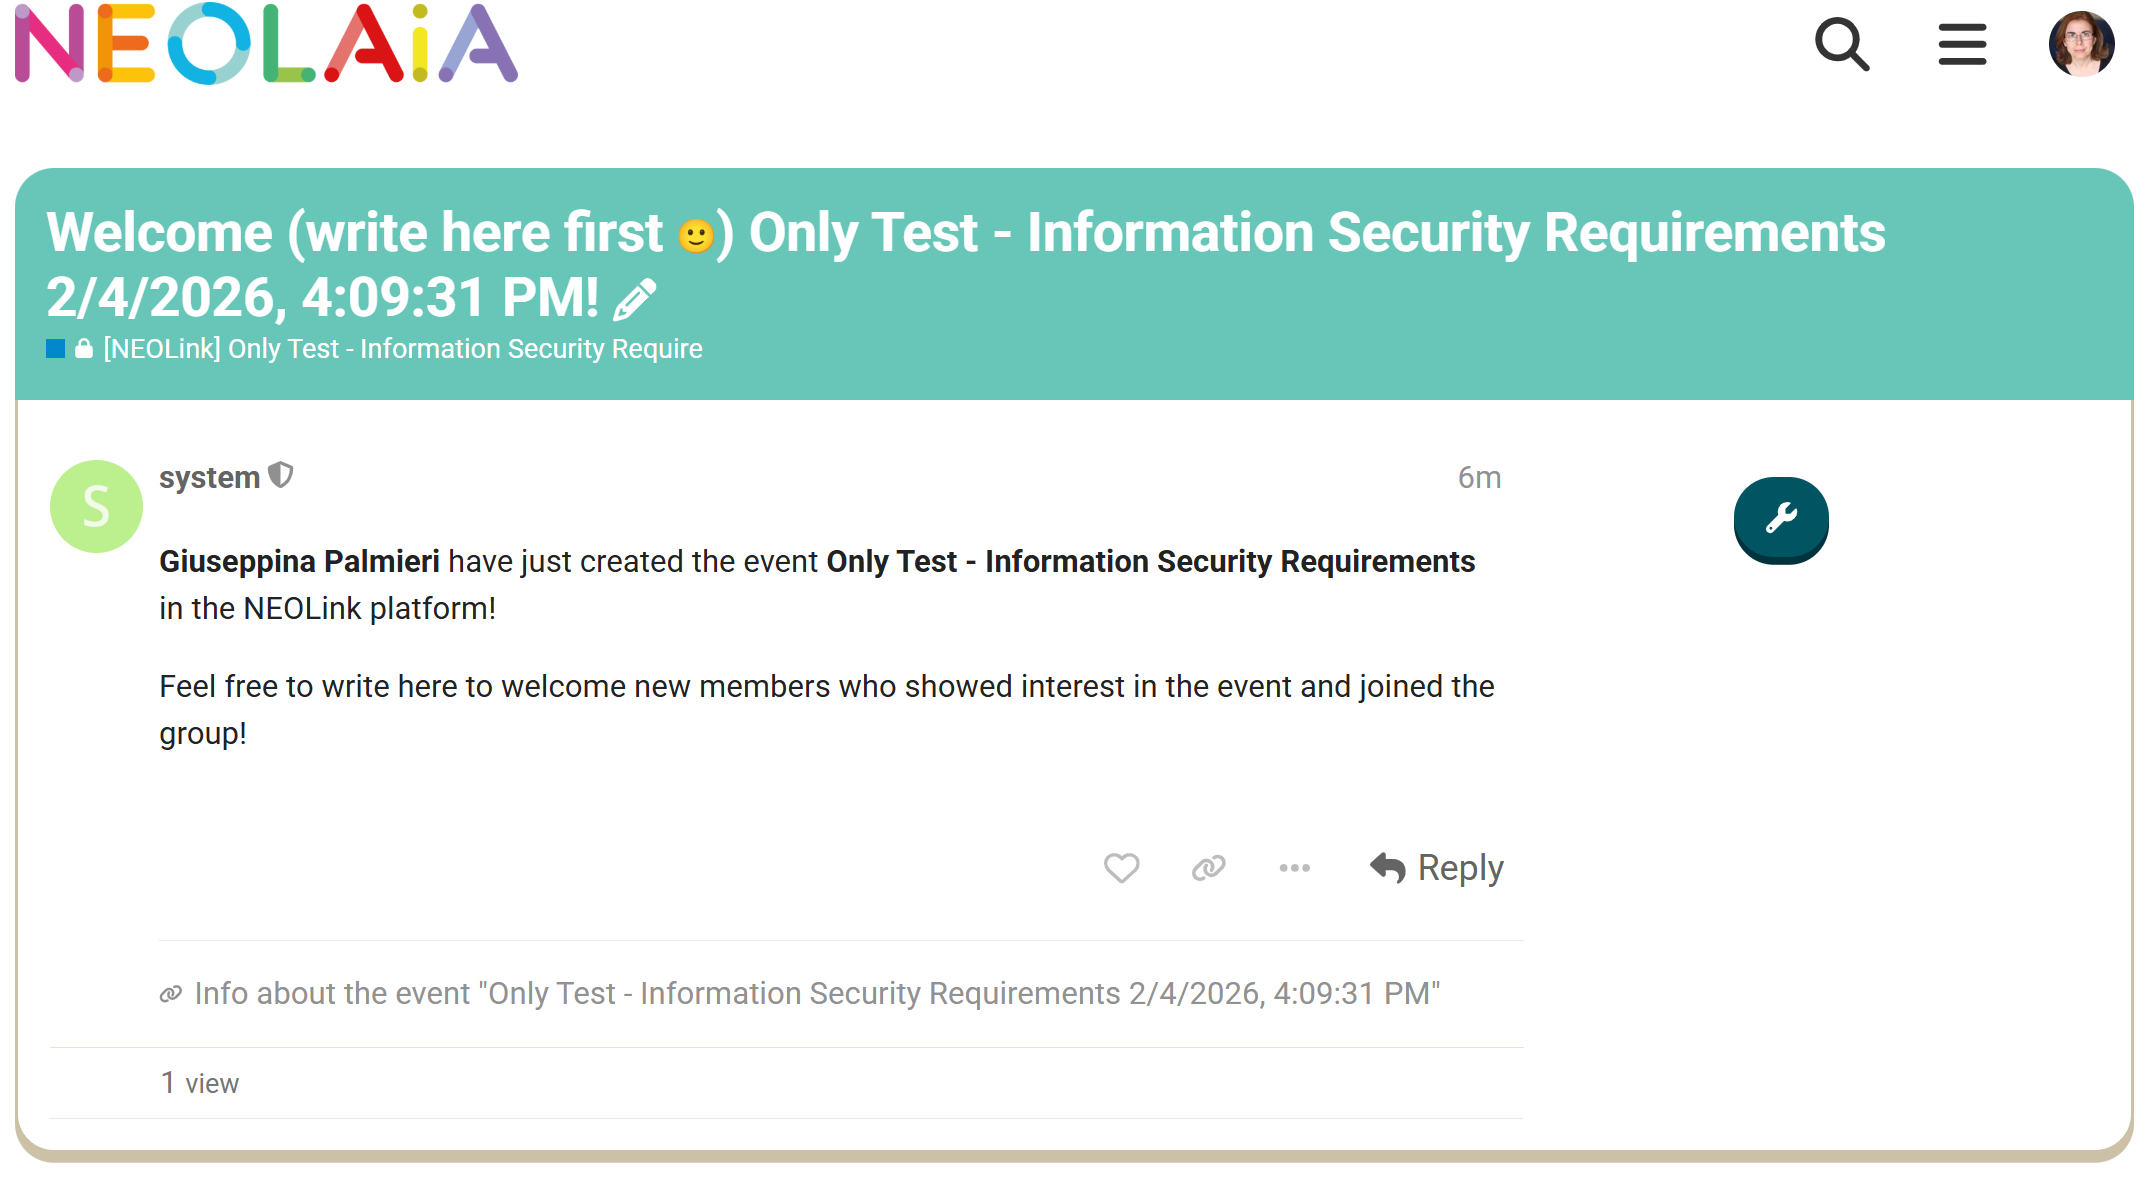
The Welcome page is the first discussion area associated with the event. It is designed to offer a friendly introduction to participants who join the Virtual Café.
Here, it is recommended that the Event Creator posts a short welcome message, introduces themselves briefly, and provides any additional useful information about the event. This may include the purpose of the activity, how the discussion space should be used, or what participants can expect as they join the group.
-
Event Discussion Created from NEOLink
This topic is automatically generated when an event is created on NEOLink. It serves as the main discussion space for the event, where participants can exchange ideas, ask questions, and interact around the event’s content.
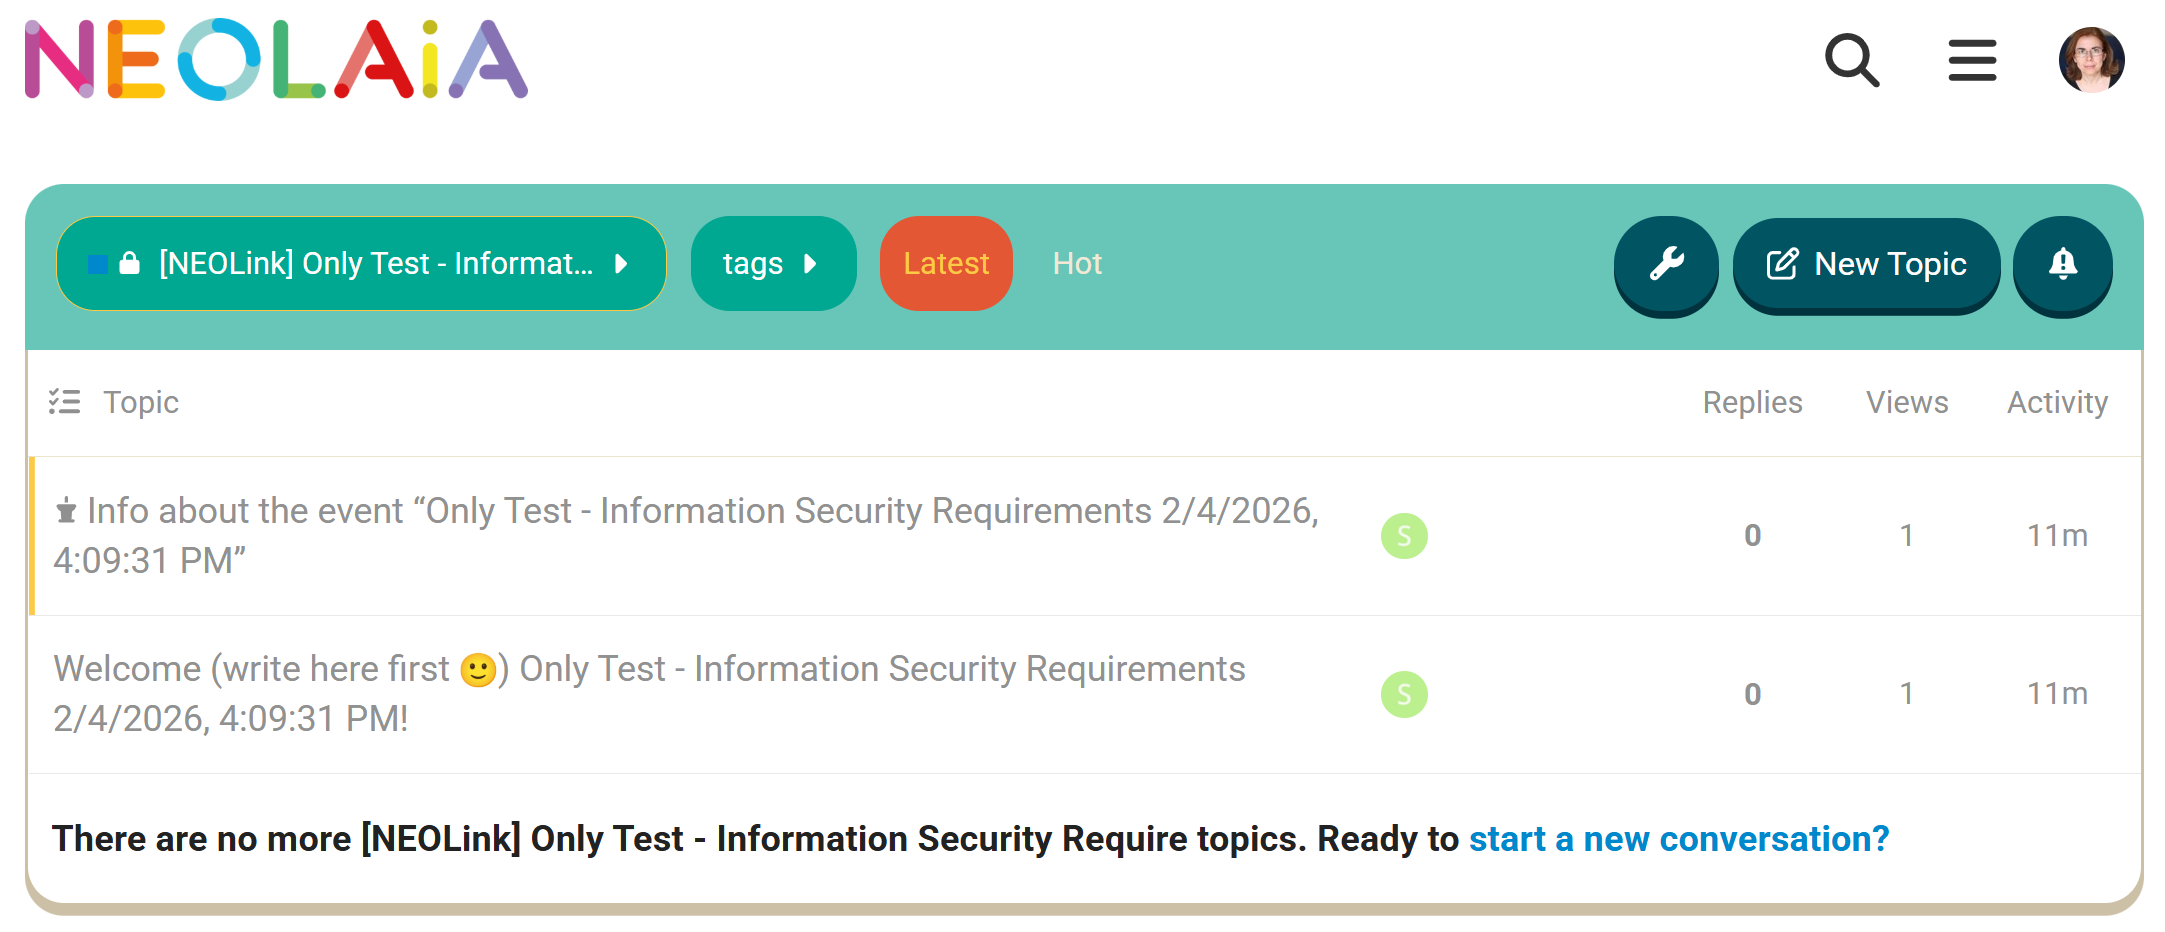
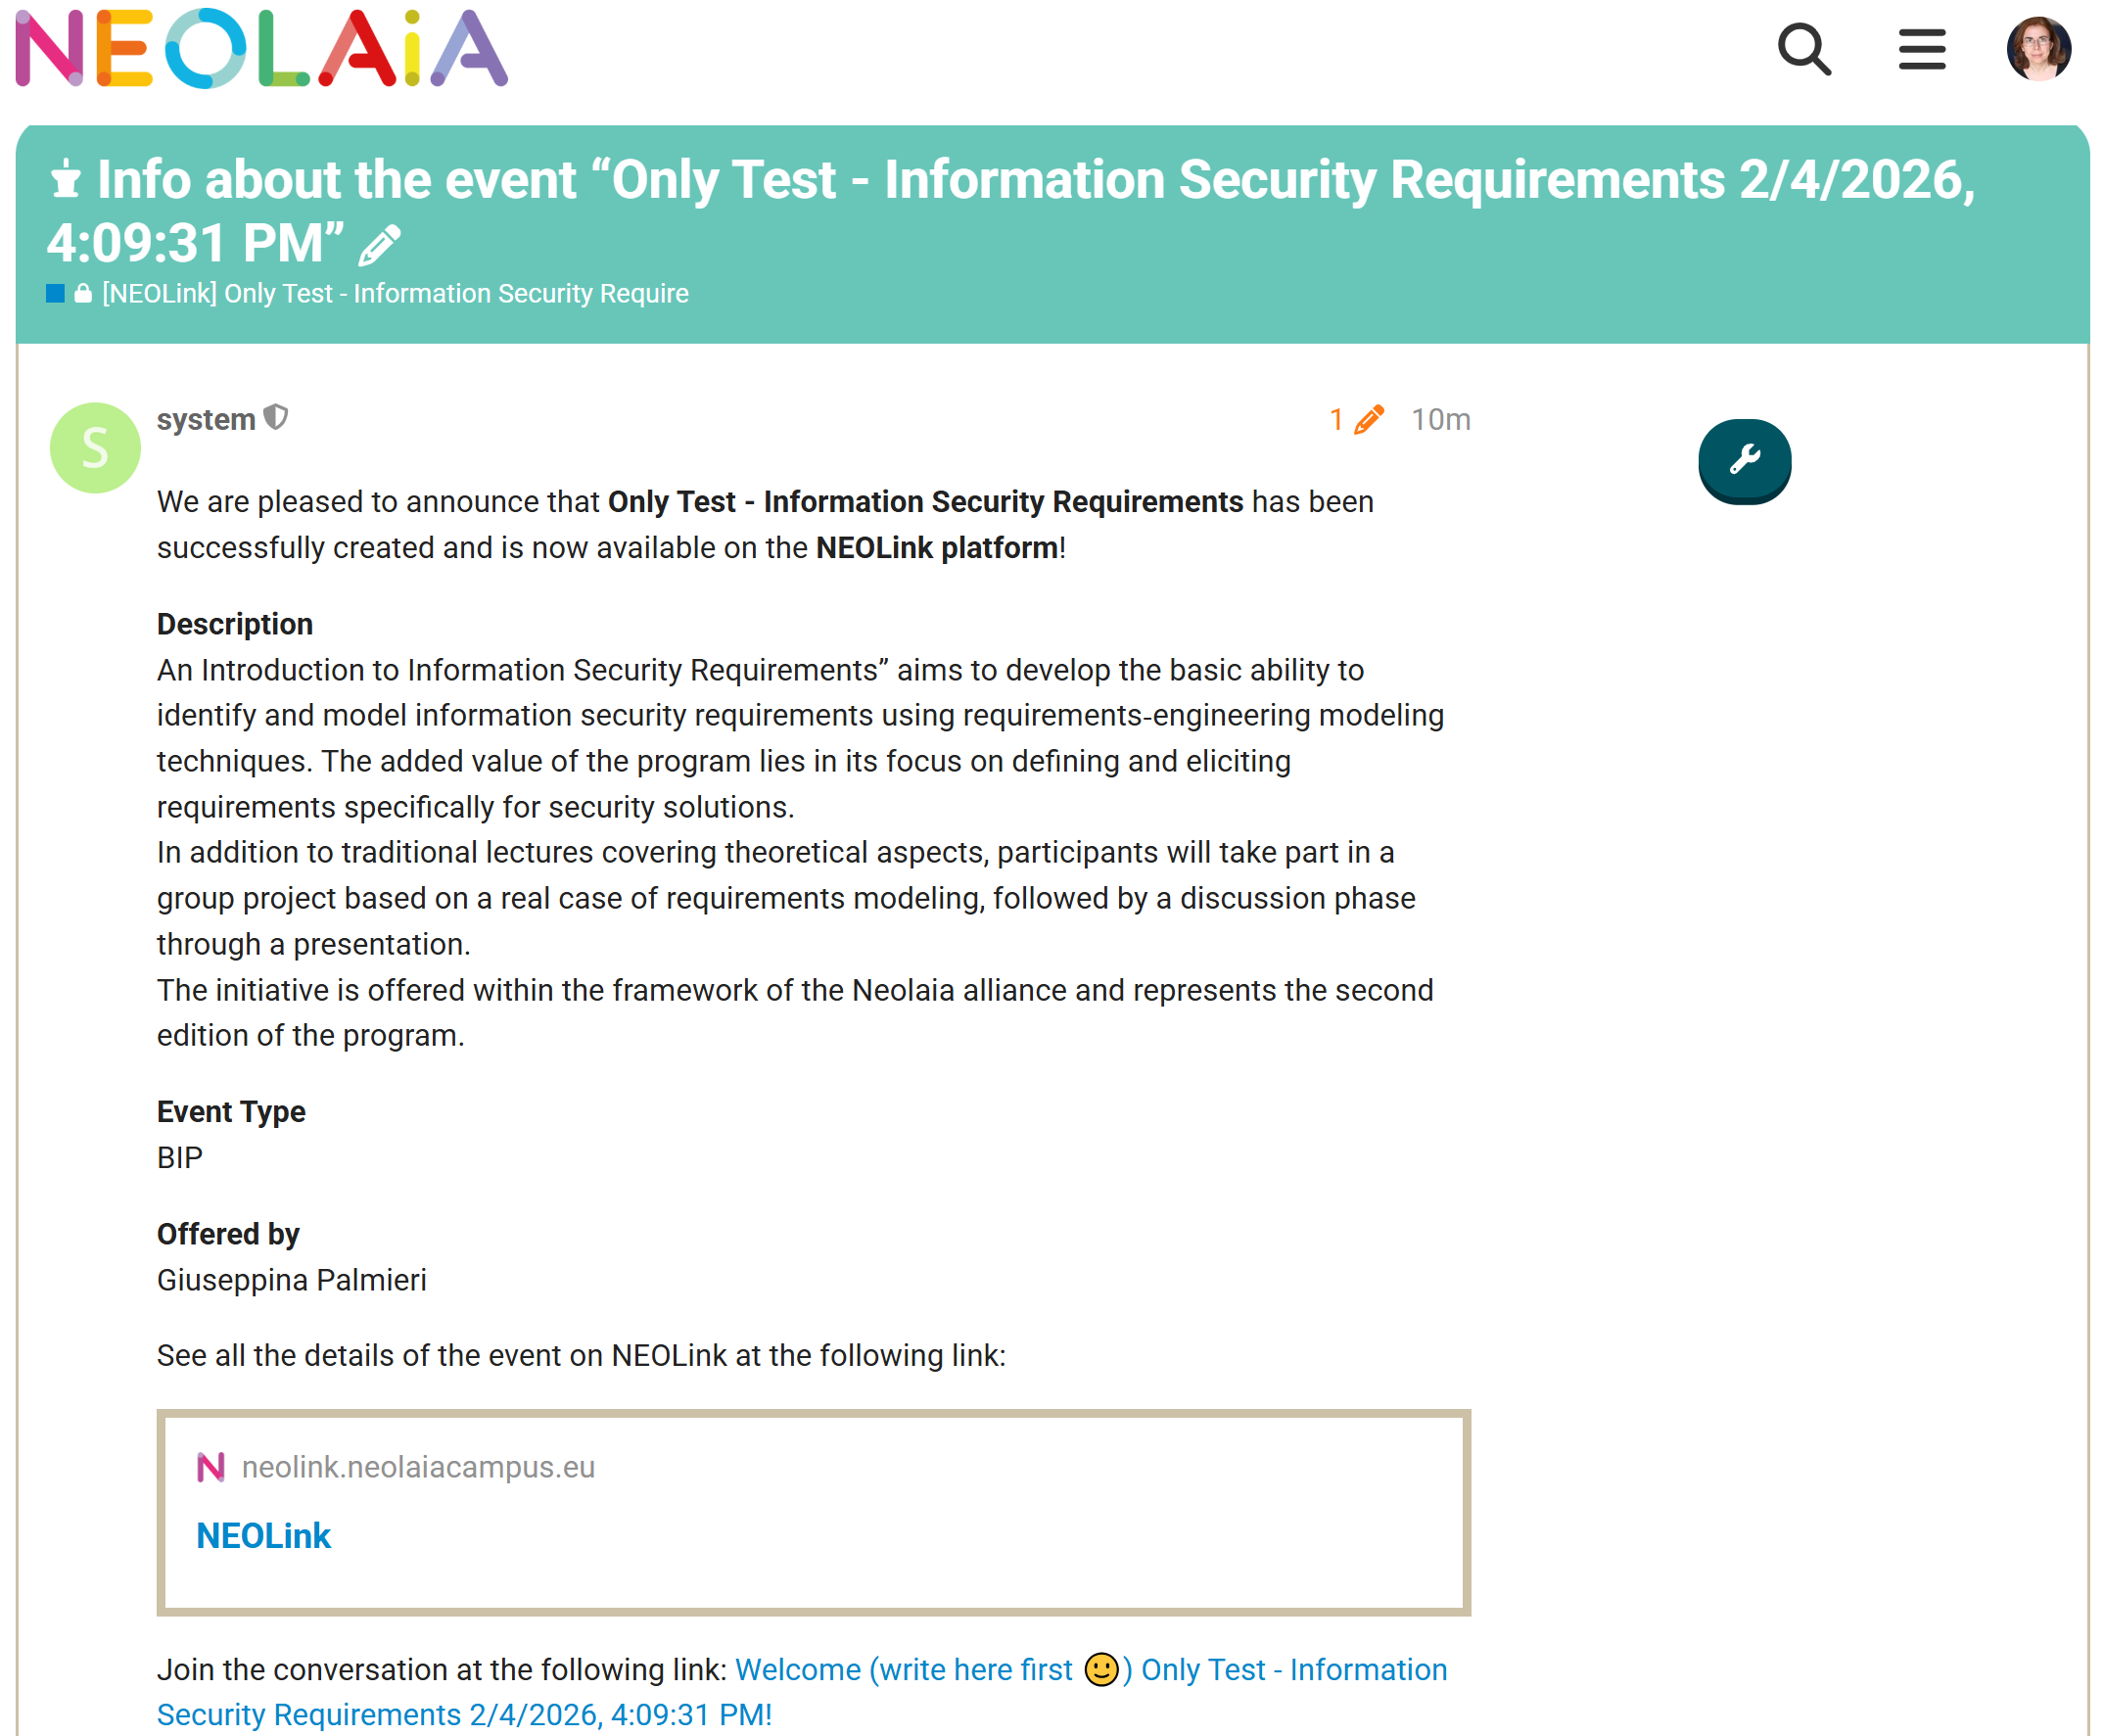
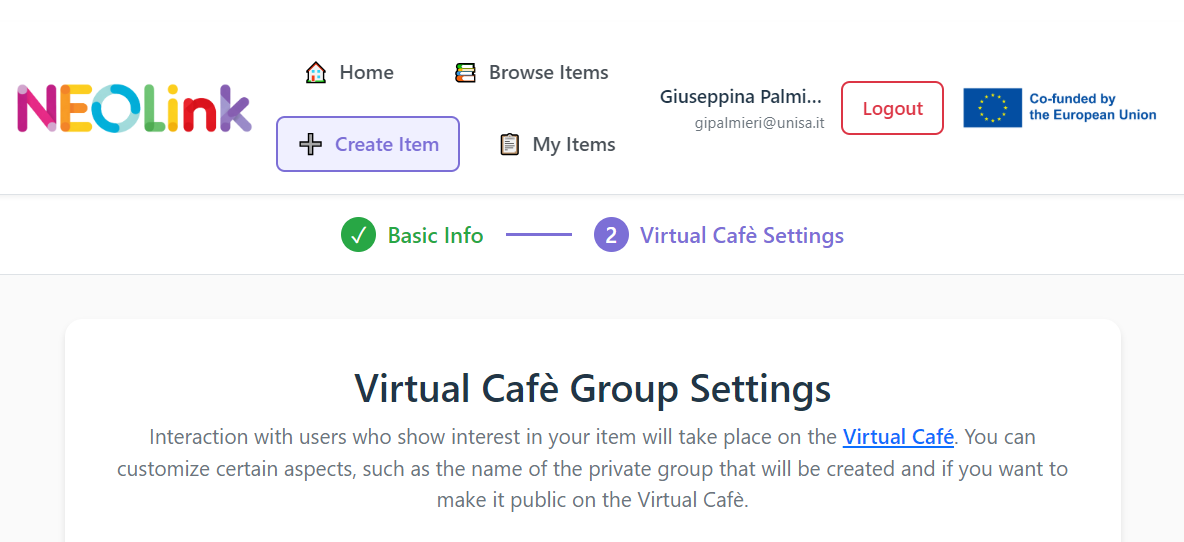
NEOLink: Virtual Cafè Group Settings
A Virtual Café after completing the basic info page related to the selected category in the previous step.
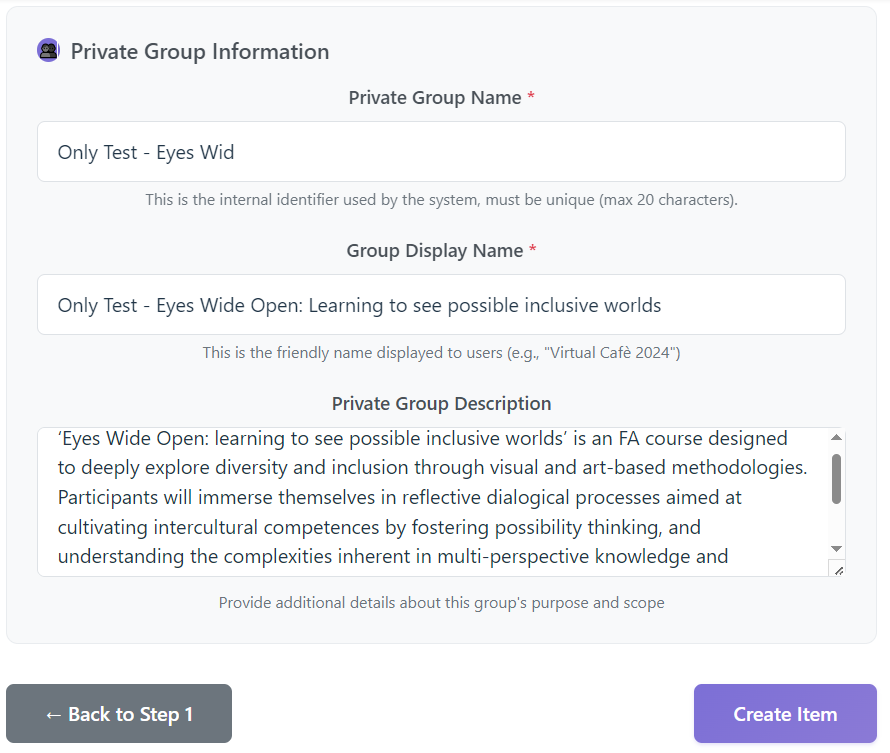
Private Group Information
Interaction with users interested in the item will take place in the Virtual Café. The user can customize elements such as the group name and decide whether the group should be visible in the Virtual Café.
A private group features:
- The main goal is simply to get in touch with people interested in the event.
- Informal, direct communication is preferred.
- The creator does not need the long‑term, searchable benefits of a public group.
A note warns that private group messages are not persistent: users who join later will not see previous conversations.
Item Creation Confirmation
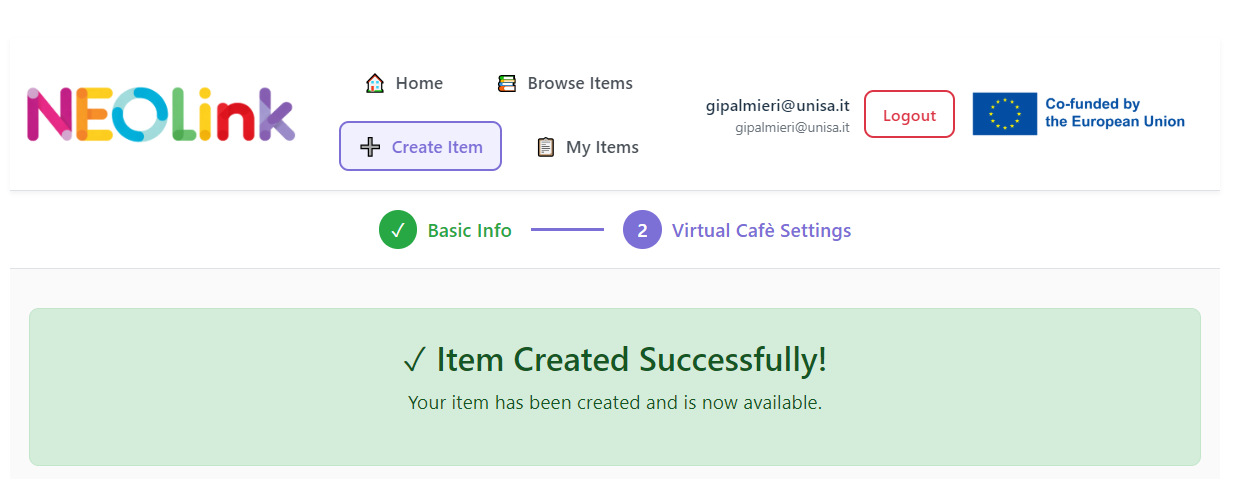
After completing all the required steps in the item creation process, the system displays a confirmation screen to inform the user that the item has been created successfully.
Your NEOLink Event in Virtual Café
What happened on Virtual Café?
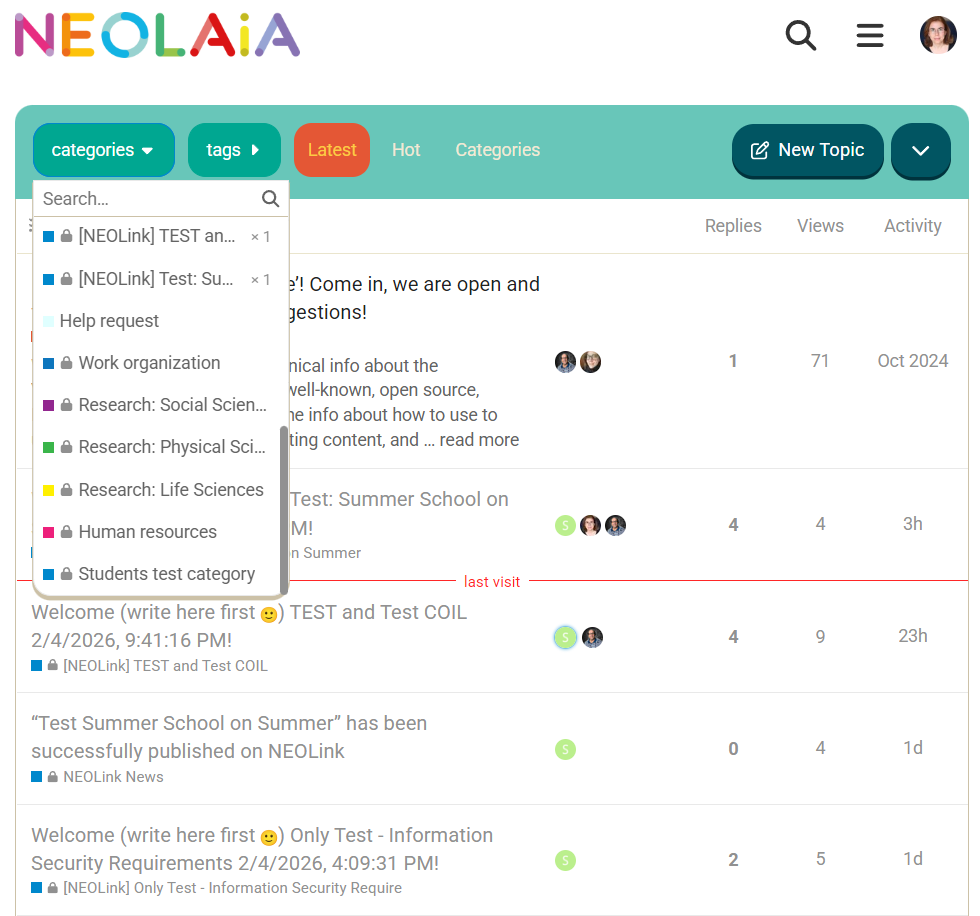
After selecting one of the events, the details of the event created in NEOLink are displayed, as shown in the image below and explained here.
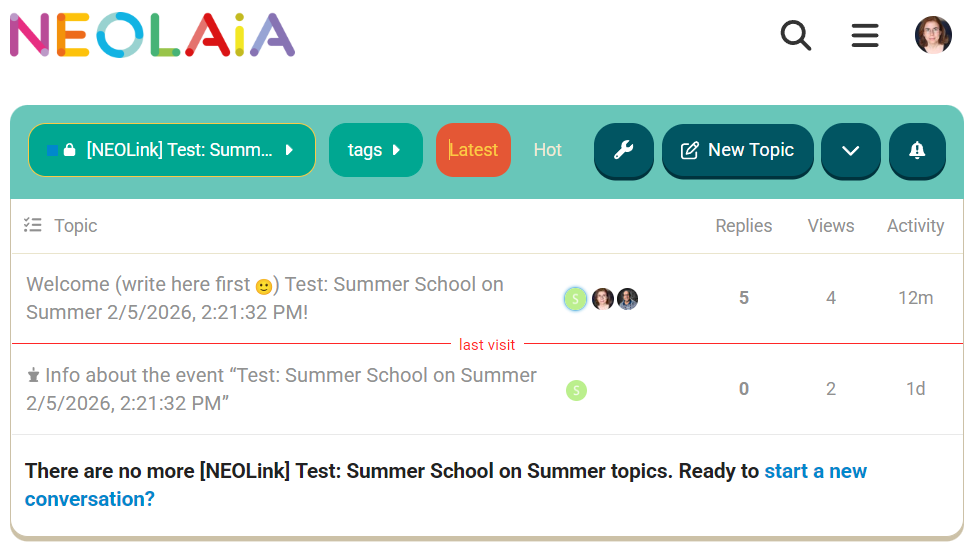
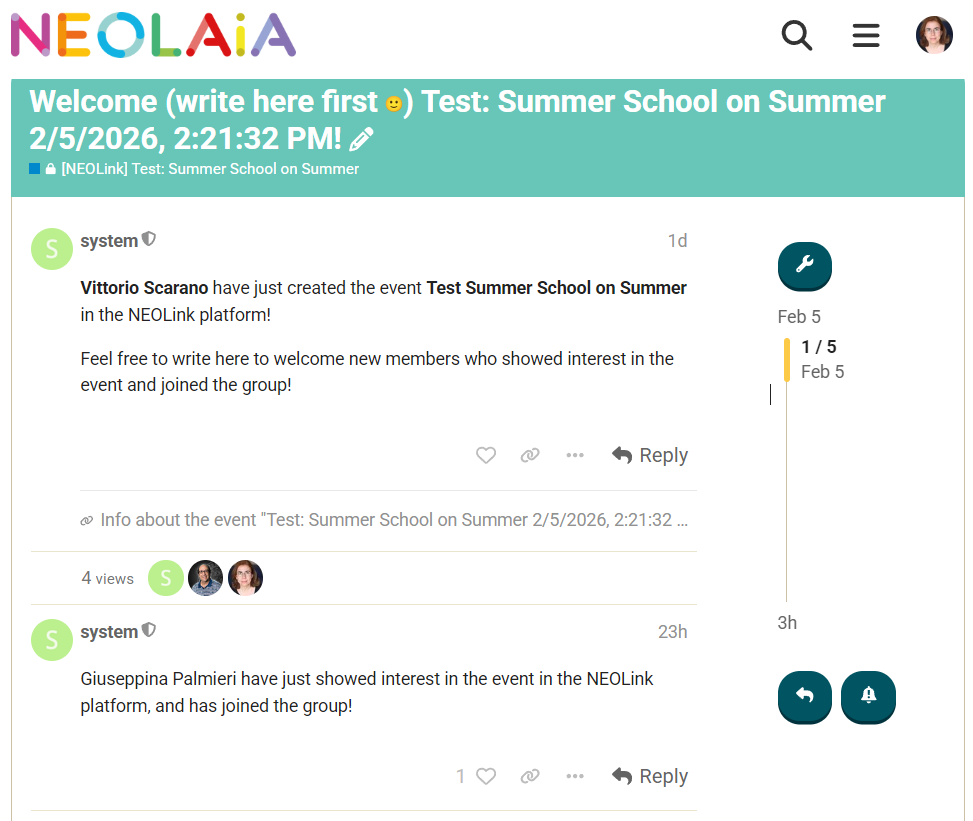
New Member Successfully Joins Discussion Group from NEOLink to Virtual Cafè
This discussion group was created on NEOLink and is now hosted in the Virtual Café. A new user has joined the group after expressing interest and is currently listed among the members, confirming successful access and participation in the group’s discussions.
Share NEOLink Events Anywhere & Virtual Café Interoperability
 platform
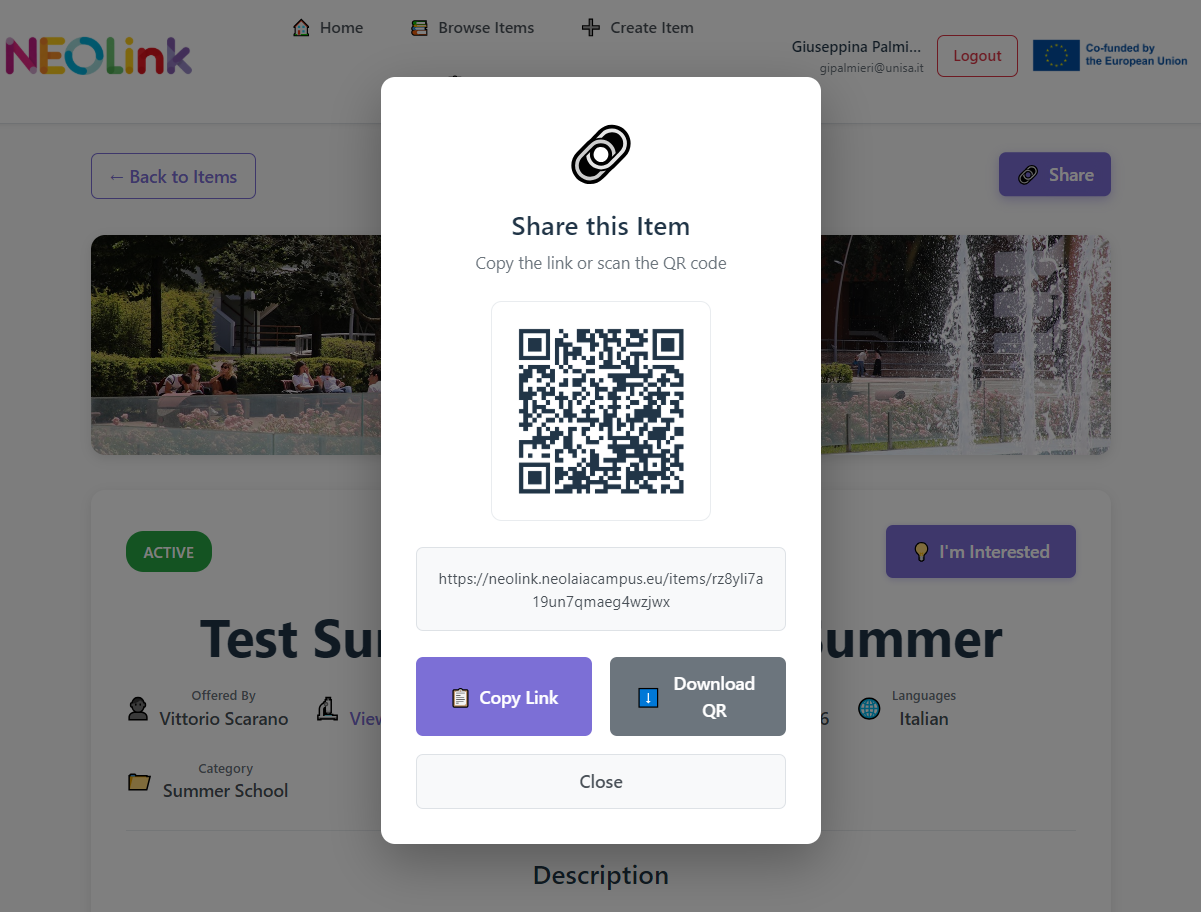
Share the Event Anywhere
 The Share button is located in the upper‑right corner of the item page.
When you click the Share button, a pop‑up window appears allowing you to easily share the item with others.
The sharing window provides two options:
-
QR Code:
You can scan the QR code directly with a mobile device to access the item instantly. -
Shareable Link:
A direct link to the item is displayed below the QR code.
You can click Copy Link to copy it to your clipboard and share it via email, chat, or any communication platform.
You can also select Download QR to save the QR code as an image and use it in presentations, documents, or offline materials.
Joining a Group in the Virtual Café
Open Discussion Button
On the right side of this section, you will see the “Open Discussion →” button, accompanied by a chat/discussion icon.
By clicking this button, you are redirected to the private discussion group created for this item in the Virtual Café platform.
Here, participants can exchange ideas, ask questions, and collaborate around the event.
 To participate in the Virtual Café, the user selects the group of interest by clicking the “I’m Interested” button.
NEOLink Events Automatically Published in the Virtual Café
After events have been created in NEOLink, we can now see what happens on the Virtual Café.
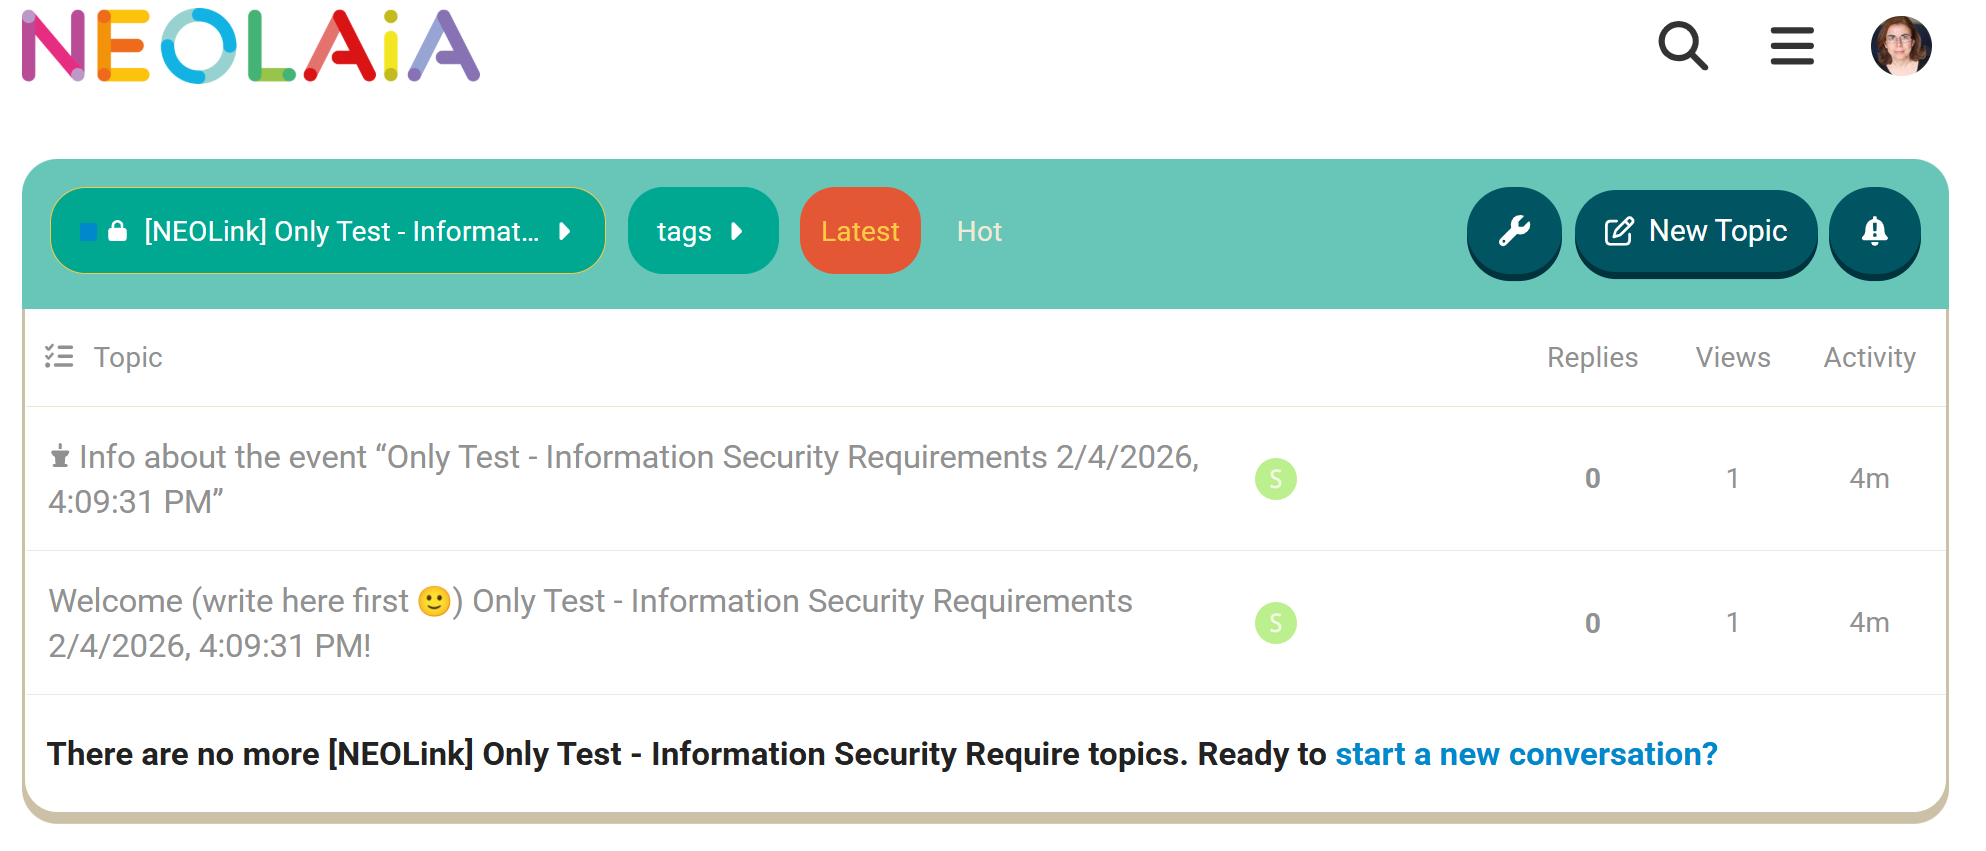
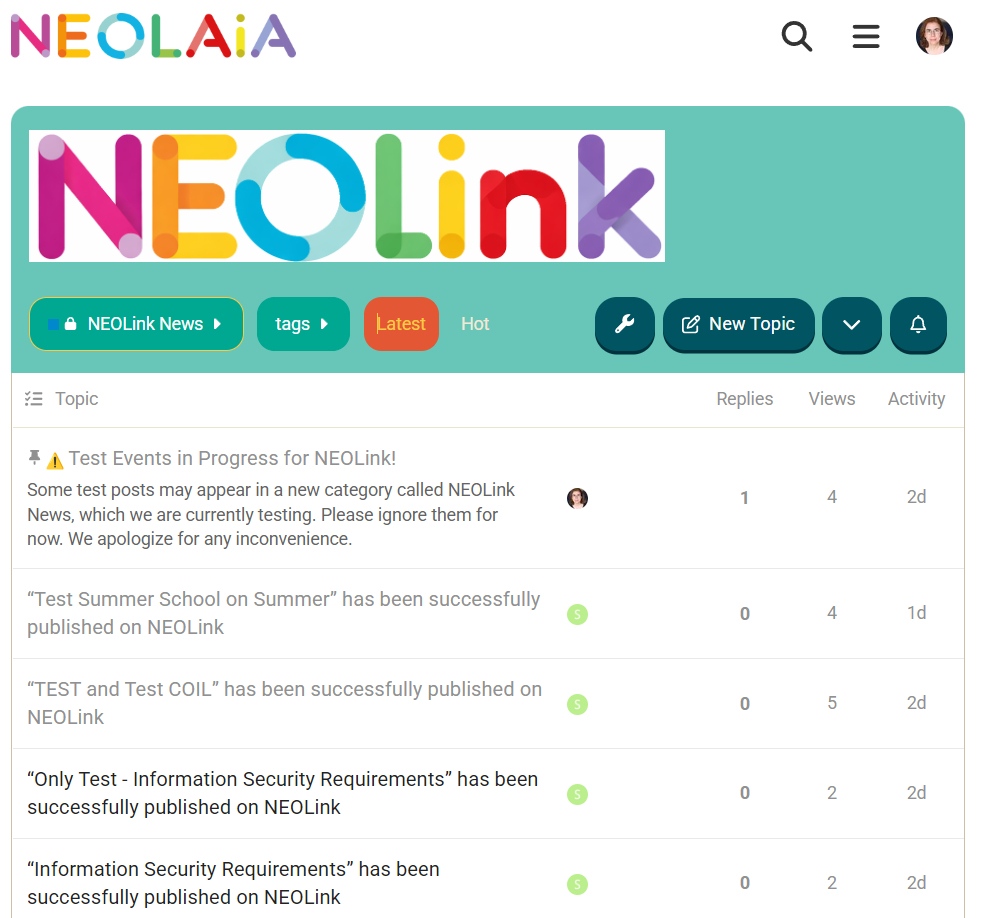
The image below shows the Virtual Café interface, where newly published NEOLink events appear as announcements within the NEOLink News section. Each event is automatically posted as a new topic, making it visible to the community and easily accessible for further discussion:
- At the top, the NEOLink header visually identifies the section dedicated to updates related to the platform.
- The navigation filters—NEOLink News, tags, Latest, New, and Hot—allow users to sort and explore content efficiently.
- Below, the list of topics displays the NEOLink event announcements. Each entry confirms that the associated event “has been successfully published on NEOLink.”
- For each topic, users can see:
- the number of replies,
- views,
- and the time of the most recent activity.
This automated publication ensures that NEOLink events immediately become visible to all users on the Virtual Café, enabling quick access, interaction, and follow-up discussions.
COIL
Description
Collaborative Online International Learning (COIL) courses connect students and educators from different NEOLAiA universities through joint coursework, shared tasks, and collaborative projects conducted entirely online.
By working together across borders, students develop intercultural communication skills, learn new perspectives in their field of study, and practice teamwork in a digital environment. COIL offers the benefits of an international experience while staying at home, making it an inclusive and flexible way to broaden horizons and build valuable skills for future studies and careers.
Basic info
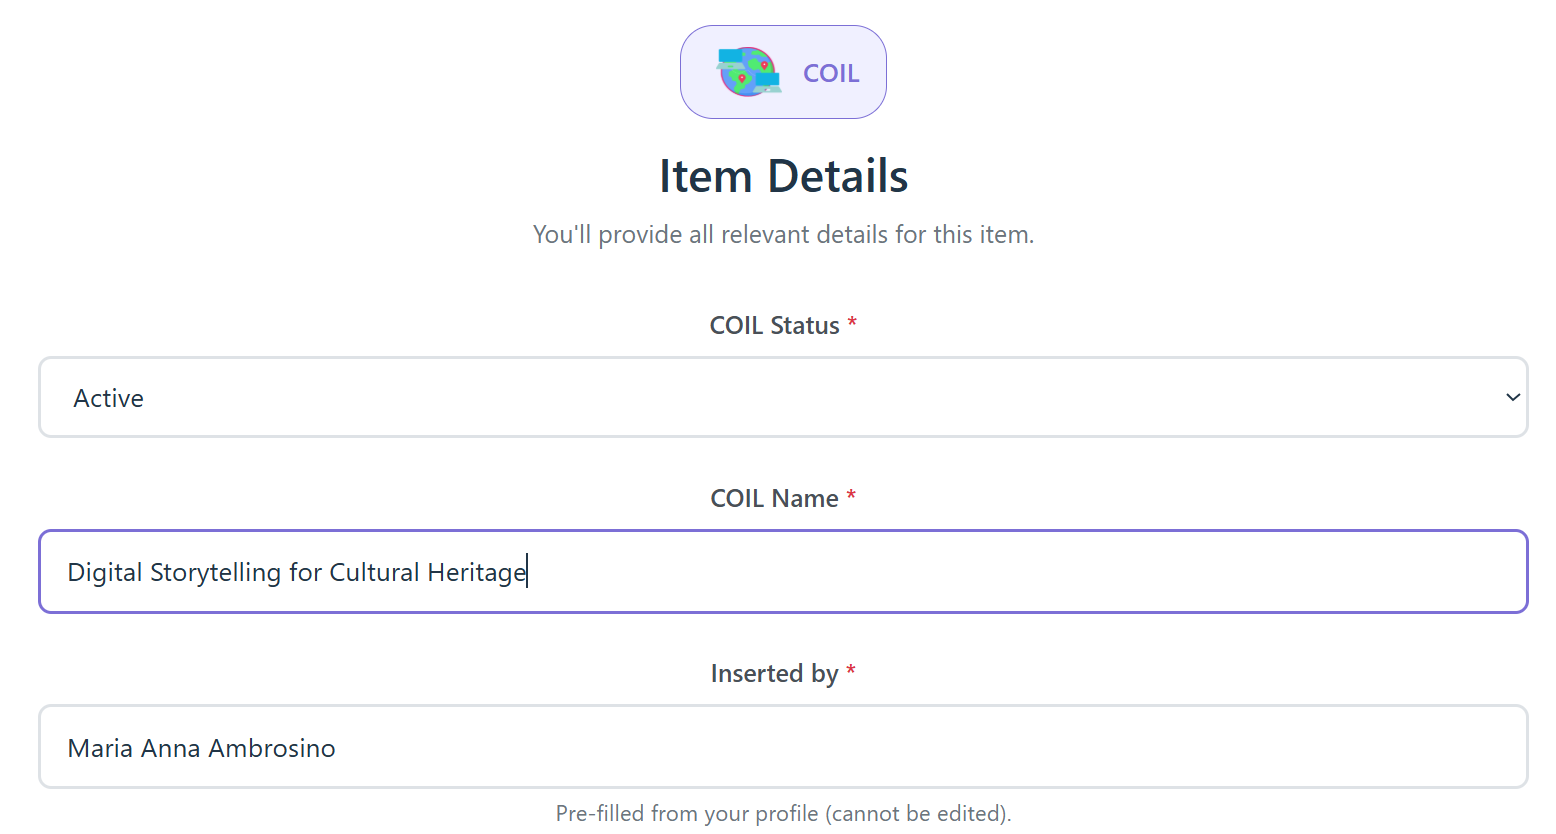
The page allows the user to enter all required information associated with the Collaborative Online International Learning (COIL) course.

1. COIL Status *
A dropdown menu where the user selects the current status of the COIL item (e.g., Active, Running, or Expired).
This field is required.
2. COIL Name *
A text input field where the user must enter the name of the COIL course.
This field is required.
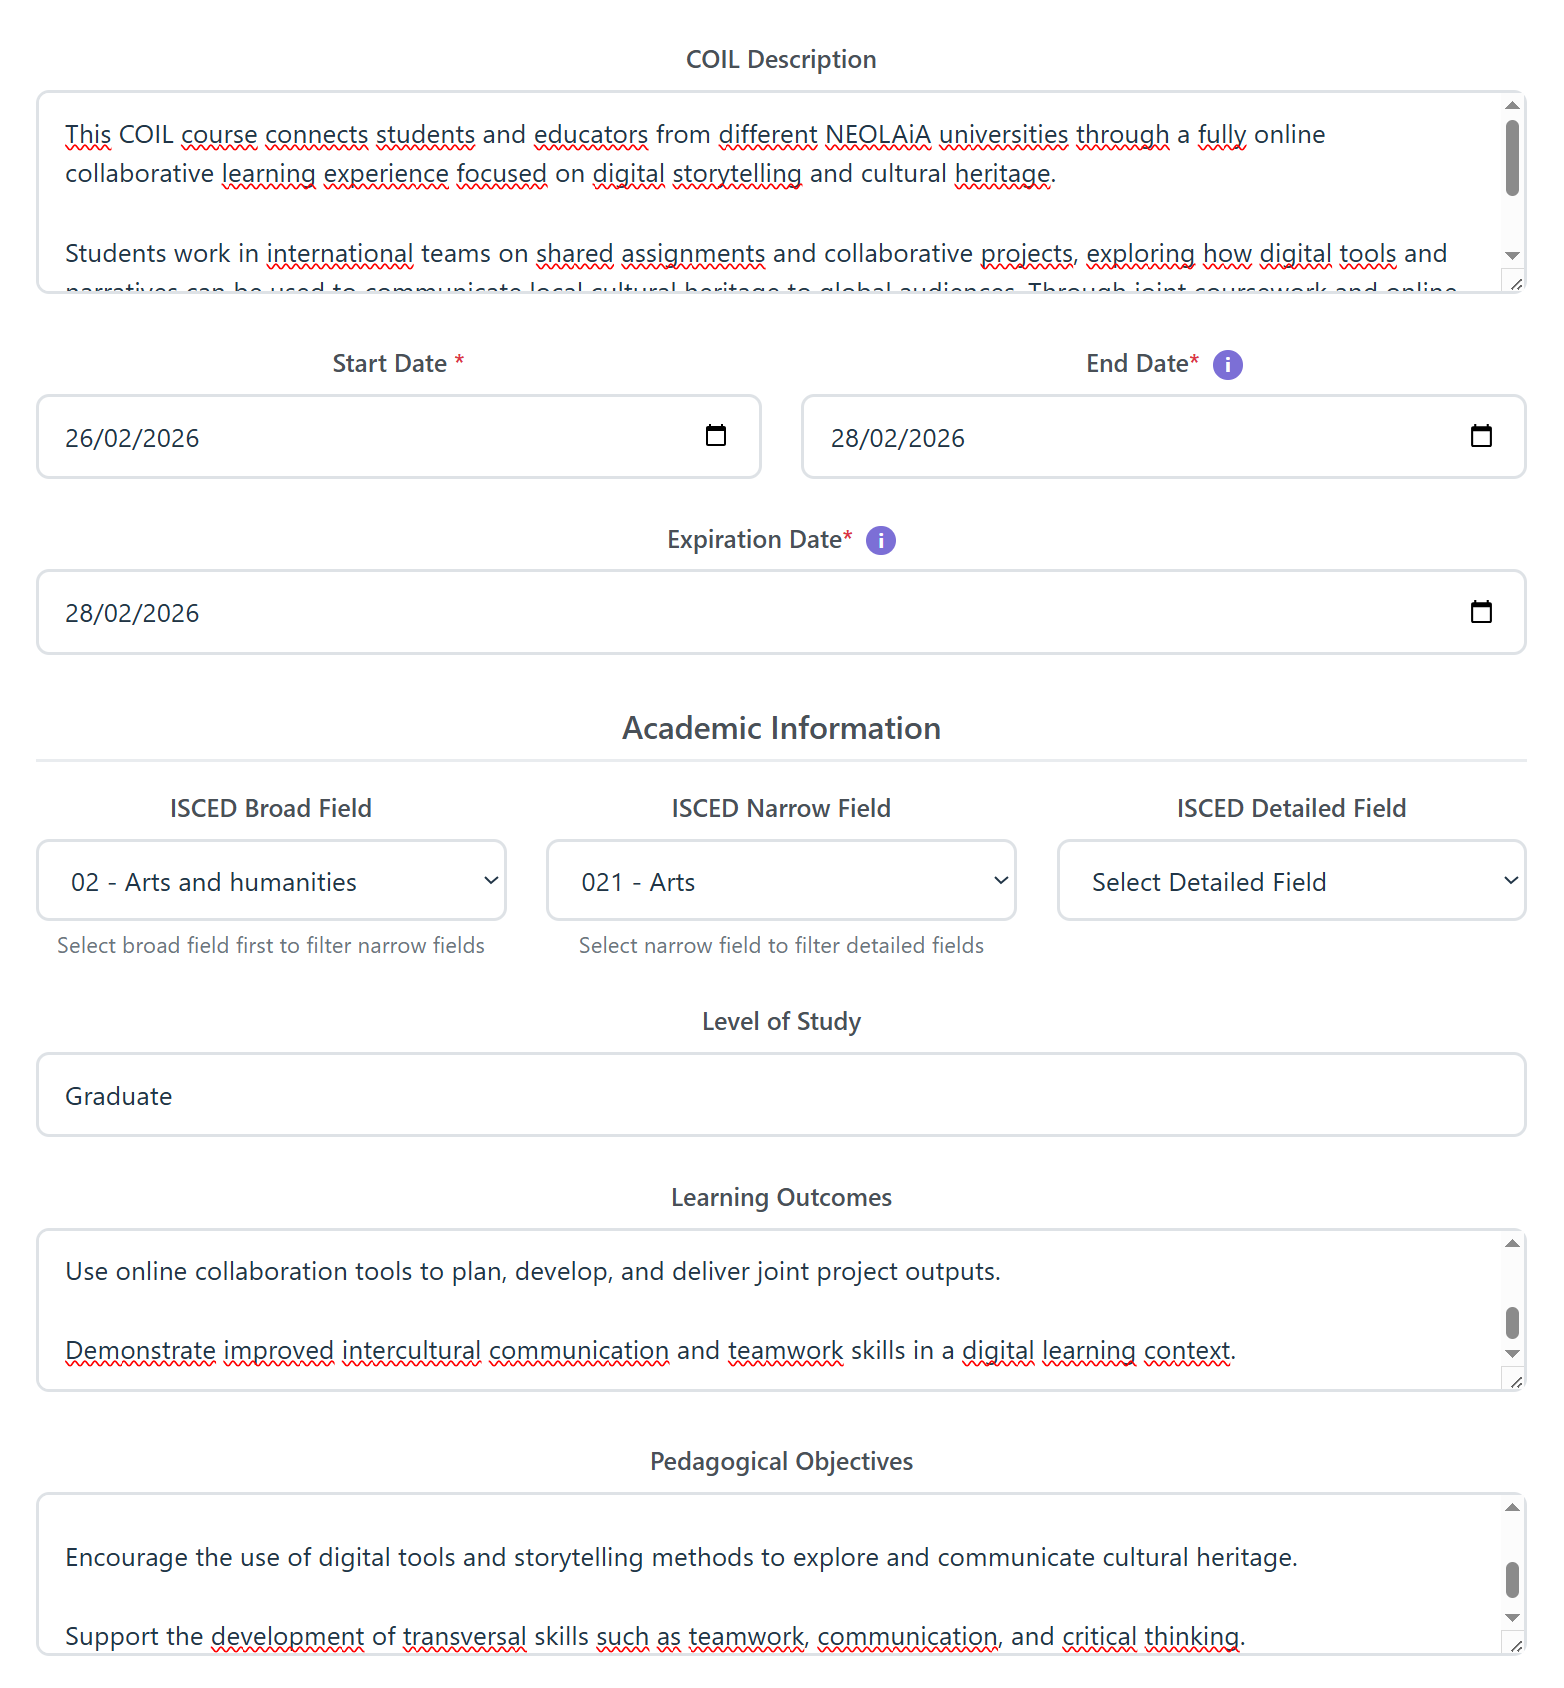
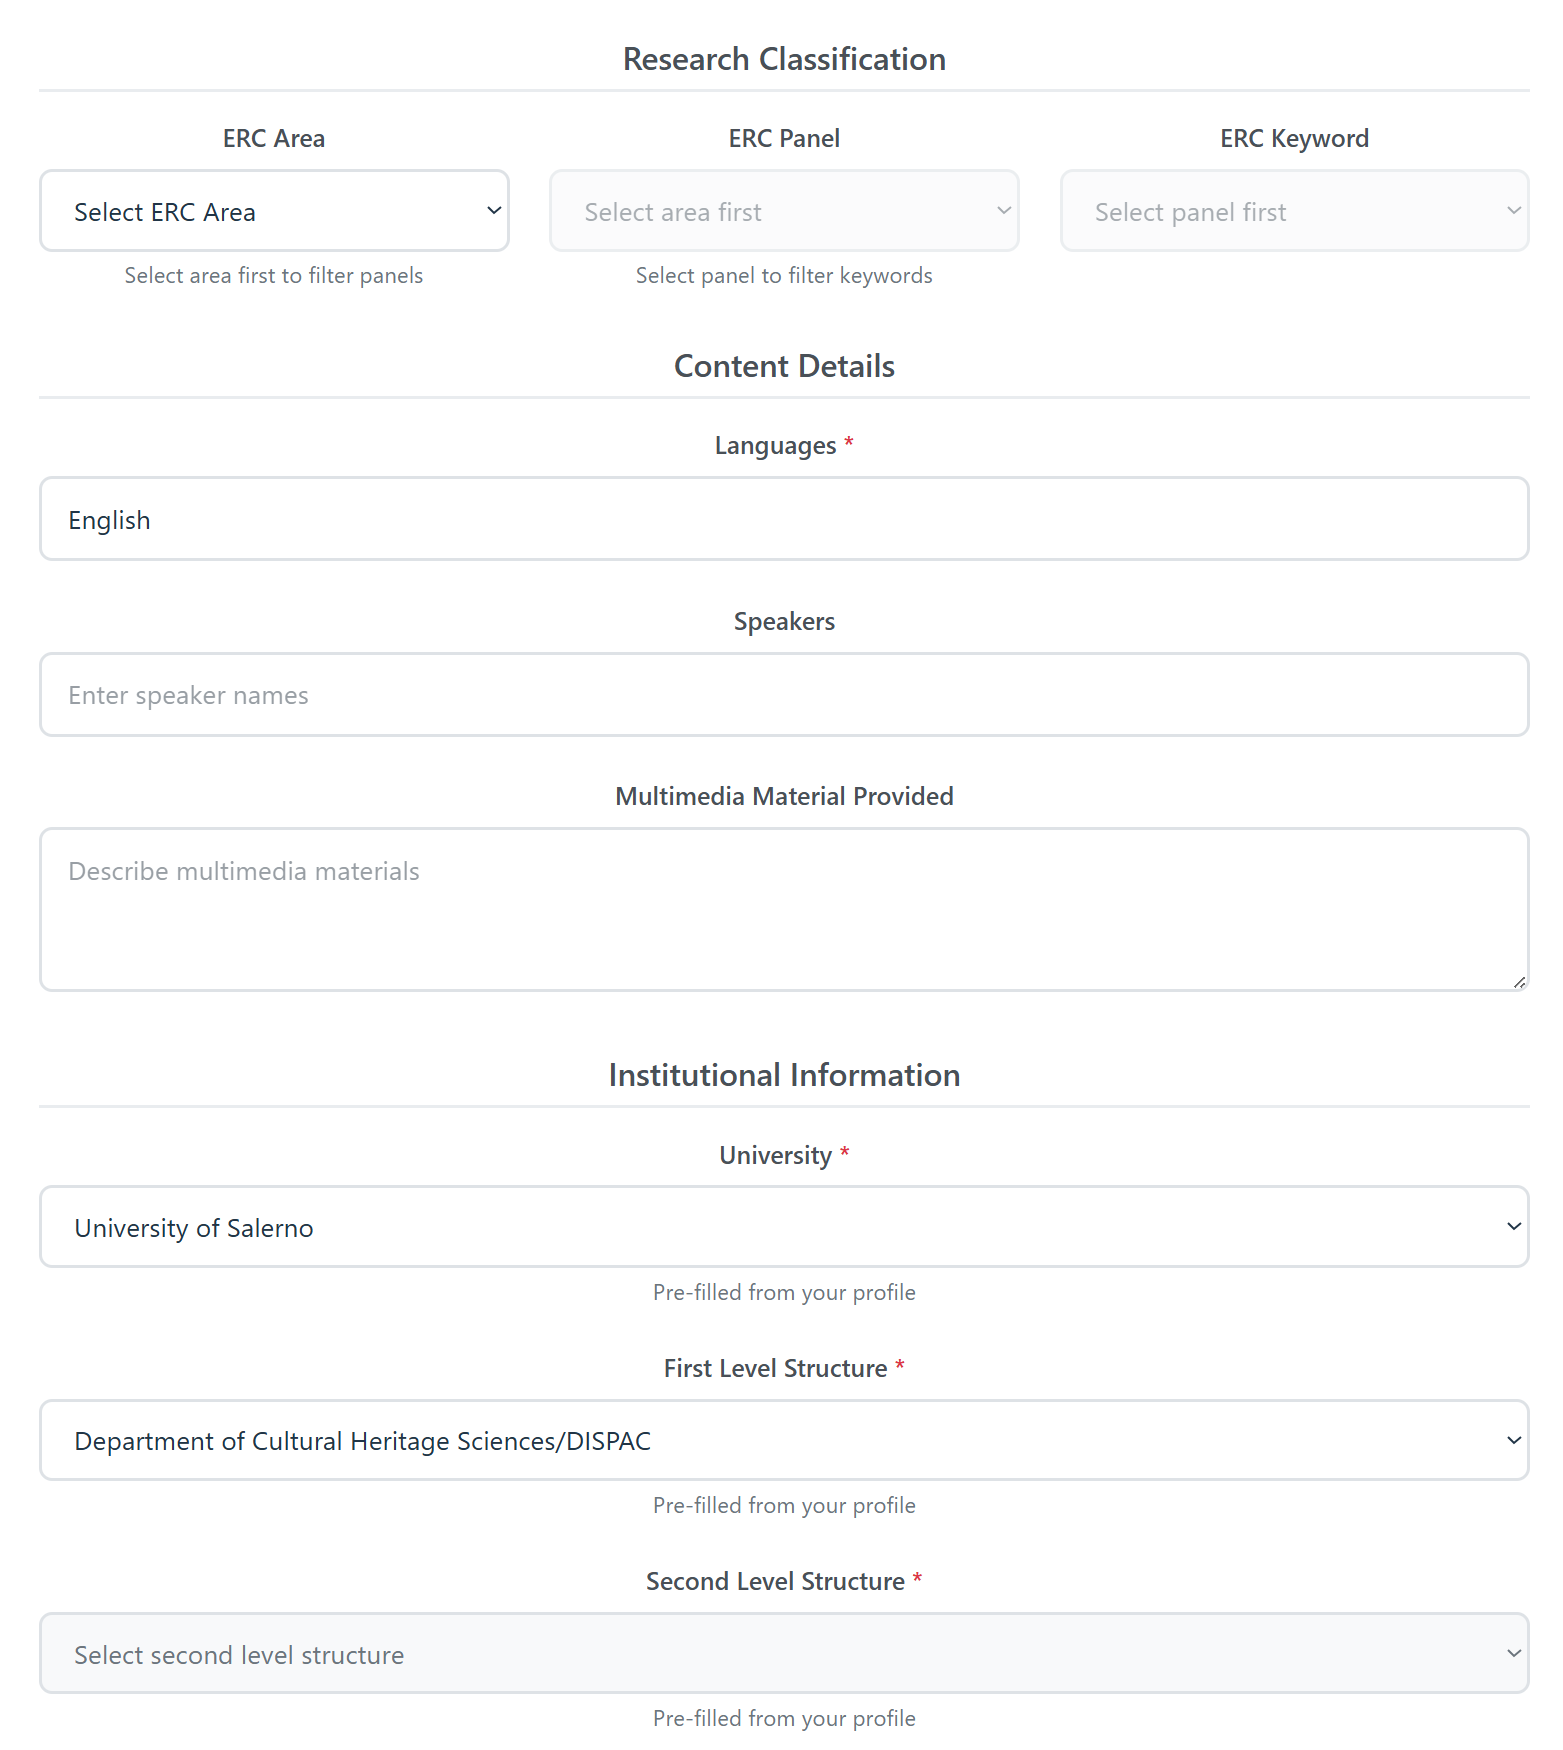
Other fields to complete
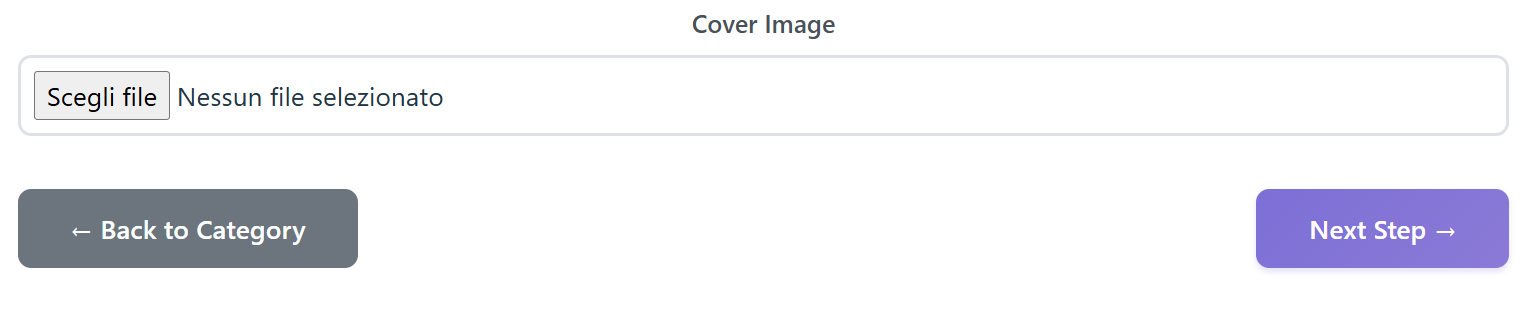
Now you are on a dedicated page for the Virtual Café after completing the basic info page related to the selected category
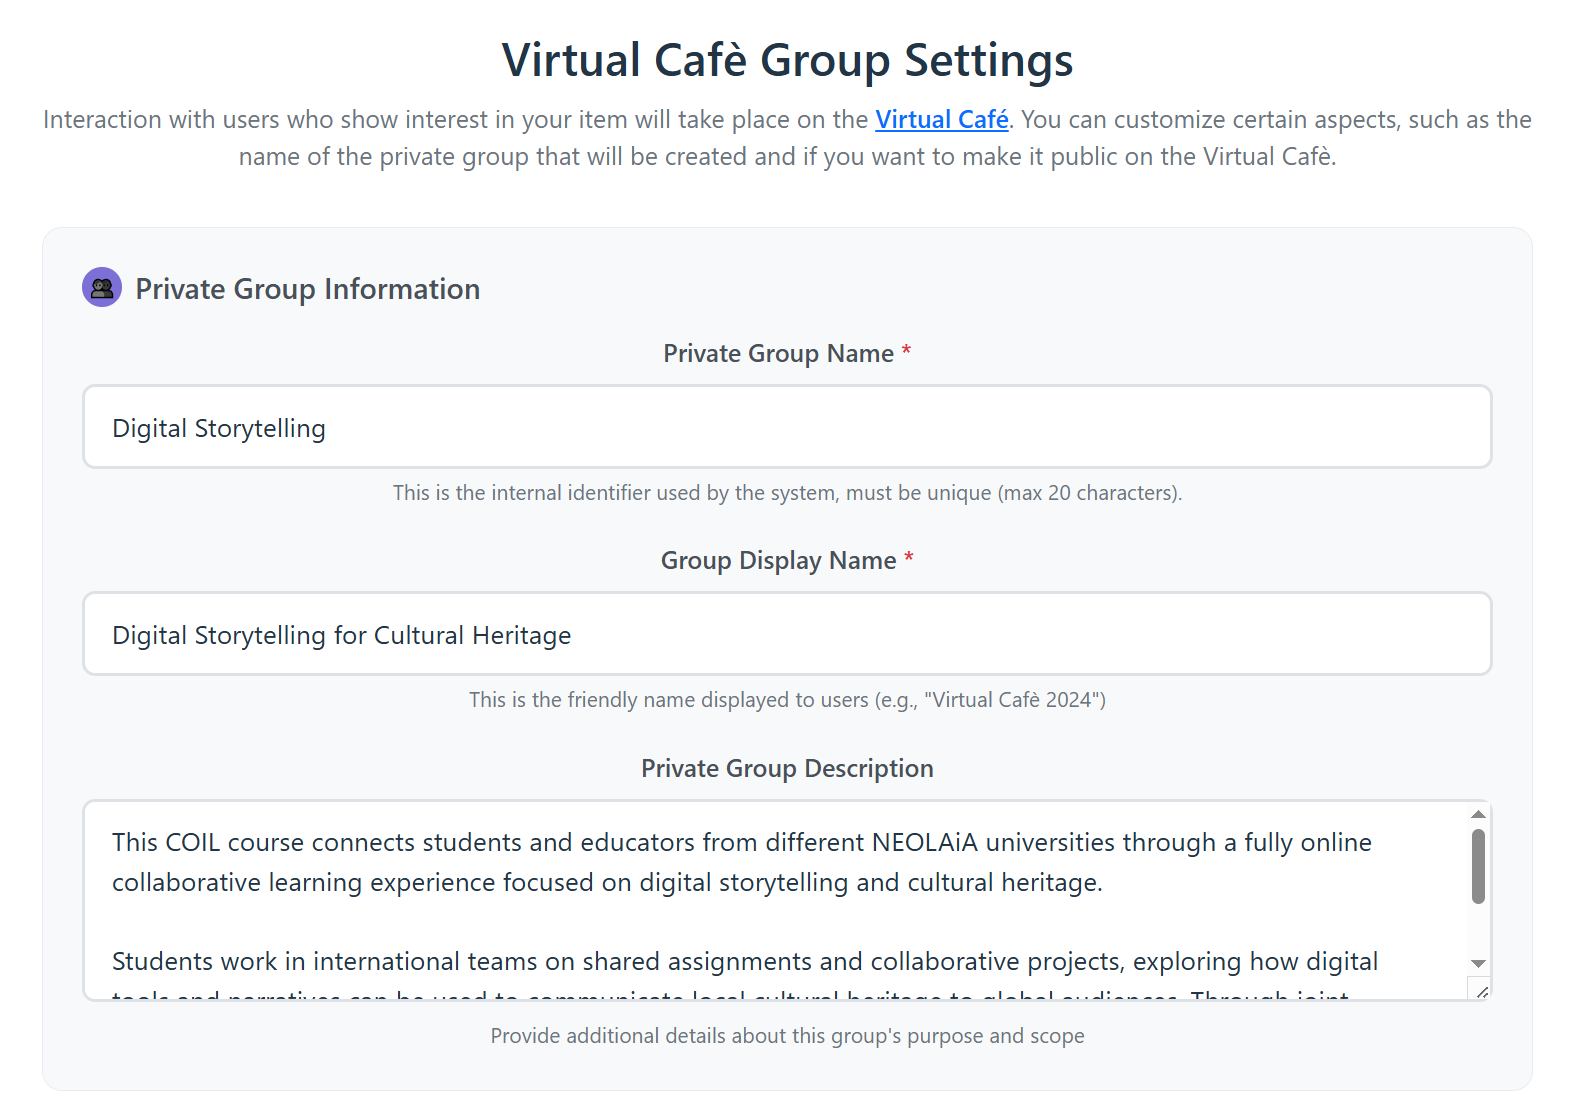
NEOLink: Virtual Cafè Group settings
A Virtual Café discussion space is created automatically after completing the basic information page for the selected category in the previous step. This results in a private discussion group, which functions as a restricted space where only approved members can participate.
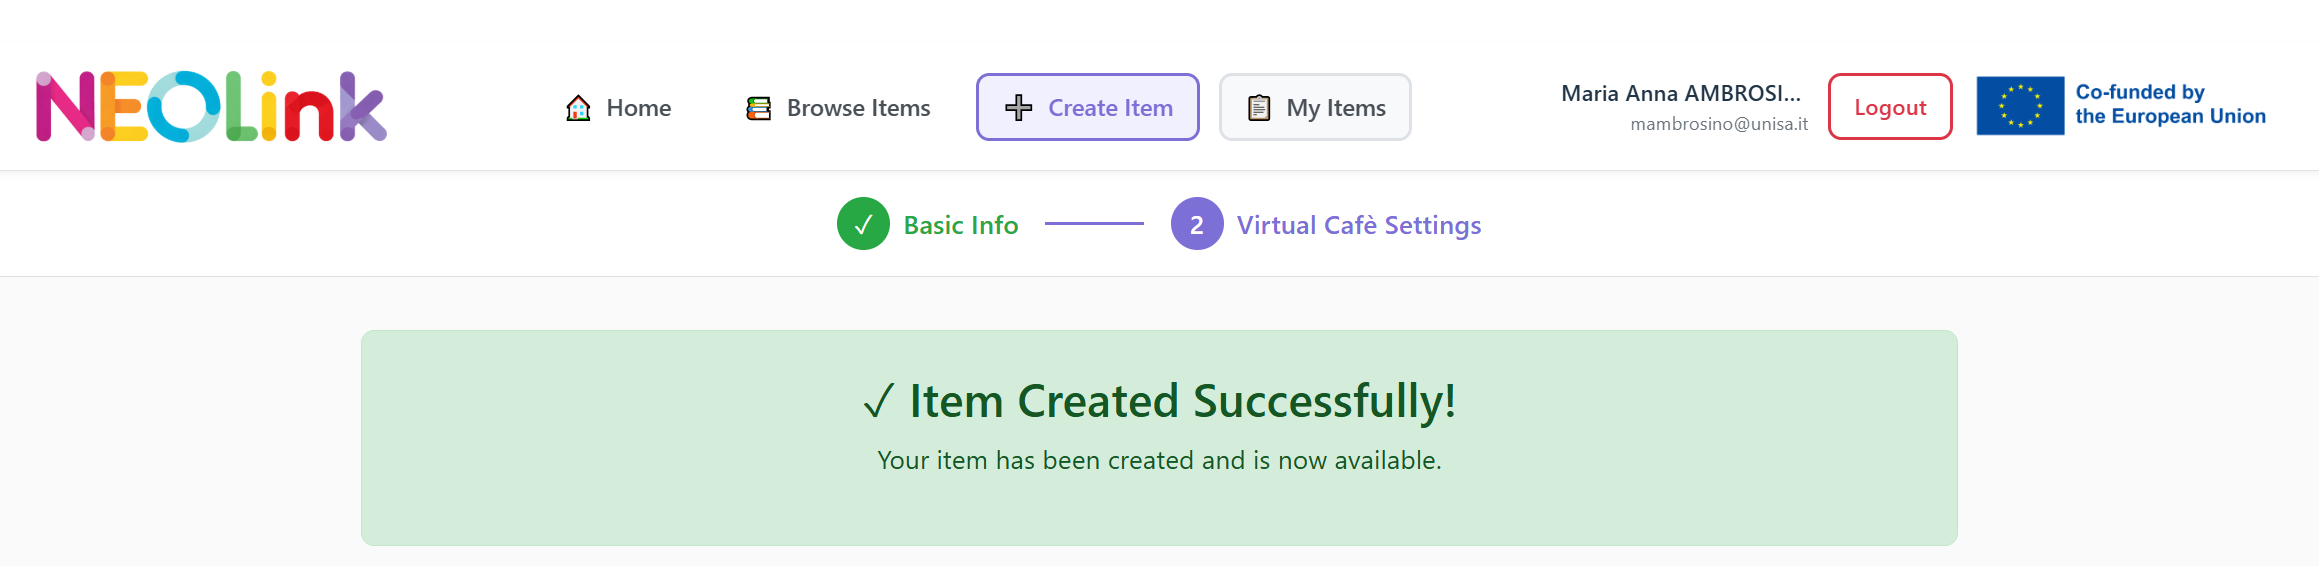
Item Creation Confirmation
After completing all the required steps in the item creation process, the system displays a confirmation screen to inform the user that the item has been created successfully.
Interaction with Virtual Cafe'
Information and settings
Interaction with the Virtual Café
For each item created on the platform, user interaction and engagement are managed through the Virtual Café. The Virtual Café provides a dedicated space where interested users can communicate, ask questions, and participate in discussions related to the item.
Private Groups
-
Private groups are accessible only to invited or accepted participants. They are suitable for direct and informal communication when long-term visibility and archived discussions are not required. Messages in private groups are not persistent, meaning that users joining later will not have access to previous conversations.
Group Management and Flexibility
Group visibility and settings can be adjusted during the item creation process or updated later directly within the Virtual Café platform. If users are unsure about the best configuration, they can skip the group setup step and decide on public or private visibility at a later stage.
Through the Virtual Café, the platform supports meaningful interaction, collaboration, and community building around each item.
Choosing category
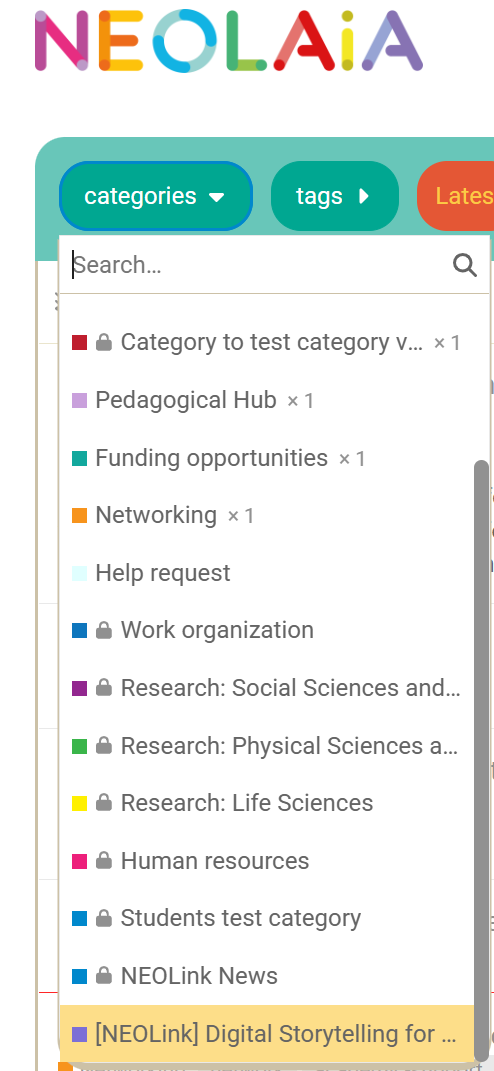
Items created on NEOLink are also reflected on the Virtual Café platform through categories.
When an item is published, a corresponding category is created (or updated) on Virtual Café, allowing users to easily discover and follow discussions related to that item.
Categories help organize content by topic or activity type and provide structured access to discussions, news, and updates associated with NEOLink items.
Visibility and Notifications
User Roles and Notifications in Discussion Groups
The user classification is defined as follows:
-
Discussion Group Owner – The user who creates and publishes the event.
-
Discussion Group Participant – A user who joins and actively interacts with the event (e.g. comments, activities, attendance).
-
Read-only Member – A user who can view the event and its details but does not join or interact with it.
|
User Type
|
Virtual Café Notifications 🔔 |
Email Notifications |
Notes |
|
Discussion Group Owner |
Notified when users show interest; receive updates on participant activity. |
Summary emails about user interest, including discussion history.
|
Receive the highest level of detail. |
|
Discussion Group Participant |
Receives notifications about new activity, interaction updates, and comments related to the event. |
Emails with subject line: "Group Activity – Event Name"; includes the history of the discussion. |
Full participation enabled. |
|
Read-only Member |
Sees the welcome message and a direct link to the NEOLink event; cannot interact with the event.
|
No email notifications are sent. |
Event visibility only; no participation features. |

Virtual Café Notifications
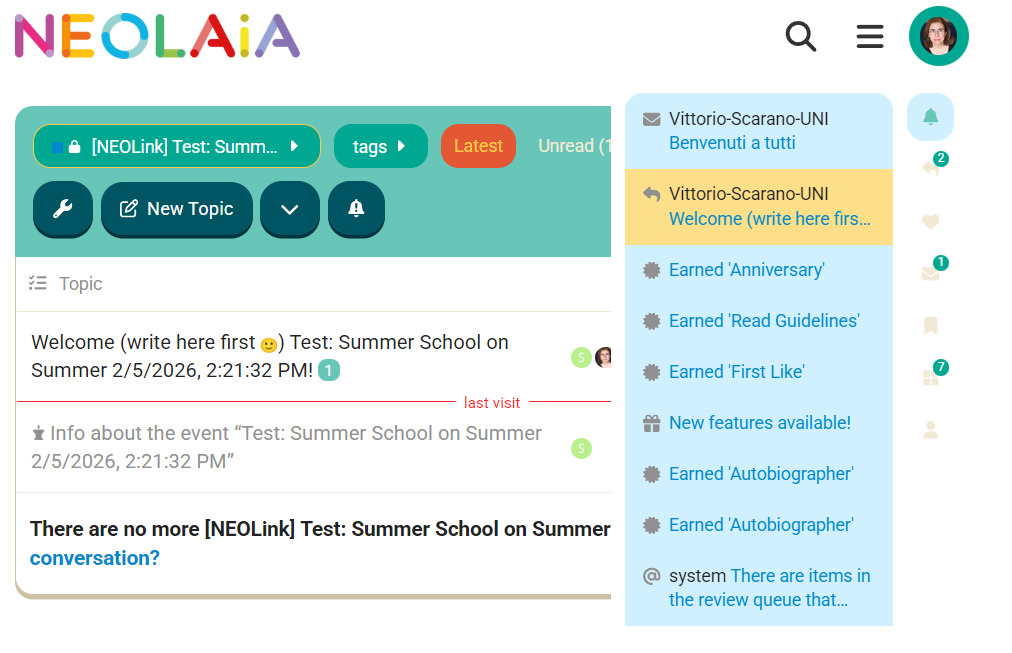
Discussion Group Owner
In Virtual Cafè: notified when users show interest.
Discussion Group Participant
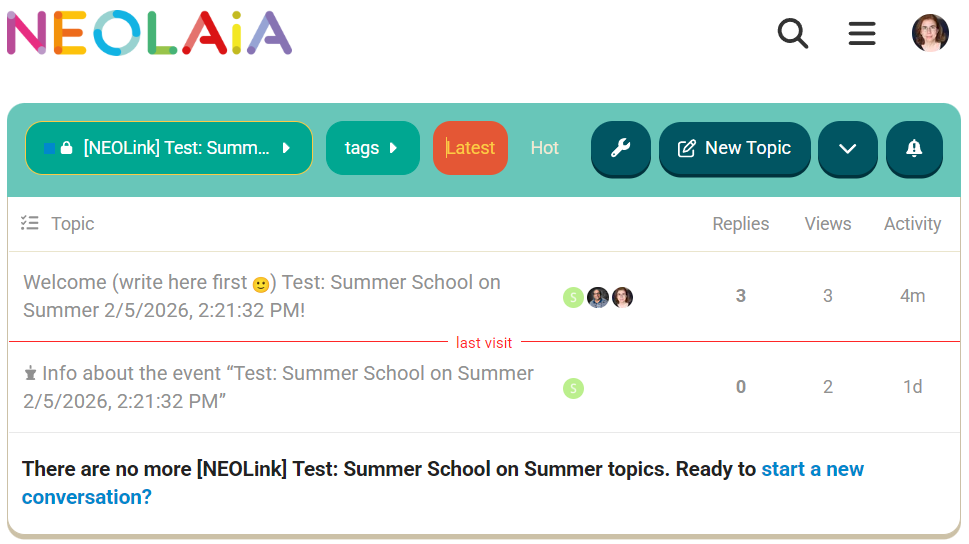
From NEOLink, users can access the discussion space associated with an event through the Virtual Café.
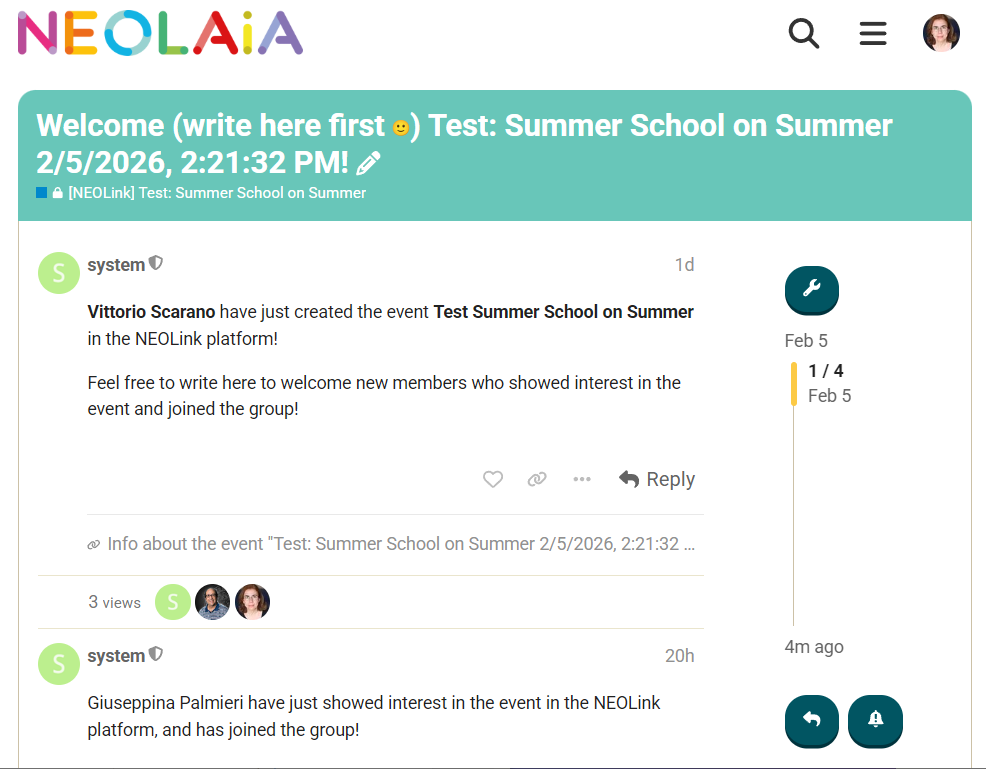
On the event page, a dedicated topic is displayed. By clicking on this topic, the user is taken directly into the Virtual Café discussion group where the conversation takes place.
Inside the group, users can see all existing posts, reply to messages, and follow ongoing discussions related to the event. This seamless transition—from NEOLink to the topic and then into the discussion group—allows users to join the conversation with a single click.
Read-only Member
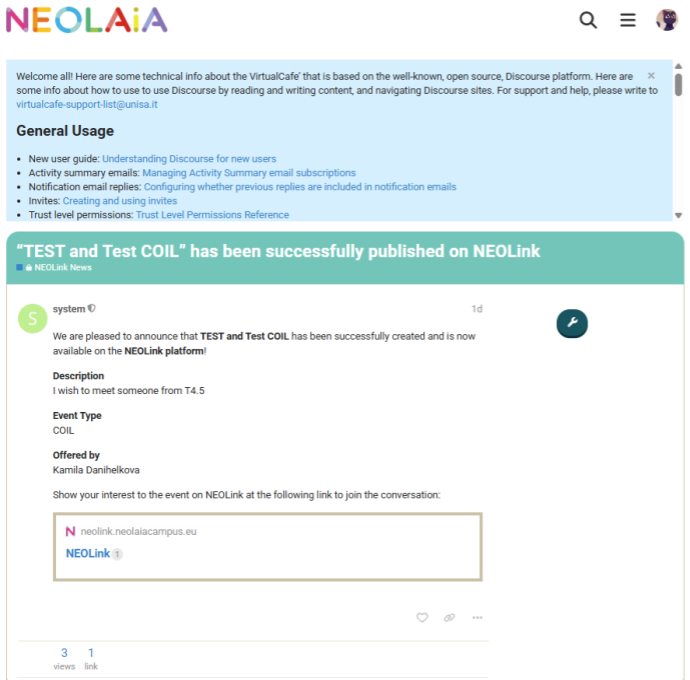
In the Virtual Café, anyone viewing any event created in NEOLink can only see the welcome message and any possible “ ,” but they cannot interact. However, a direct link to the event created in NEOLink is provided to encourage participation and stimulate interest.
Email notification
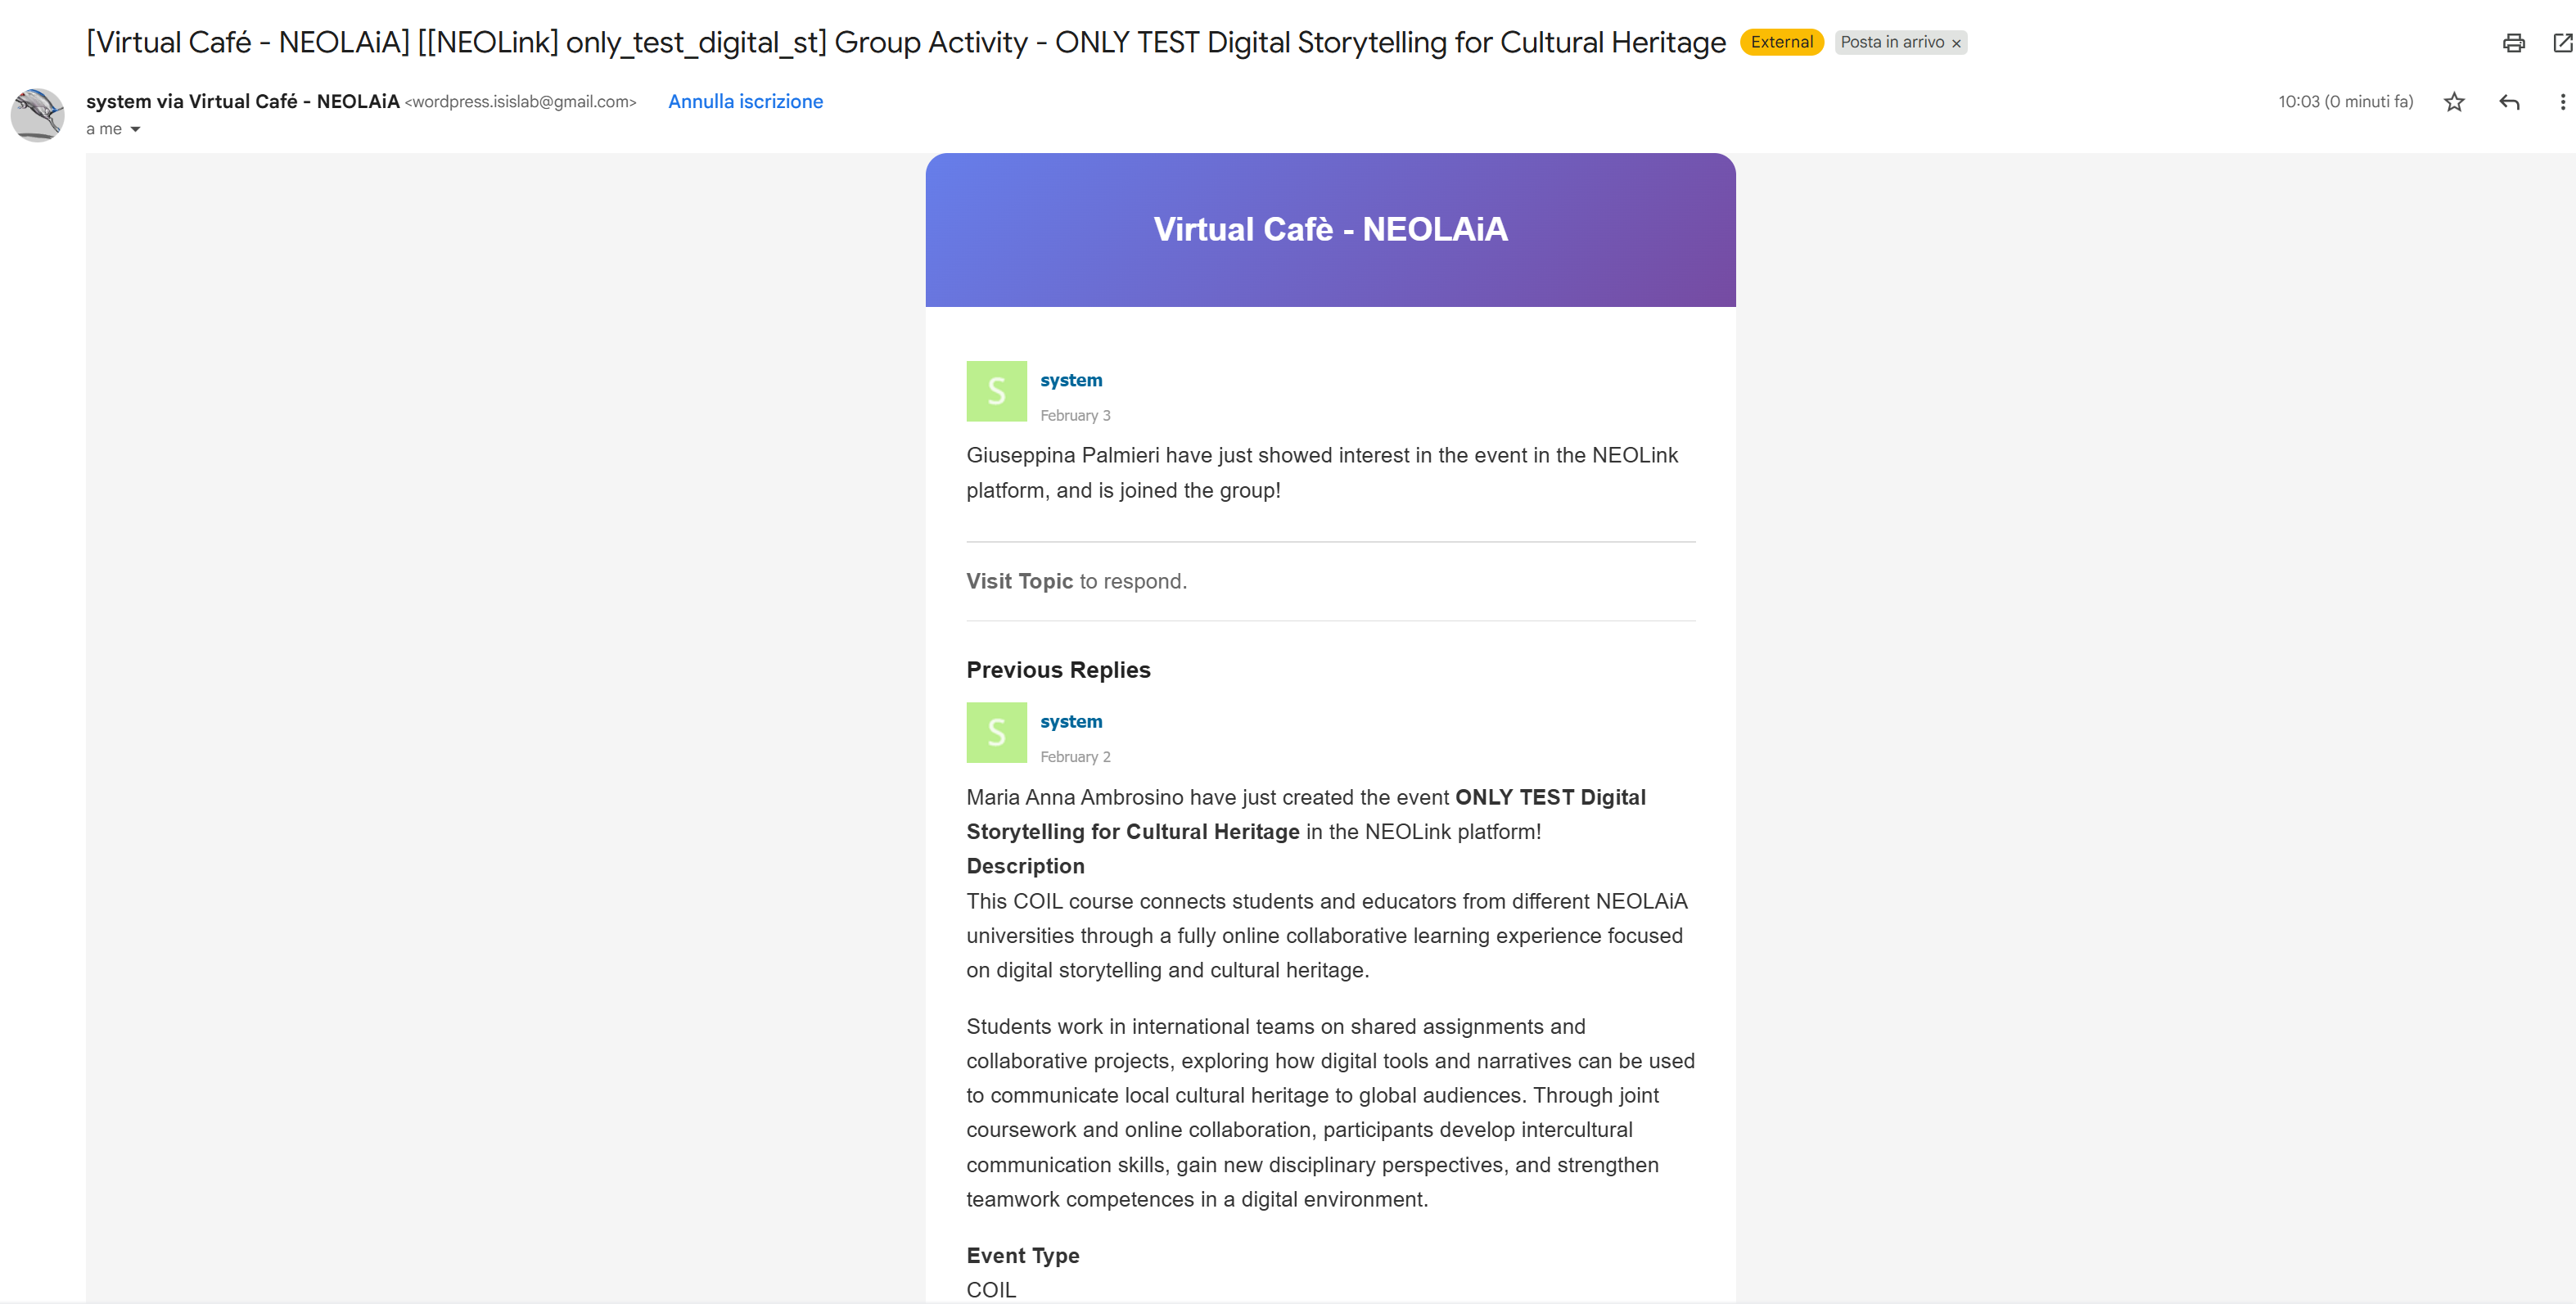
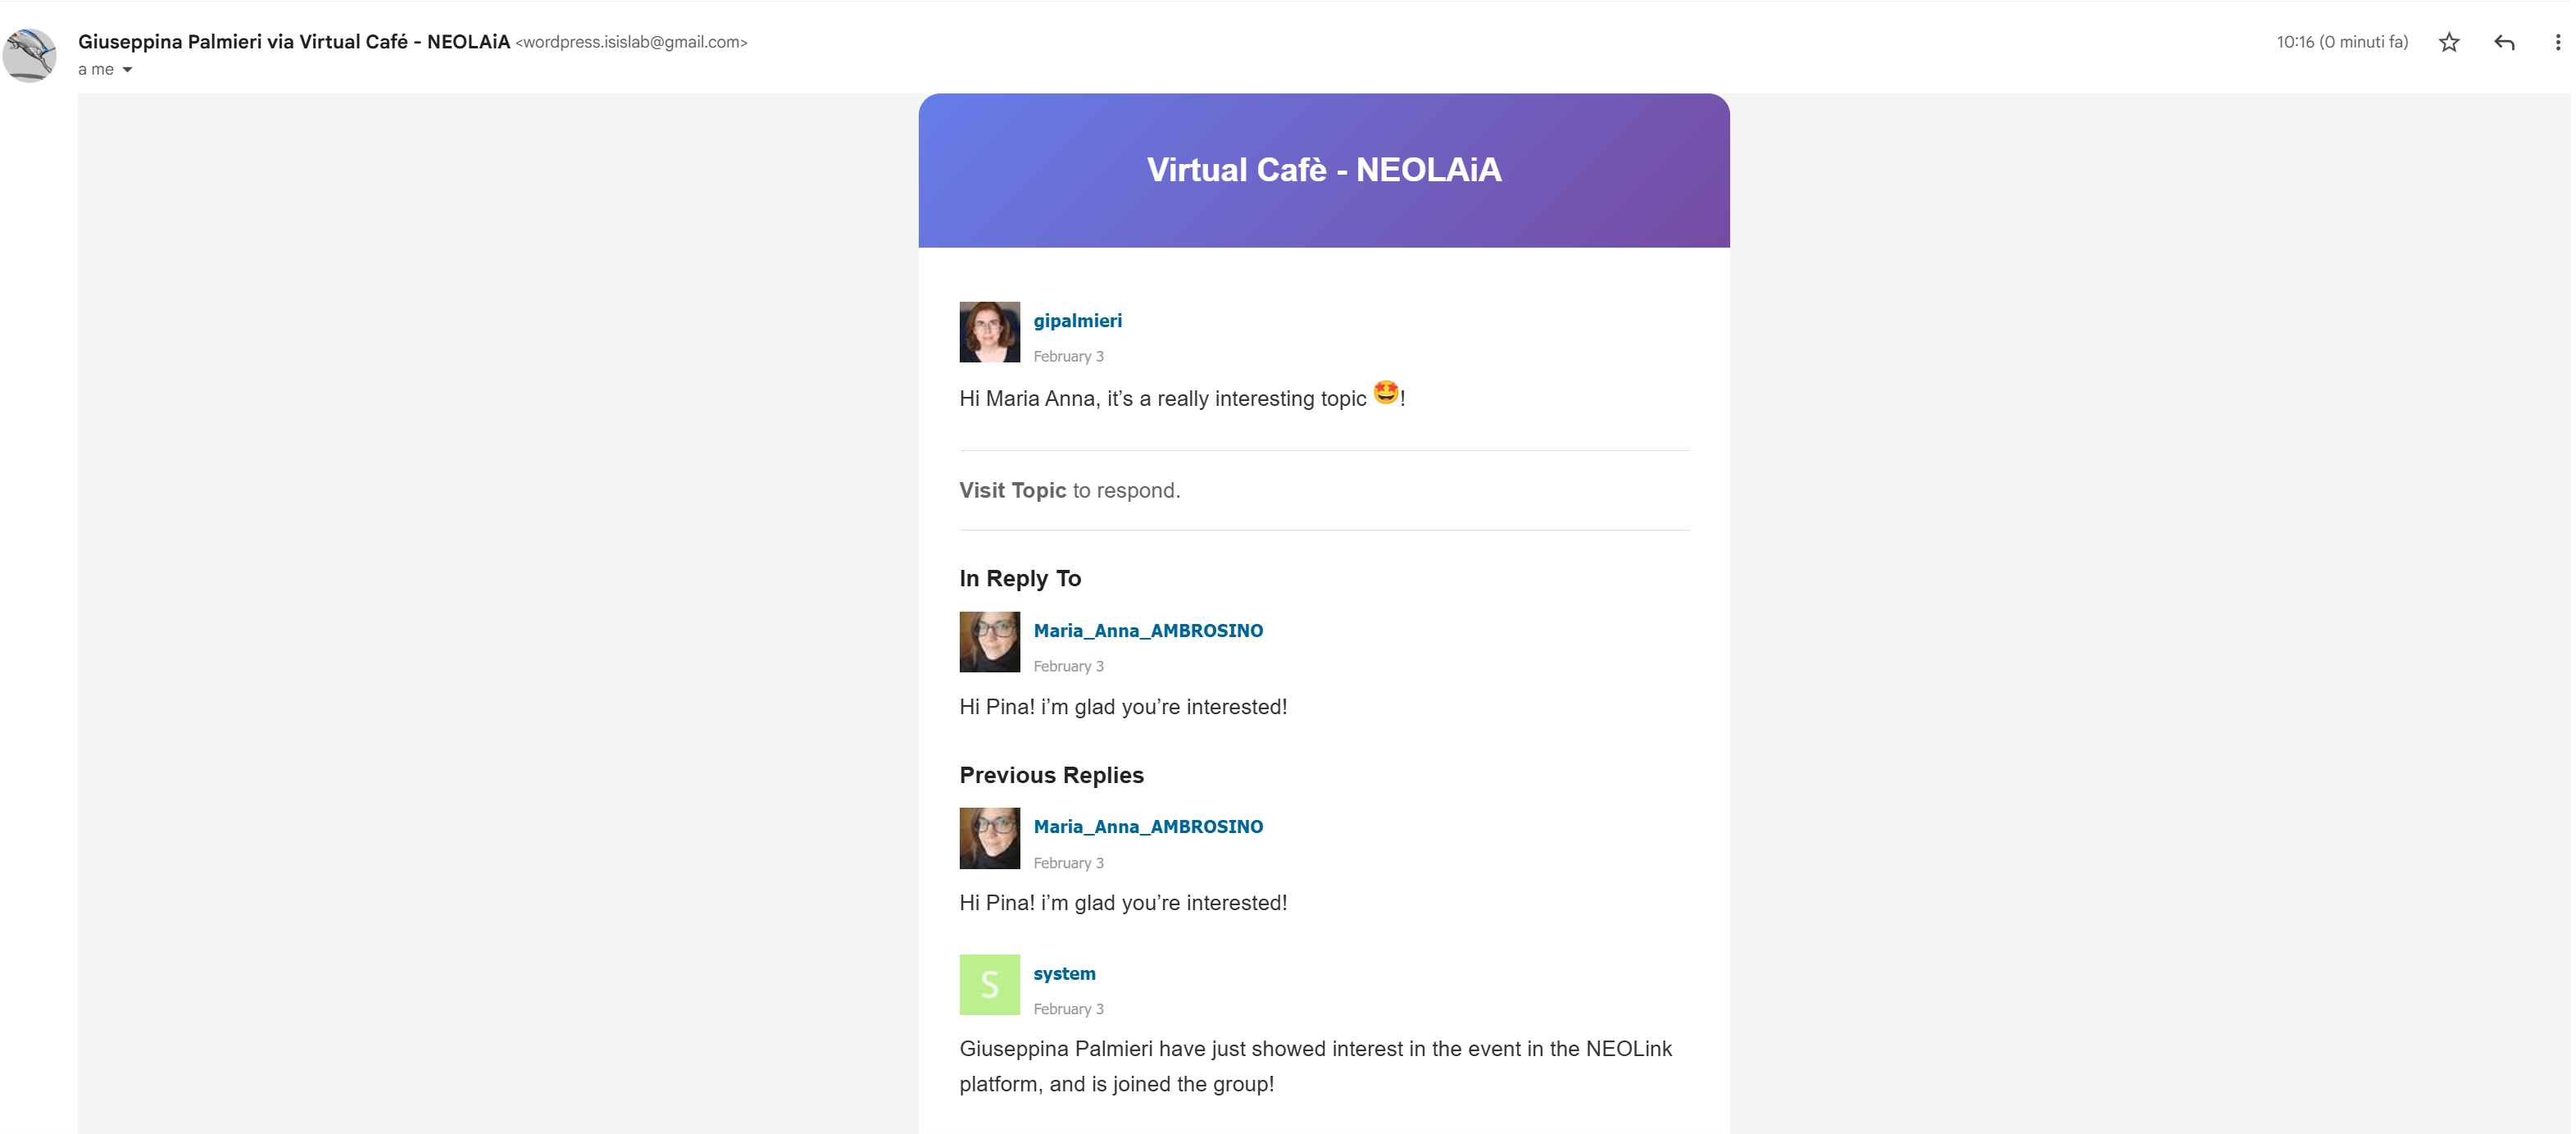
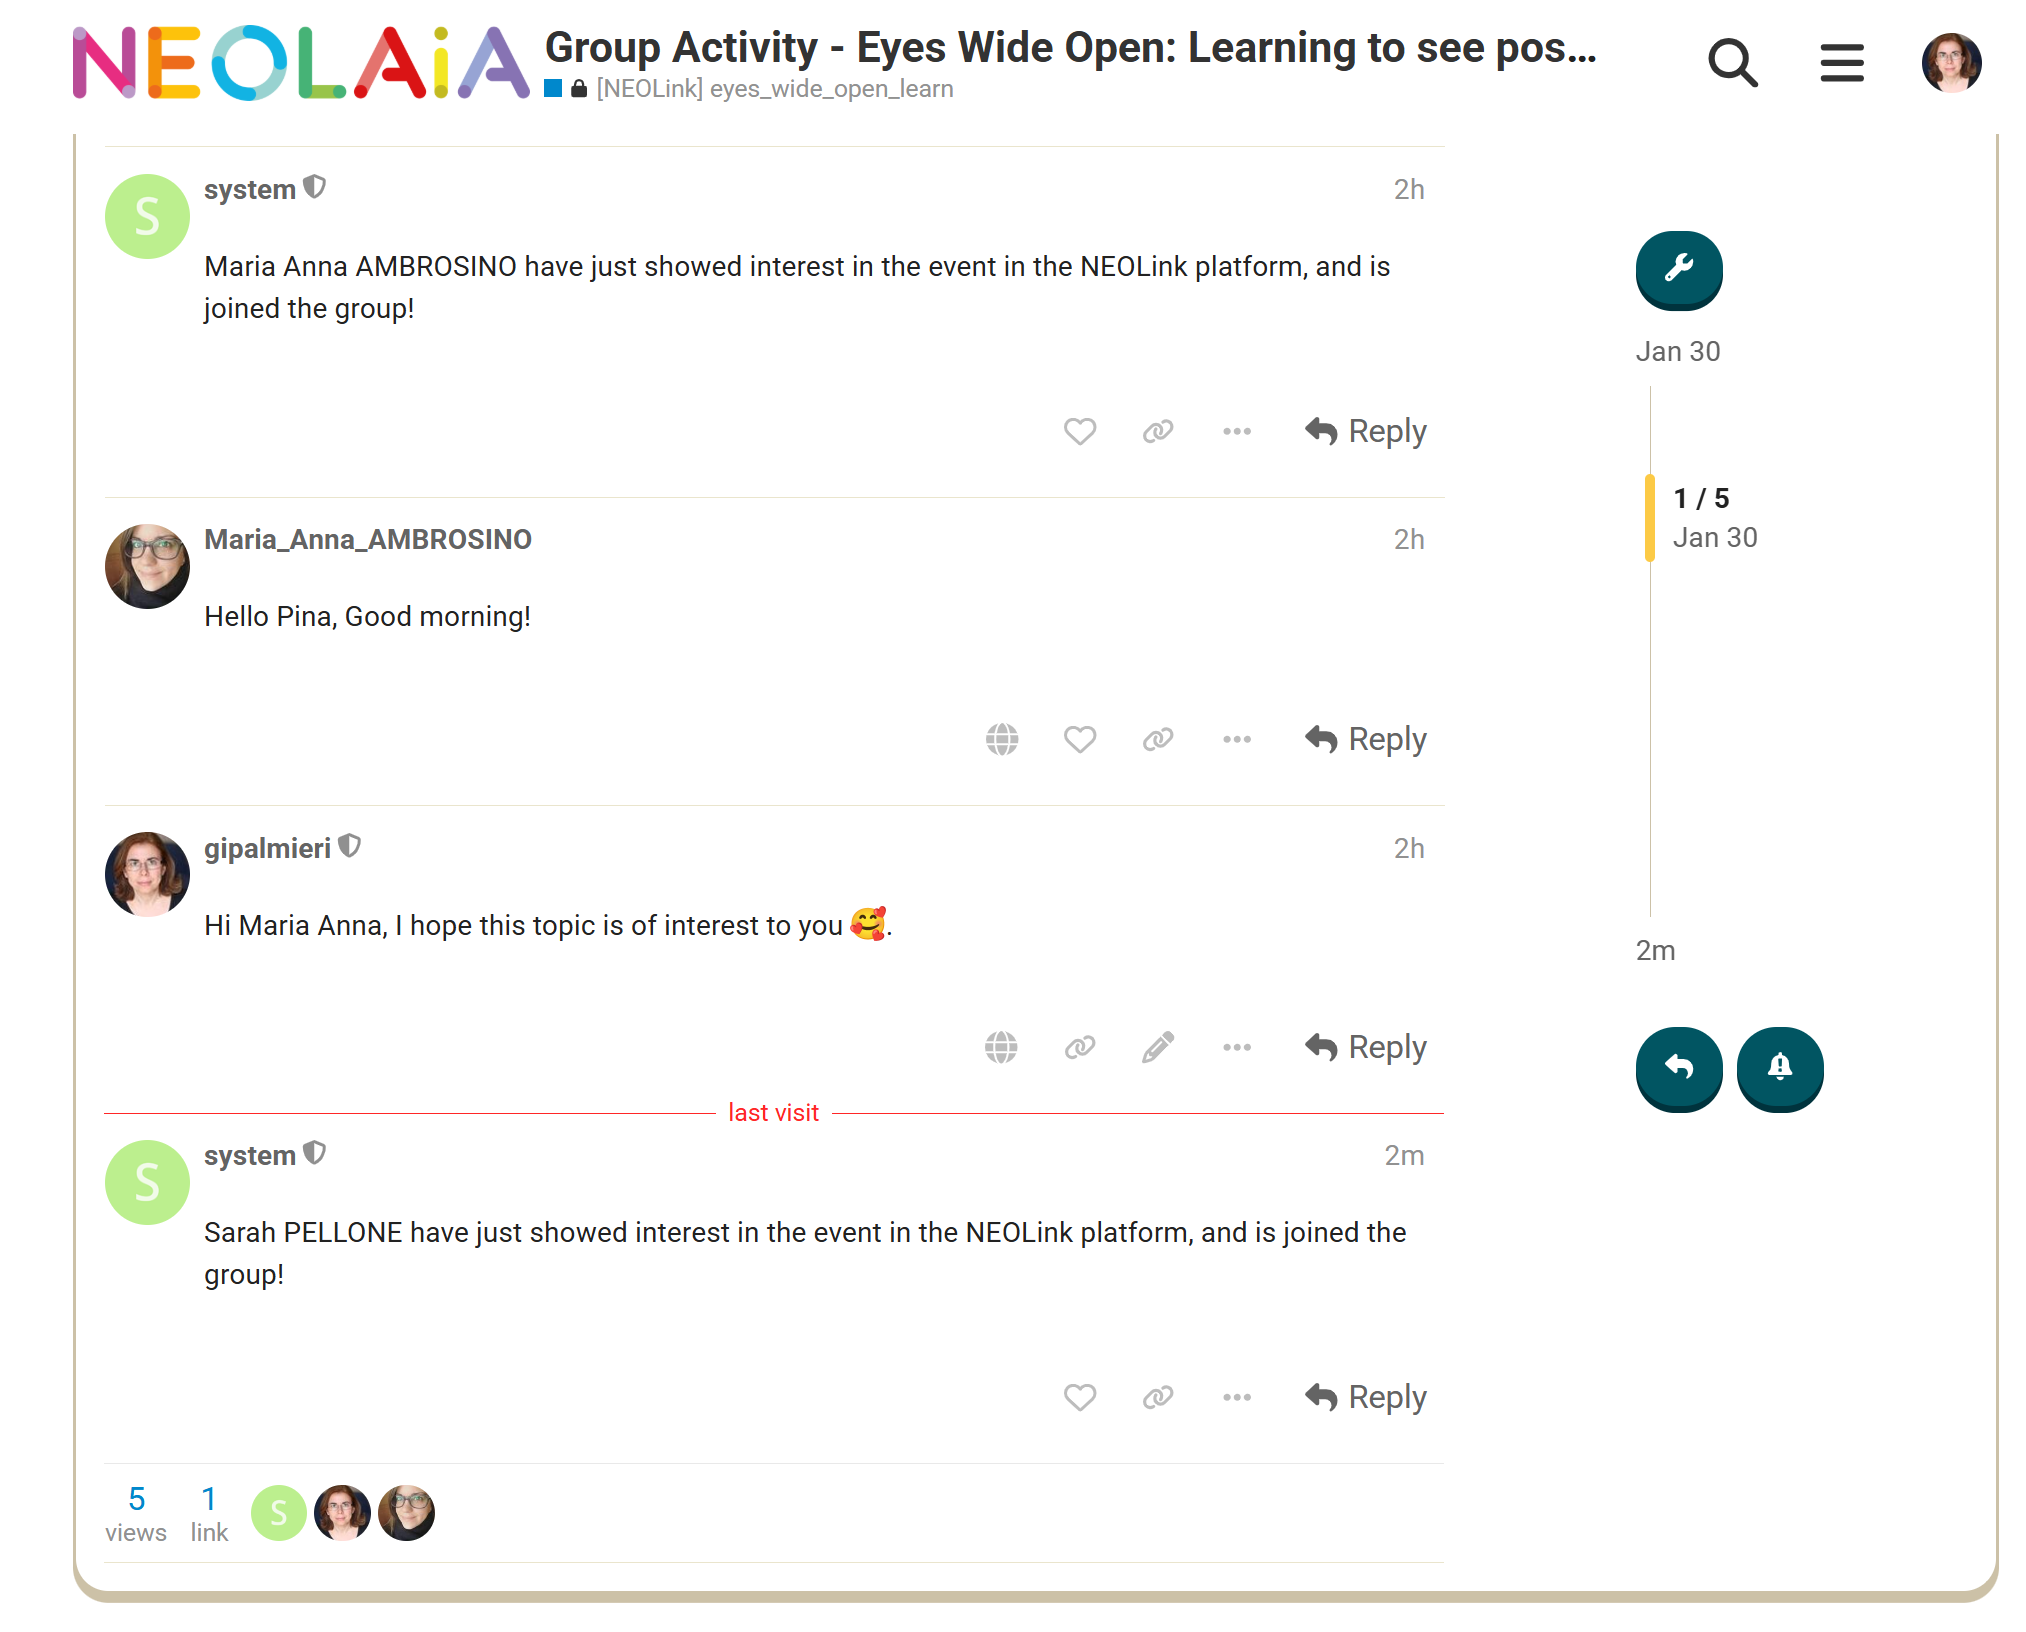
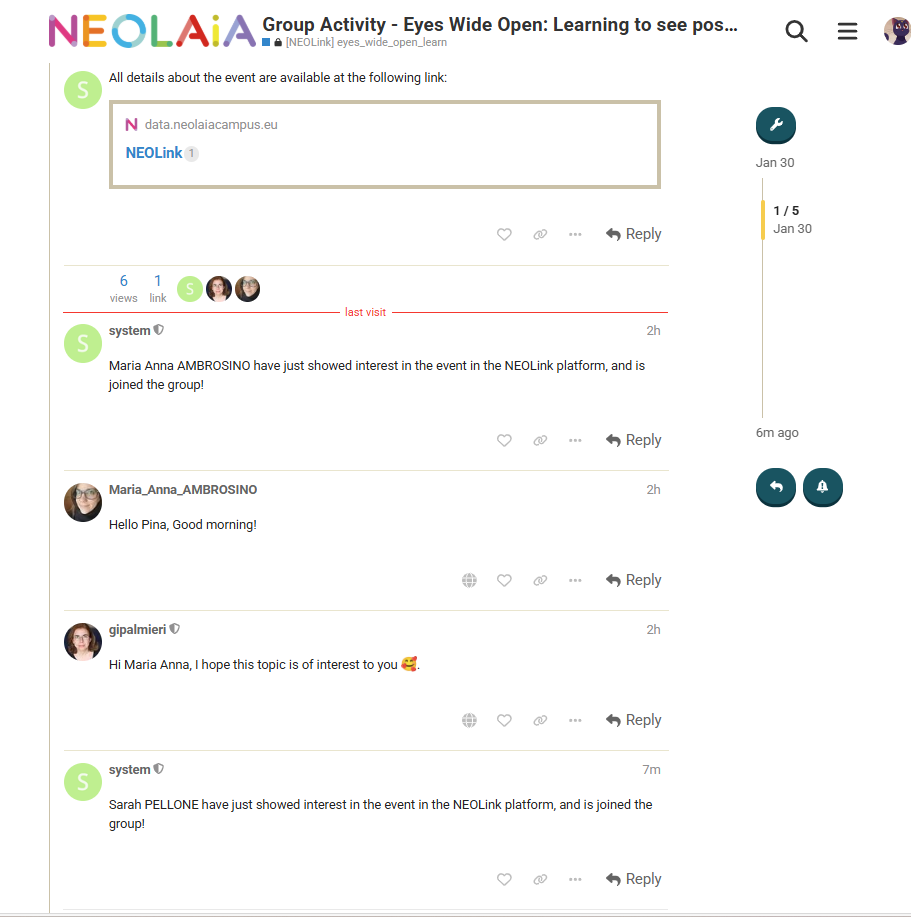
Discussion History Visibility for New Members
A “last visit” marker is also visible, helping users quickly identify what has been posted since their previous access.
Planning an NEOLink Event with Integrated Topics
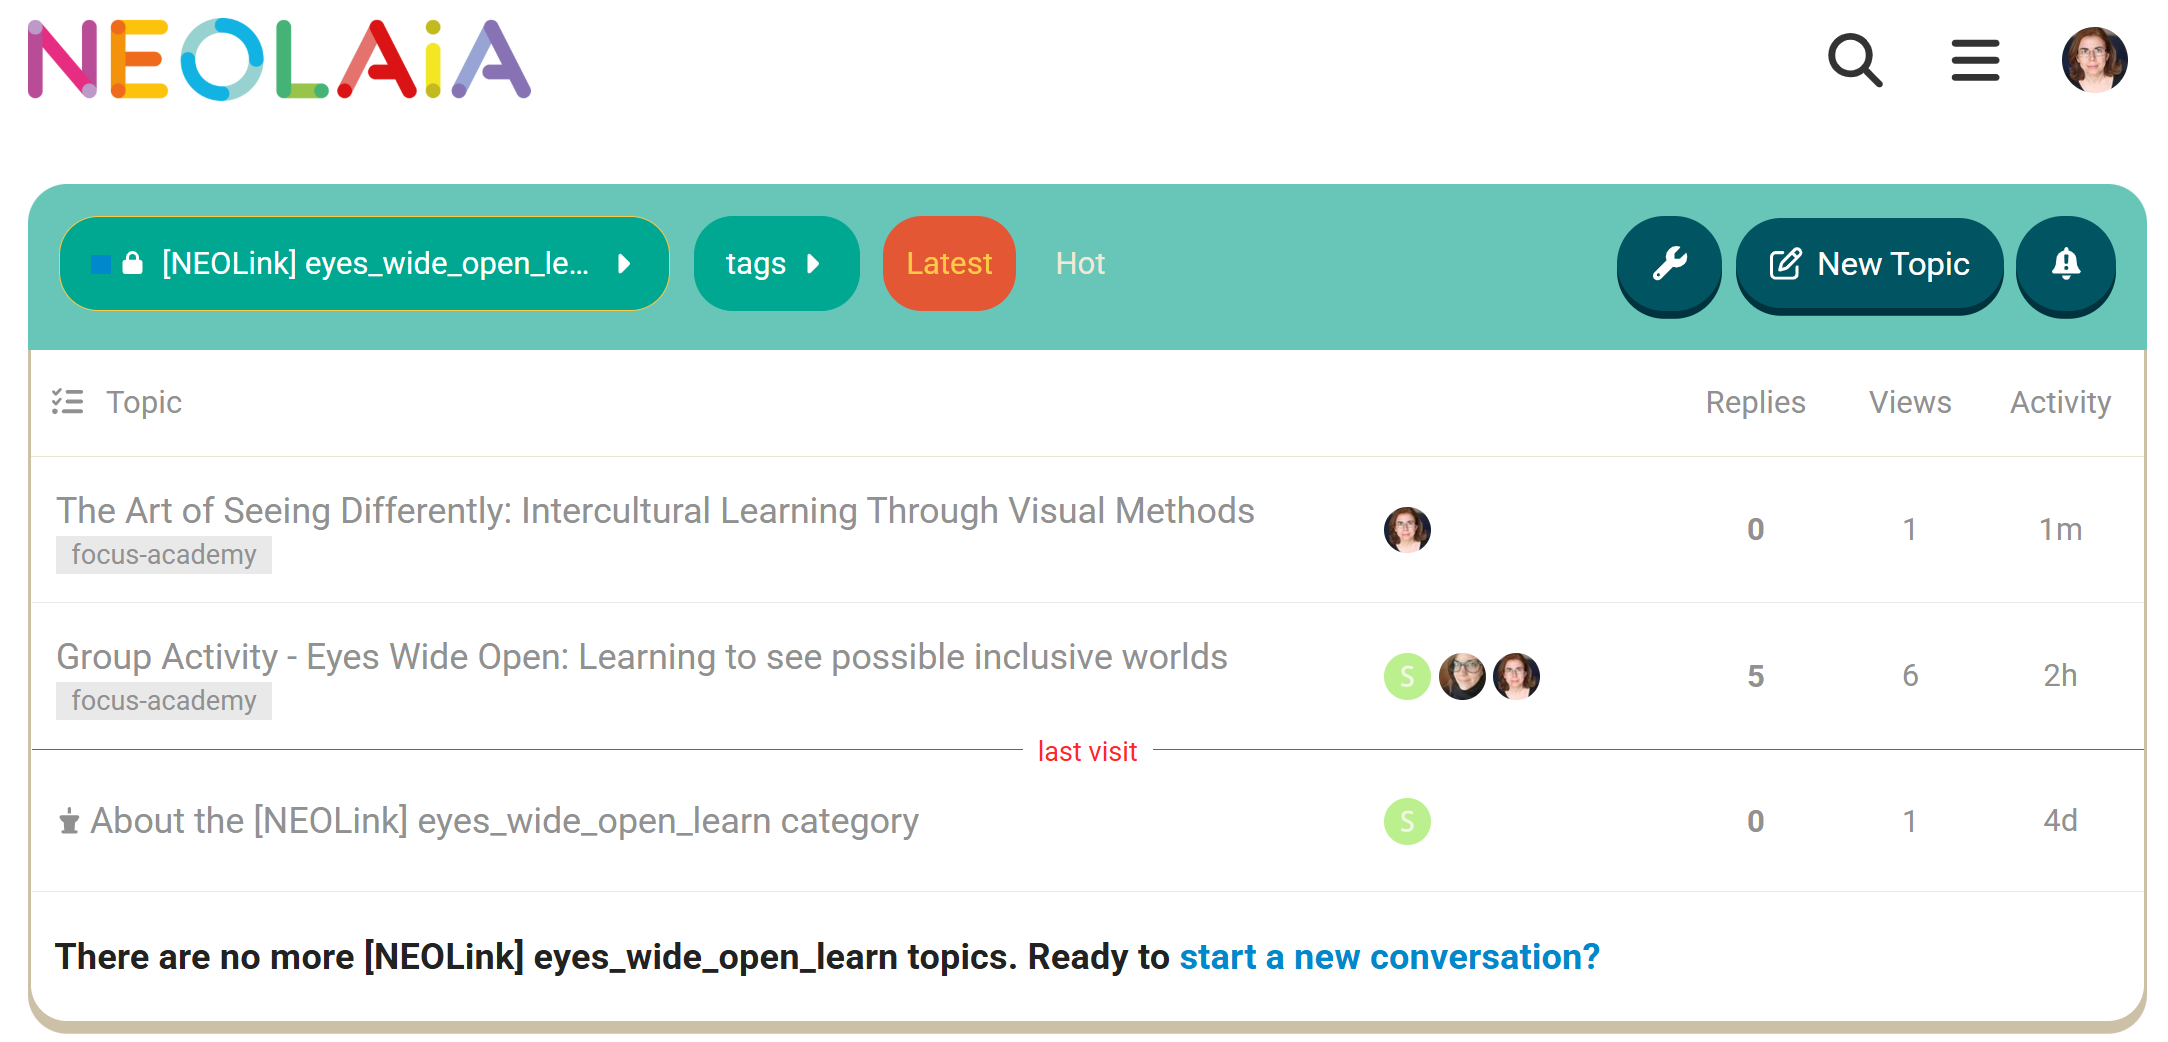
Below, the “Create a new Topic” area is open, with a draft title: “The Art of Seeing Differently: Intercultural Learning Through Visual Methods.” This implies that the user is preparing to start a discussion related to visual approaches to intercultural education.
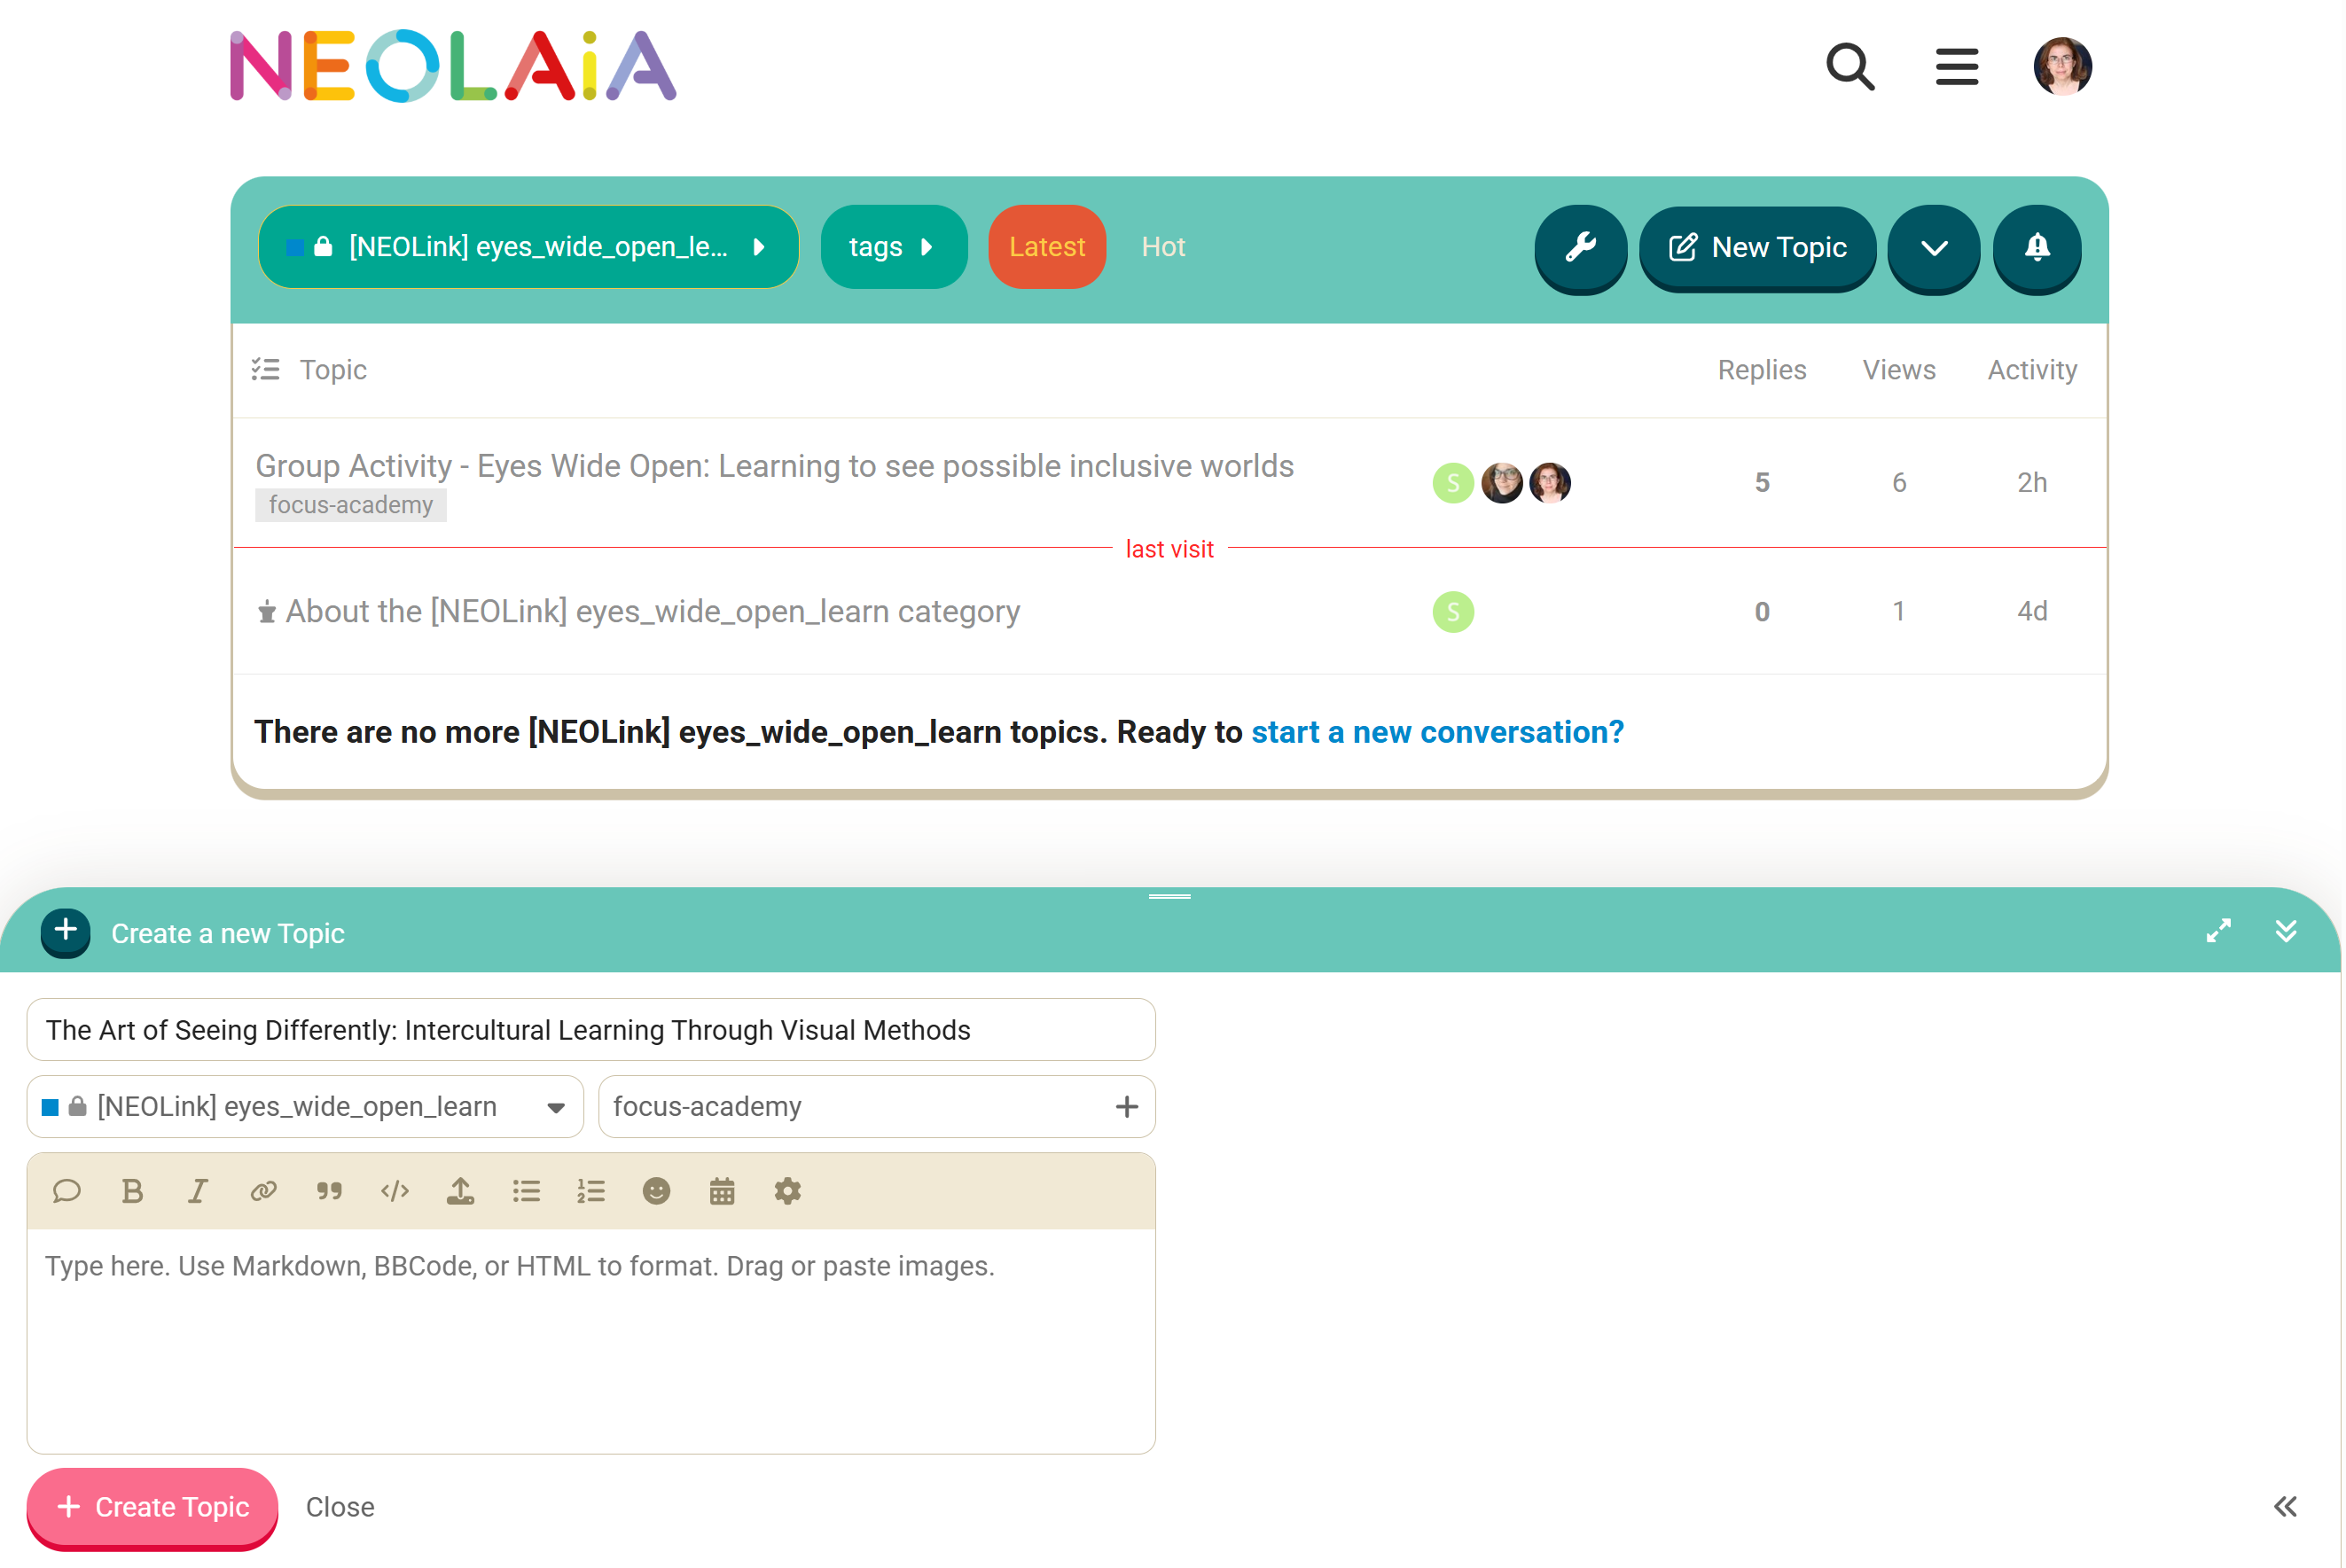
From here, users can open the topic, read its content, and begin participating in the discussion
License
Attribution-NonCommercial-ShareAlike 4.0 International

CC BY-NC-SA
This license enables reusers to distribute, remix, adapt, and build upon the material in any medium or format for non commercial purposes only, and only so long as attribution is given to the creator. If you remix, adapt, or build upon the material, you must license the modified material under identical terms. CC BY-NC-SA includes the following elements:
You are free to:
The licensor cannot revoke these freedoms as long as you follow the license terms.
Under the following terms:
 Attribution — BY You must give appropriate credit, provide a link to the license, and indicate if changes were made. You may do so in any reasonable manner, but not in any way that suggests the licensor endorses you or your use.
 NonCommercial — NC You may not use the material for commercial purposes.
 ShareAlike — SA If you remix, transform, or build upon the material, you must distribute your contributions under the same license as the original.
No additional restrictions — You may not apply legal terms or technological measures that legally restrict others from doing anything the license permits.
See Deed
About the license and Creative Commons
Creative Commons Corporation issues a clear disclaimer on its public licenses like CC BY-NC-SA 4.0. It states that Creative Commons is not a law firm, offers no legal advice, and provides licenses on an "as-is" basis without warranties.
Using Creative Commons Public Licenses
Creative Commons public licenses offer standardized terms for creators to share copyrighted works and related rights. These licenses promote open access while protecting creators' interests .
Considerations for licensors
Considerations for the public
Licensors using Creative Commons public licenses grant the public permission to use material under specific terms, but only where the licensor's permission is required beyond copyright exceptions.
License Scope
Licenses cover permissions under copyright and related rights the licensor controls; other restrictions (e.g., third-party rights) still apply. Special requests like marking changes are encouraged but not mandatory. More considerations for the public.